Category: travel tips

  • Travel Tips: Renting a Vacation Home with Kids

    Ever find yourself drinking wine and snacking on cheese while holed up with your spouse in the hotel bathroom so as to not disrupt the sleeping baby? If so, you’re in good company! We have stayed at many a hotel with our kids, but shortly after our first hotel stay with a baby, we realized the standard one room hotel was not an ideal set up when traveling with young kids who need to go to bed early or nap. Although we have used points to upgrade to one-bedroom suites, they aren’t always an option in terms of location or price, and even then, space is still limited.

    Even under the best circumstances, staying in a hotel with a toddler is cramped.

    Cue the vacation rental! We have rented many vacation homes from a variety of different sources – HomeAway, VRBO, AirBnB, and small local management companies such as Eastern Shore Vacation Rental and Lydia Mountain Lodge & Lodge Cabins. Having rented and stayed at dozens of vacation rentals over the years, there are a few things that are absolutely critical to ensuring you have an enjoyable vacation in a setting that works for your family.

    Read the Reviews!

    When I start planning a vacation, I usually flag 3-5 homes that I am interested in and save them as a favorite on whatever app I’m using. Then, when I’m up in the middle of the night and unable to sleep, I scroll through the reviews. Even if there are nothing but five star glowing review, reading the reviews will provide you with tidbits of information that can help inform your stay. For example, a reviewer might mention how the laundry machine broke during their stay and the owner sent out a repair person the next morning. A reviewer might also comment on the lovely Thai restaurant within walking distance that they dined at twice during their stay.

    If there are negative reviews, you will want to not only gauge whether the review is relevant but also note whether the owner responded to the negative reviewer. For instance, if a reviewer mentions that their vacation was awful because it rained every day while they were there… you can likely disregard that one star review. If a reviewer comments on the cranky neighbor with the dog that barks all night long, you might want to scratch that home off your list. And finally, if the owner responds to a review complaining about a broken screen or some item that needed repair, you not only learn that the owner is engaged, but that the owner is interested in continuing to provide a quality vacation rental.

    Finally, keep an eye out for reviews from families with kids. Even if they don’t mention specifically how the house was well suited for their kids, the fact that a reviewer says “our family of five stayed at the home and had a great time!” is a good sign that the house will work for families with children.

    One of our first vacation rentals had a lovely outdoor balcony with high walls, so our toddler was safe to be outside and we had a nice retreat for naps and bedtime.

    Contact the Owner and Ask Questions!

    Although I study all the photos on the individual listings with a careful eye, the photos don’t always explain everything. If you have any questions, don’t hesitate to contact the owner or the management company and ask!

    When planning our trip to Monterey, I quickly zoned in on one rental that I was very interested in. I had a difficult time figuring out the layout of the home and the description was not entirely clear either, so I contacted the owner to ask my questions and we ended up having a quick 10 minute phone conversation where he explained the layout to me. Not only did this answer my questions, but speaking with the owner directly on the phone gave me a sense of the owner’s personality and level of engagement with the home, which definitely helped persuade me to confirm the rental.

    When asking questions, don’t be shy and limit yourself to property specific questions. If there is anything that is absolutely critical to you, ask away! When renting a vacation home in Hawaii, I asked what the walk to the ocean was like because the listing only said it was “a block away.” It turns out the “block” was actually a small street and an easement through the neighbor’s property. If I had not asked, I would have been disappointed upon arriving at the house because there was no clear pathway from the house to the ocean. Instead, I knew what to expect going into the trip and prior to confirming the rental.

    A neighborhood easement led us to the most beautiful beach during our stay in Hawaii.

    Without exception, every single owner I have contacted with questions has been happy to answer them. It’s their business and they have every incentive to make sure not only that the house is the right fit for you, but also that you enjoy your vacation so you can leave a glowing review.

    My favorite rental house of all time was in Seward, Alaska and came with this view.

    Know What’s Included

    Knowing what your rental includes is important. When looking for homes in Monterey, I quickly noticed that many homes included aquarium passes for use. Thus, the homes that did not include aquarium passes were quickly crossed off my list as the included passes helped save us hundreds of dollars during our stay. In different areas, what is included can vary and typically the policies are the same in a particular area. For instance, I was shocked the first time we rented a house on the Eastern Shore because linens were not included in the base price – there was an additional $125 charge for linens or you could bring your own. When looking around, I found this was common in the area, likely because the homes are managed by a management company instead of a private owner. Long story short, know what’s included so you’re not surprised when you read the fine print later on or… when you show up for your vacation without linens and find bare beds!

    Our tiny rental cabin in Delaware (near Dewey) that included linens for an extra $50.

    Proceed With Caution

    Before booking, make sure you know what you’re getting and understand that a vacation rental is not a hotel. Vacation rentals do not include daily housekeeping and turn down service so make sure you understand that. In terms of the individual booking sites, I have heard numerous stories of AirBnb rentals being cancelled at the last minute and my understanding is that AirBnb is more of an apartment sharing concept than a true vacation rental that you are likely to get from HomeAway or VRBO. Long story short, make sure you not only read the information on what’s included in the specific rental, but also read the individual website’s guarantees and policies. If you have any trouble with the individual owner, you may find yourself needing to escalate the issue with the booking site. And finally, if you can, book with a credit card that offers as many protections as you can. I personally prefer to book with my Chase Sapphire Reserve card, which offers trip protection.

    Enjoy!

    My final tip is to kick back and relax! We have taken many amazing vacations with our kids, but our favorite vacations are the ones in which we rent a small cabin or home just a few hours away. Getting away from home provides us with a chance to take a breath and remove ourselves from the hustle and bustle of real life and juggling work and activities, but having a vacation rental allows us to have our creature comforts. Indeed, we have gotten so comfortable with traveling this way that we have mastered the art of preparing a meal to take and bake with us upon arrival.

    Our standard first night meal at the cabin on our annual fall getaway.

    And, the best part of these mini getaways is that we get to bring along our four legged family member!

    Resting on the deck of our Lydia Mountain Cabin Rental.
  • Travel Tips: Taking Advantage of Flight Deals

    Travel Tips: Taking Advantage of Flight Deals

    featured image photo credit

    If you’re like me, you subscribe to any number of websites that send you travel deals.  And, if you’re like me, you aren’t able to take advantage of most of the incredible flight deals that come your way because there are too many schedules to juggle. With two working parents and one school age child, our opportunities to “get away” are limited by school schedules, vacation availability and work obligations, and if we’re seeking to sneak off as a couple, grandparent availability.

    In the past few weeks, however, I’ve been fortunate to take advantage of two incredible flight opportunities that have come across my desk.

    Washington, DC to Liberia, Costa Rica for less than $400 per person roundtrip

    white sand beach at the Andaz Papagayo

    photo credit

    In 2014, while expecting our second, we explored traveling to the Andaz Papagayo for a few days just to relax. Unfortunately, flights to and from Liberia (LIR), the nearest airport, were either non-existent or cost prohibitive and the thought of flying to San Jose, Costa Rica and then making the nearly six hour drive to the Andaz Papagayo was less than appealing to a pregnant woman. Over the years, I have come across a number of reviews from other travel bloggers who have traveled to the Andaz Papagayo, heartily recommending it not only as a vacation destination, but as a family vacation destination. Consequently, although not quite the couples getaway we had initially intended it to be, I mentally filed the Andaz Papagayo away as a possible family vacation spot, especially as my youngest has gotten older and more flexible.

    To my happy surprise, an email alerting me to a flight deal from DC to LIR for less than $400 per  person crossed my desk a few weeks ago and within 1 hour, I was in possession of four roundtrip reservations to the Costa Rica for the Spring of 2018 for under $1,600. Here’s how it happened.

    First, I checked online and confirmed that there actually were four tickets available for our desired travel dates. The deal involved two separate airlines – outbound on United Airlines and back home on Copa Airlines.  Thus, I had to check on both sites to confirm availability before proceeding to my next step: calling my husband and confirming that he was able and willing to travel to Costa Rica. Upon learning that he desired a suite at the Andaz Papagayo instead of a single room, I decided to go ahead and book the flights and sort out the hotel logistics later (we planned to redeem Hyatt points so availability was not guaranteed). To make this possible, I booked four one-way tickets on United from DC to Liberia (LIR) for $653.16, making sure to note that the fare was subject to United’s 24 hour flexible booking policy. Next, I reserved four one way tickets on Copa from LIR back to DC for $941.22, taking advantage of Copa’s 24 hour “reserve and pay later” option.

    At copa.com you can put reservations on hold. Simply select the option “Reserve and pay later” and copa.com will keep your reservation active for 24 hours, and you will have this time to make payment. This reservation may be paid for later using a credit card in the Manage your booking section.

    Source

    Knowing that I had round trip tickets for four secured to LIR for our desired dates at just under $1,600 (the total was $1,594.38), I was able to relax and comfortably explore options for reserving our stay at the Andaz Papagayo. At some point that evening, I touched base with my husband, confirmed that we had our stay booked at the Andaz in suitable accommodations, and went back to Copa’s website to pay for our reservation.

    Washington, DC to San Francisco, CA for $99 per person round trip

    If you’re sitting there with your mouth open, you’re in good company. I did not believe this fare could exist and frankly, almost didn’t bother clicking to check because I figured the dates would be so limited that there was no way we could take advantage of the deal. On a whim, I decided to check for availability over Martin Luther King weekend and to my surprise, found four round trip tickets from DC to SFO at the promised rate of $99 per person round trip. I was all set to book when I paused and thought – do I really want to haul my children out to San Francisco over a long weekend? The answer: no.

    I quickly revised the search down to two round trips tickets and found even more availability at the promised rate of $99 per person round trip. Knowing that I could cancel the tickets within 24 hours if, for some reason, we were unable to take the trip, I decided to proceed to booking. Imagine my surprise when I learned that American Airlines offers a 24 hour free hold. In lieu of the 24 hour cancellation policy, American allows you to hold the reservation for 24 hours – fee free. I gladly selected this option as it meant I could avoid entering credit card information and the hassle of cancelling the ticket if the grandparents ended up not being available.

    Luckily for me, I was able to confirm that evening that my amazing in laws were available and willing to come and babysit while my husband and I jet off to San Francisco for four days. That night, I logged onto the American website, retrieved the reservation, paid for the ticket, and received our confirmation for two round trip tickets from DC to SFO for a grand total of $200.22.

    How can you take advantage of these deals?

    Here’s what I do to make sure that when an appealing deal comes across my desk, I am able to take advantage of it before it expires or runs out.

    • I subscribe to many flight alert websites and I also “Like” many on Facebook. It’s not enough just to “Like” the flight alert pages on Facebook, however, you must, if you want to take advantage of the deals, make sure to prioritize these pages so that they appear on the top of your feed. This way, whenever you log into Facebook, you’ll immediately see the top travel deals before scrolling through to learn what your friend’s kids’ ate for dinner.
    • You must be on the same page as your spouse in terms of travel interests. It does nobody any good if you are dying to go to Thailand and ride elephants, but your spouse’s number one nightmare is being stomped to death by elephants.
    • You must be organized and have clearly set dates for when you are available for travel. Every year, I anxiously await the release of my son’s academic calendar. Once given those dates, I enter them into my calendar and cross reference them with holidays and three day weekends. Whenever a flight deal pops up, I can just flip to my calendar and find a list of all the dates in which my son is not in school and we are available to travel.
    • Be ready to book immediately. Even if you are not able to reach your spouse because s/he is in a meeting, you can book a flight reservation and cancel within 24 hours without fee or penalty, provided your trip is more than seven days out. The U.S. Department of Transportation imposes this requirement on airlines operating within the United States and this gives you an easy way to reserve a ticket, without worrying about being stuck with non-refundable fare and/or a fee if you are unable to actually take the trip. Although airline policies may vary, the general rule is cancel within 24 hours for trips more than seven days out for a full refund. You will see the fine print prior to completing the purchase, so always make a note of it before you hit “CONFIRM PURCHASE.” If you’re lucky, you’ll hit upon an airline like American or Copa that offers you a fee-free 24 hour hold, saving you the hassle of worrying about cancelling the ticket if it turns out you can’t take the trip.

    My two favorite websites for airfare deals are The Flight DealSecret Flying, although there are many more options and you never know when one will alert you to the perfect fare deal!


  • Travel Tips: How miles and points have helped my family see the world

    Travel Tips: How miles and points have helped my family see the world

    This post contains links to credit card / bank applications that may earn me a modest referral credit. You don’t have to use these links and if you find a better available offer, by all means, use the better offer. Any opinions expressed in this post are my own.

    Why do I bother with miles and points?

    Growing up, my family took maybe a small handful of “trips.” We traveled to Utah one winter to see family friends who were living there temporarily, we traveled to Taiwan one winter to visit friends and my grandparents, and, we made small trips to San Diego and to Northern California to visit my brothers, who were attending college away from home. We never took a true vacation – one that didn’t involve visiting family/friends.

    The first true vacation I took wasn’t until after I met my husband. At the time, we were unmarried, in school, and had zero money. His parents generously rented a house on the Madison River in Wyoming, and we spent a magical week hiking, fishing, and enjoying the beauty that is Big Sky Country.

    My first real vacation with my now husband, then boyfriend, to Yellowstone in 2003!

    Once we graduated from school and were gainfully employed, we could no longer depend on familial charity to subsidize our travel. Unfortunately, we learned the hard way that travel involved significant costs – airplane tickets, accommodations, food, heck, even the taxi ride from our house to Dulles Airport runs $60-80 one-way! When we were first married, we lived in Cleveland and were childless, so given the low cost of living and lack of other expenses, we only slightly dabbled in miles and points. Sure, we had a Starwood Preferred Guest account that accumulated miles for stays, and we had Continental Airlines frequent flier accounts where we banked points for travel. But, we never really explored miles and points until we moved to DC and had kids.

    The first trip we took using miles was a babymoon that we booked shortly after finding out I was pregnant with my first child. We went to Paris for one week over Christmas, “paying” for our airfare in coach with points, and “paying” for our hotel with some combination of American Express Membership Rewards points and money. I don’t recall the exact details of that trip, but I do remember being thrilled that we were spending a week in Paris for less than $1,000 out of pocket (for airfare and accommodations, not food and other expenses incurred during the trip).

    Paris, December 2008

    After my son was born, my husband approached me one evening and said that he was thinking about applying for a credit card that had a large signing bonus. A sign-up bonus is something credit cards offer to entice you to apply – they’re frequently tethered to a minimum spend requirement, so a standard sign up bonus can be something like: 75,000 points after $4,500 in spend in the first three months! Companies may also offer to waive the first year of the annual fee and/or include other benefits, such as credit for Global Entry fees, access to Priority Pass lounges, etc. At the time, we had only one credit card that required an fee – the American Express Gold card that my husband had long before we were married. As someone who obsesses over the details, I didn’t necessarily agree with the idea of applying for credit cards that had annual fees, but I agreed to go along with the experiment to see where it took us.

    Where did it take us?

    In 2013, our points took us, literally, around the world. For 360,000 United MileagePlus points (transferred from our Chase Ultimate Awards accounts) and $242.10, my husband, son, and I traveled from DC to Japan and back, with an overnight stopover in Munich. We also used points to pay for three day/two night stay in Kyoto in a Japanese style room and we used points to stay at the Hyatt Regency in Tokyo for five days/four nights.

    Most recently, in 2017, my husband and I paid for a pair of round trip business class tickets from DC to South Africa with 320,000 United MileagePlus points (again transferred from our Chase Ultimate Rewards accounts) and $150.72.

    We spent three nights at the Andaz Fifth Avenue on points in May of 2013, so splurged on room service.

    Those are shining examples of how we have been able to travel on points in style. Without careful and creative use of points, we would not have been able to travel in business class and we likely would have had to cut back on spending during the trip. In addition to those two trips, we have also used points to defray the cost of last minute airline tickets and on numerous hotel stays (including an upcoming one week stay at the Andaz Papayago booked entirely on points. We are staying there for 15,000 points / night versus the average daily rate of $450).

    The first solo trip I took with my son was partially funded by Chase Ultimate Rewards Points – I had to travel for work and booked his ticket using points at the last minute.


    Is it worth it to pay an annual fee?

    If you’re like me, the first question you need to ask is: “am I okay with paying an annual fee on a card?” I never had an annual fee card until I married my husband and became an authorized user on his American Express Gold card. Paying an annual fee for a credit card was verboten – so my favorite card was a Discover card that gave me 1% cash back on spend. When my husband first suggested applying for different credit cards, I didn’t actually believe we could do anything with the points accrued. However, that all changed after our trip to Paris and I have done a complete about face since our trip to Japan. As our family has grown and our travels have become more extensive, I’ve also realized that there are benefits to certain credit cards that can reduce the annual fee such that it’s “essentially” free.

    Two credit cards that come immediately to mind that I carry in my wallet every day are:

    • The Chase Sapphire Reserve – Although this card has an annual fee of $450, there is an automatic $300 annual travel credit. If you book airline tickets the day you get the card, you will receive an automatic $300 credit to your account, thus reducing the fee to $150. The card also includes a Global Entry of TSA Pre-Check application fee credit of up to $100 (once every four years), primary rental car collision coverage (meaning you don’t have to go through your car insurance!), you pay no foreign transaction fees, AND you get free access to Priority Pass lounges. During our recent trip to Africa, we visited six Priority Pass lounges – although not critical, it definitely is much more comfortable than hanging out in the general waiting area – at least there are clean bathrooms and abundant charging stations. These are all the benefits of the card you get on top of the signup bonus and the 3x points on travel and dining.
    • The Chase Marriott Rewards Visa – The Chase Marriott Rewards visa is a card that has earned its spot in my wallet for one reason – the annual free night at a Category 1-5 hotel. The card has an $85 annual fee, but the free night is easily worth that. Most recently, I used the free night in Johannesburg, near the airport, as an easy pit stop before our early morning flight to Zimbabwe. Although the hotel rates were *only* in the low $100’s, it was an easy way to use the free night reward and offset some of the cost of our trip. Currently, the card comes with 80,000 points after $3,000 in spend in the first three months and earns you 2x points on airline, car rentals, and dining and 5x points on spending at Marriott hotels.

    Another card that we renew every year when the annual fee comes up is the United Mileage Plus Explorer card. Although the card carries a $95 annual fee, it also comes with a free checked bag for you and your companion when traveling on the same reservation, access to priority boarding, and two one-time United Club passes annually. Although these benefits are, in my opinion, decent, they aren’t enough alone to compel me to keep the card. BUT, United now gives cardholders access to additional Saver level award seats. When booking award tickets, there are typically four different award classes: Economy, Saver Economy, Business, Business Saver. Although you get the same seat if you book Economy or Saver Economy, the Saver fares usually require half as many points to redeem. The same goes for the business award seats. As you might expect, the saver fares get snapped up quickly, so having access to more saver fares is definitely a sufficient enticement to hang on to the United card, even with the $95 annual fee.

    being a cardholder can open up otherwise unavailable rewards
    One of the things I love about flying premium class is the international dining course. This is the Ethiopian sampler that we were presented with en route to Addis Ababa.

    How do we do it?

    With full time jobs and two kids, we aren’t able to take as much advantage of traveling on points as we could, but this is the formula that works for us.

    • Hold two accounts of the same credit card. My husband and I each have our own Chase Sapphire Reserve card, our own Alaska Airlines Bank of America Card, etc. We hold separate accounts instead of signing up as authorized users for two simple reasons: the sign-up bonus and the benefits outweigh the costs. When the Chase Sapphire Reserve card launched, it was offering a 100,000 points sign up bonus for 4,000 spend in the first three months sign up for the card during this time, thus netting us 200,000 Chase Ultimate Rewards points, right off the bat. We also each hold the Alaska Airlines card because it includes one companion fare pass per year, which entitles the cardholder to purchase one round-trip coach companion fare on Alaska or Virgin America from $121 when traveling with another passenger on a paid, published coach airfare on the same flight. Because we frequently travel from DC to the West Coast with our family of four, this companion fare has helped us to significantly offset the cost of travel. For example, when my toddler and I flew to Anchorage to meet the rest of the family in July 2016, the base fare for my ticket was $1,544.26. My companion fare son’s ticket, however, was only $99.
    • Put all of your spending, that you can, on your credit cards. When I say we use our credit cards for everything, I mean everything. I even pay our water bill on our credit card, even though there is a $1.49 flat fee for all credit card payments. I figure the $1.49 fee is offset by three months of postage stamps, so I simply charge $200-300 every few months and carry a positive balance on the account, refilling it when it gets low. The internet is full of people who have researched the cost/benefits of paying estimated taxes or your mortgage with a credit card, but we haven’t quite reached that level of detail in our household (yet!).
    • Put your spending on the card that nets you the most benefits. For instance, we charge all Starwood hotel stays onto our American Express Starwood credit card, all dining and travel onto our Chase Sapphire Reserve card (which offers 3x the points on travel and dining), and we also carry the Chase Freedom card which has different bonus spending categories every quarter.  For example, for the third quarter of 2017, Chase Freedom is offering 5x the points on restaurant spending. Thus, although I typically use my Sapphire Reserve card for restaurants because I get 3x the spend, I have been using my Freedom card this quarter instead of my Sapphire for the extra 2% bonus. I try to keep it to a relatively simple set of categories because I only have so much mental bandwidth to spare these days, but if you want to see how detailed the analysis can get, read this article on how a man put a $45,000 car on his credit card for miles but made a big mistake.
    • Finally, although we do not accrue points in this way, I do maintain a Charles Schwab checking account which includes free ATMs anywhere. I use this card exclusively for withdrawing cash at ATMs around the world. The fees are automatically credited at the end of the statement closing period and I don’t worry about having our main bank accounts compromised.
    This is how I organize my cards in my wallet, so I don’t even have to think about which card to use. Just follow the labels!

    Would I recommend this?

    Yes! I definitely recommend everyone explore the world of travel and points. Even if you aren’t inclined to carry five different credit cards each (because it does take a lot of work to track!), it is possible that there is a way for you to spend the same amount, but on a different card that nets you significant benefits. The only caveat is this is that I would caution you not to get into this hobby if you are unable to pay your bills on time. If you are carrying a balance on your credit card, you should focus on paying the balance off before you start diving into the world of points.

    There are tons of resources online to help you get started if this is something you’re interested in. This New York Times article from 2015 includes links to a number of miles and points bloggers I follow. Do not follow the recommendations in the article, however, as they are outdated. Instead, visit the individual bloggers and search for their most recent posts on “best cards.” I’ve included, below, a few links to the authors I have relied upon most heavily in the past.

  • Travel With Infants and Toddlers:  Diapers

    Travel With Infants and Toddlers: Diapers

    Traveling with an infant or toddler wearing diapers means that you need to make sure to have diapering supplies and are able to do diaper changes when necessary.

    Diapers

    When traveling with a child who wears diapers, the first question is – should you pack enough diapers for the entire trip or plan to purchase at your destination?  Some parents always pack and others always plan to purchase.

    On our first trip abroad with an infant, I brought only enough diapers for the first few days and planned to purchase diapers in London. Diapers were definitely available (something that is not the case in every destination).  Unfortunately, I could not purchase the diapers, and even though we calculated our son’s weight in kilograms before buying, the ones we purchased were not ideal in terms of fit and nor were the second box we bought.

    Since that first trip, having the right type of diaper became a travel essential. The last things I want to deal with on the road are additional diaper blow outs or leaks.  I never took an international trip with a child in diapers without packing enough diapers for the entire trip again.  However, if wipes were likely to be available in my destination, I often planned to purchase when needed.

    While diapers are certainly available in large, metropolitan areas like London, they are not available in all destinations. We vacationed at all-inclusive resorts in Riviera Maya twice, and I noted that the on-site shop carried only one bag of exorbitantly priced size 3 diapers.  Diapers might be available nearby off the resort but would definitely be challenging to locate.  We also traveled to India with a toddler in diapers.  Although we did not specifically look for diapers, selection was certainly limited, and we were extremely glad that we had what we needed.

    I did purchase diapers a few times when traveling domestically a few times, but I had identified in advance a store that I planned to shop at when we arrived at our destination. While diapers are certainly bulky and take up a significant amount of precious baggage space, I found that packing diapers became an additional packing challenge that ensured that there would be some space to bring home souvenirs.

    Our favorite diapers

    Diapering

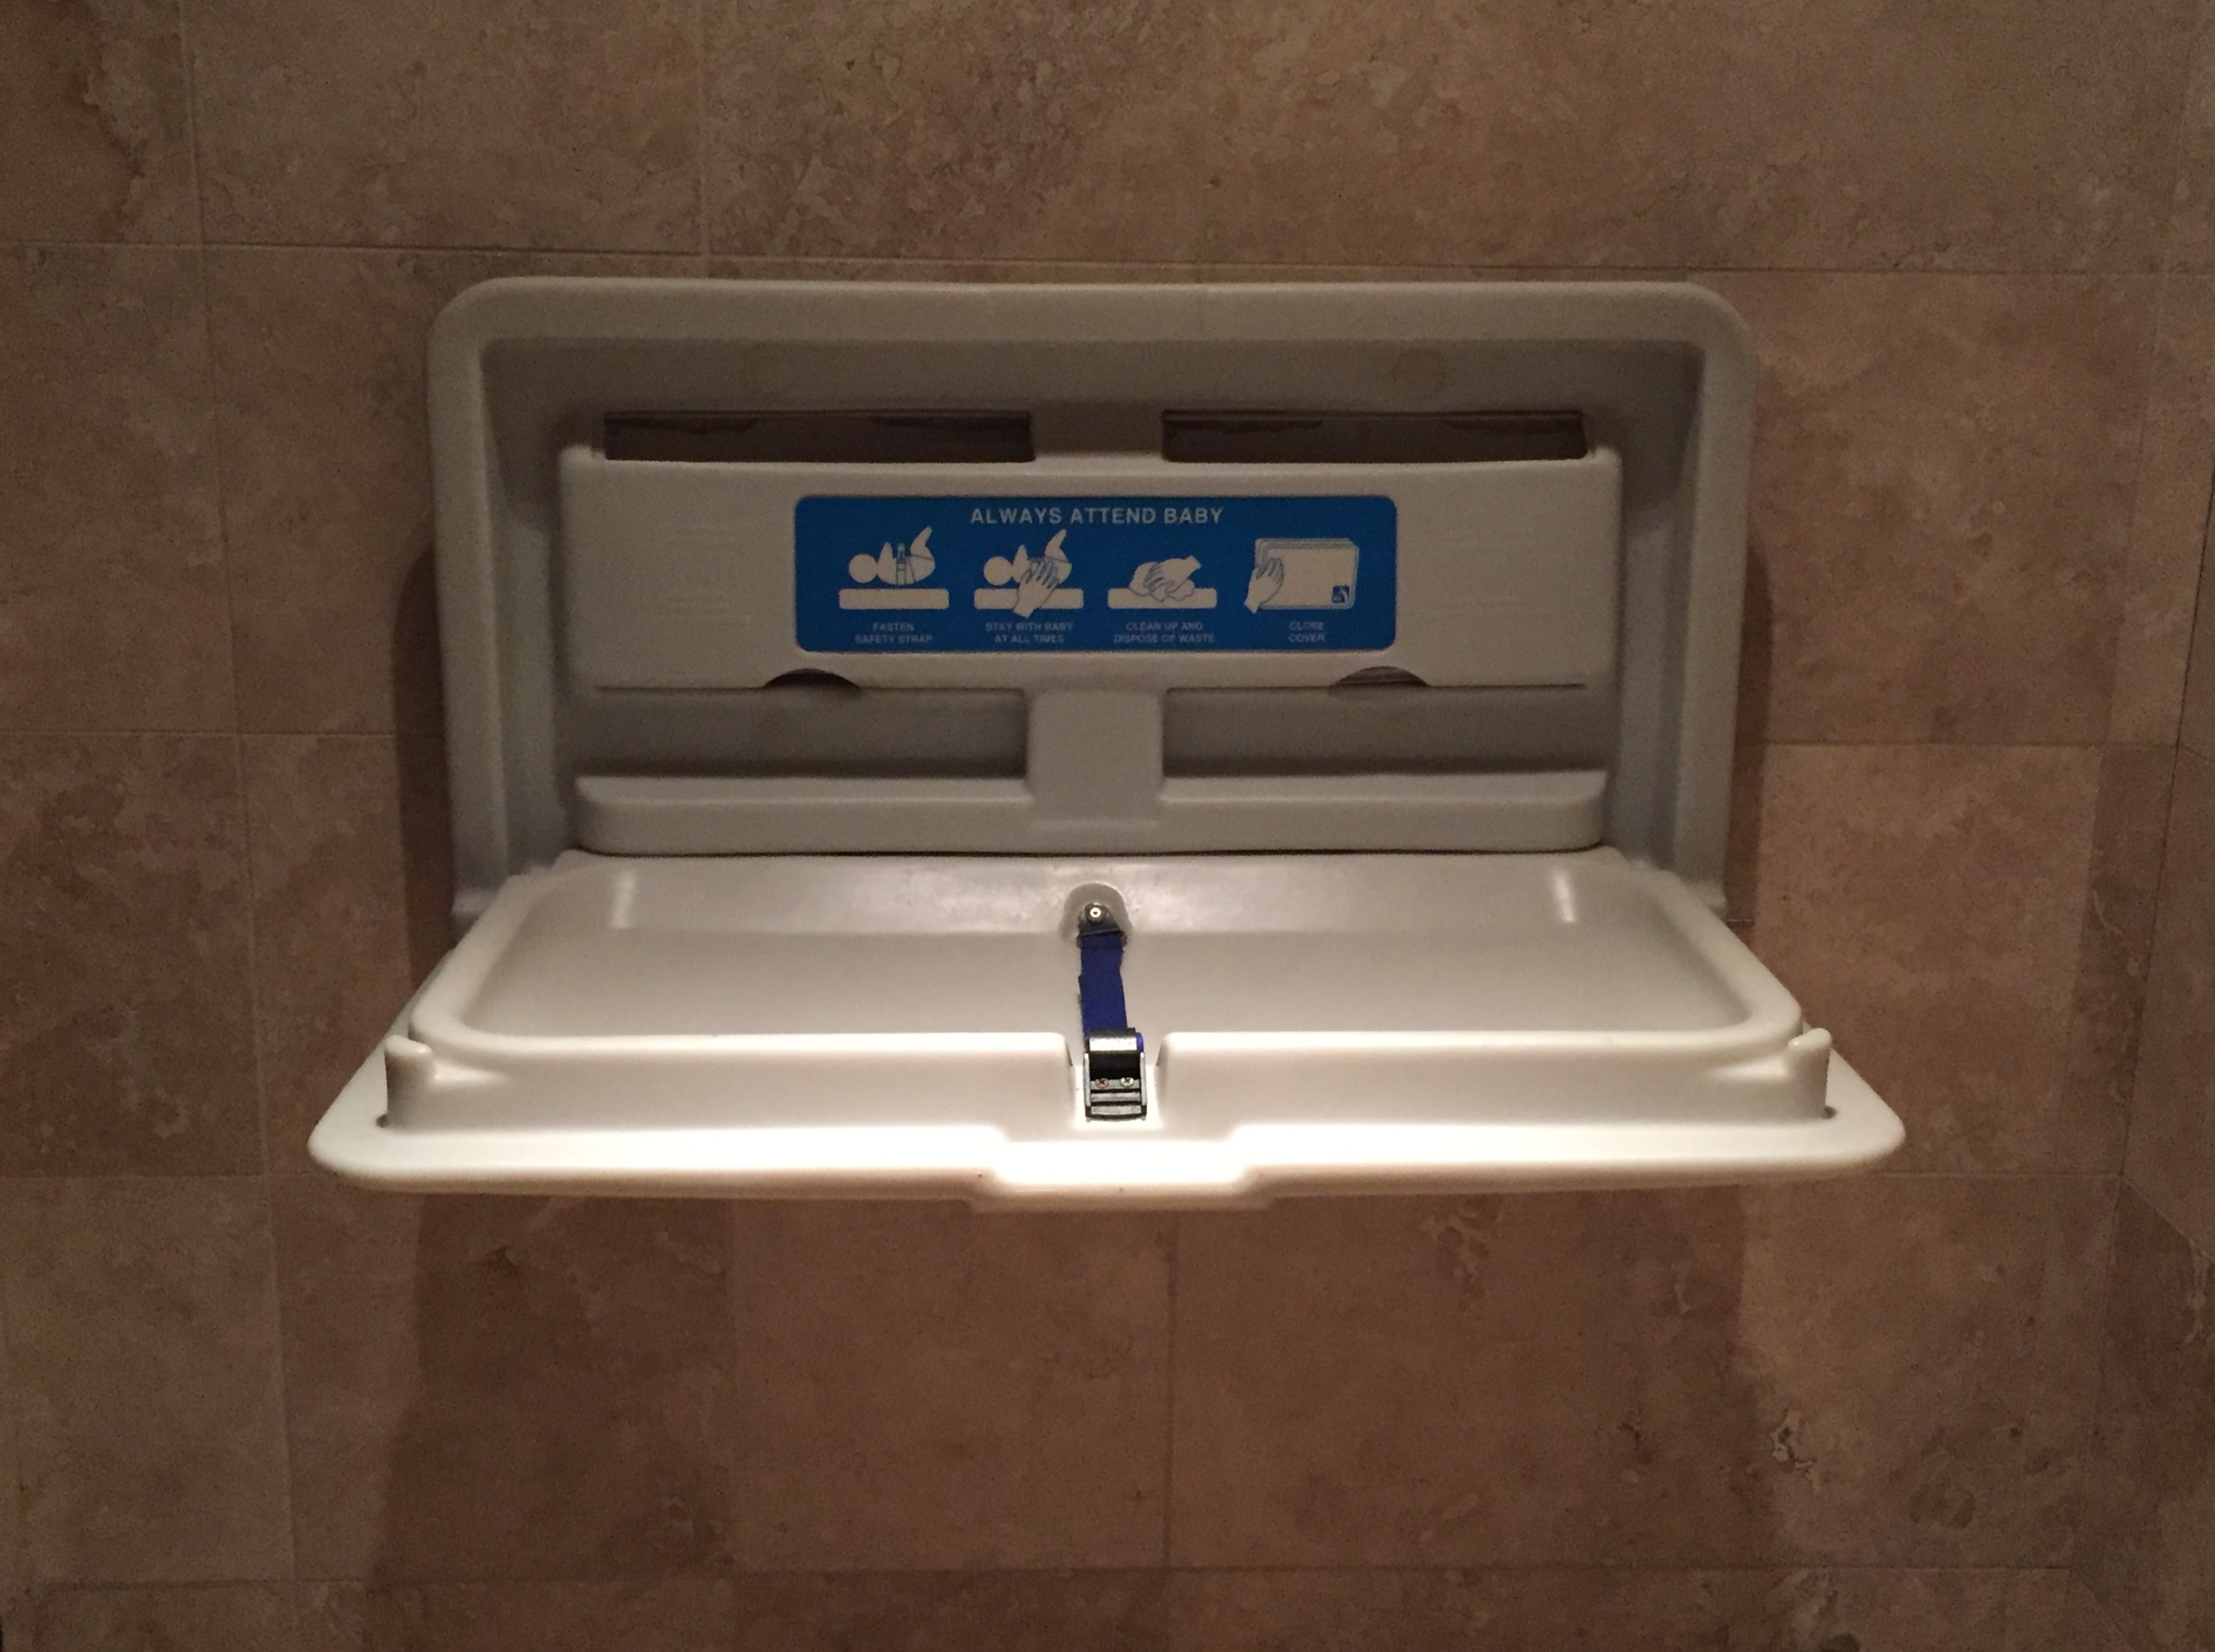
    Diapering can be a bit of a challenge while traveling, especially if you are not traveling by car. Unlike nursing, diaper changes in public spaces, particularly restaurants or coffee shops, raises valid hygiene concerns because no one wants to sit and eat on a bench where a diaper has been changed.  At least one diaper station is available on each flight, but not necessarily in every bathroom, so you have to check the sign on the door.  There are many more diapering stations in restrooms than in the past, especially in tourist sites, but they are definitely not universal.  But, a diaper kit, paper towel dispenser and standing diaper changes can make diapering easier.

    Sign indicating diaper changing facilities

    I was never a fan of carrying the traditional diaper bag in addition to my own handbag.  Instead, I created diaper kits using the clear plastic packaging that onesies come in with a flap and snap opening.  I liked these containers because the plastic was thicker than ziplocks, and the snap was easier to open. I added a few diapers, wipes, a diaper pad and a change of clothes.  I had a few of these stocked at any one time in each car and my handbag.

    It has been almost a year since I have needed to carry diapers, and we no longer have any diaper gear, but Nancy took some illustrative pictures of her similar diaper set up.  She used the super cute and compact diaper clutch to carry a few diapers, wipes and a diaper liner in her handbag.

    Nancy’s diaper clutch
    Typical contents of Nancy’s diaper clutch

    While having a few diapers very accessible is key when traveling, you also need to make sure that you have more diapers than you expect to need at any one time and backup supplies in your luggage.  Nancy and I both used gallon sized ziplock bags to hold larger quantities of diapers and wipes while traveling.

    Nancy’s back up diapering supplies


    I discovered that the paper towel dispenser in the bathroom can be your ally. While air dryers may be better for the environment, paper towel dispensers can help you line whatever diaper changing area you plan to use. I always carried disposable diaper pads, but saved them to use only when paper towels were not available. No one ever commented that I used too many.

    Nancy purchases these disposable diaper liners that you sometimes find in baby changing stations in bulk.  Considering the exorbitant cost of other disposable diaper liners, I think this is a genius move that I wish I knew about.  Those liners would definitely come in handy at all the bathrooms with air dryers.

    Also, standing diaper changes are so much more sanitary than laying a baby down. I learned about standing diaper changes from my son’s day care and was skeptical at first until I realized that only my child’s feet end up touching the diapering surface. As soon as my children were confident standers, I had them stand during diaper changes in public restrooms whenever possible, and even on changing stations. This was typically not possible in tiny airplane restrooms. In restrooms with no diaper facilities, I would stand my child on the toilet seat or on the floor in a stall and do the change.

    When you are outside with no accessible bathrooms and in an emergency situation, you can move your stroller to an unobtrusive location, turn it away from view, recline the seat and quickly change the diaper.  Before you know it, diapering will just be a distant memory. Thankfully, that is what it is for me now.


  • Travel With Infants and Toddlers: Strollers and Carriers Take 2

    Travel With Infants and Toddlers: Strollers and Carriers Take 2

    For Catherine’s take on strollers and carriers, visit her post, Travel with Infants and Toddlers Strollers and Carriers.

    As anyone with kids knows, what works for one family frequently doesn’t work for another. In my experience, what has worked for one kid hasn’t worked for the other kid and so, I thought I’d add my two cents on what worked for us and didn’t work for us when traveling with infants and toddlers in terms of strollers and carriers.

    Strollers:

    My oldest child was not a fan of strollers. He never really cared for them and was fully out of them by 18 months, preferring instead to walk or push the stroller. As you can imagine, fighting with an 18 month old over whether or not he could safely push a stroller in a public space quickly became more trouble than it was worth and we essentially stopped using it at that time.

    Although the stroller was never a big part of our life with him, we did find that it was essential for one trip that we took to California, prior to his first birthday and before he could walk.  Since we were visiting family in Los Angeles, I decided to purchase a stroller and have it sent to my mother’s house prior to our arrival. Knowing that we would use the stroller in limited circumstances (malls!), I wasn’t too worried about the stroller’s ability to maneuver in rugged terrain or its ease of handling. I did, however, want something 1) inexpensive, 2) small when folded up, and 3) light. A quick amazon search and ~$40 later, I ended up settling on a Jeep umbrella stroller which served us perfectly for our week in Los Angeles.

    our inexpensive jeep stroller which worked great for our stay in Los Angeles

    Although this stroller was perfect for that trip (and a subsequent trip a few months later), it did have certain limitations.  First, as a bare bones umbrella stroller, the stroller did not recline and thus was not suitable for children who are unable to sit upright and support their bodies. The stroller also did not have a telescoping handle and was too short for my brother, who is 6’3″, to use comfortably. Nonetheless, for $40, I was happy to have it for the handful of times we needed it in California.


    Six years later, I found myself in a similar predicament of needing an umbrella stroller for a trip with a young toddler. Although I considered purchasing something inexpensive like the Jeep stroller, I decided to purchase a Maclaren Mark II stroller instead. Weighing in at less than 8 lbs, this was the lightest stroller I could find on the market and, importantly, it had a carry strap. As I was traveling alone with my toddler from our home base in Washington, DC to Alaska, I wanted something light and portable – that I could maneuver without too much difficulty.

    napping in the United Club lounge during our extended layover

    The Mark II ended up being the perfect stroller for use in the airport, as it provided my son with a spot to nap during our long layover in Seattle, and it was also easy to fold up and throw over my shoulder, thus freeing up my hands to wrangle my squirmy toddler.

    The Mark II has also proven useful on short sightseeing trips around town. Here’s my little one pictured in front of the White House during a Mommy+Son solo trip downtown

    I am a huge fan of the umbrella stroller for traveling with older infants/toddlers as they fold up small and are lightweight. However, these bare bones strollers are limiting in that the child must be able to sit upright and support their head (6+ months is the typical manufacturer recommendation) and umbrella strollers require both hands to push and don’t maneuver as well as other more robust strollers.

    For a trip to Disney World when my youngest was 10 months old and not walking, we elected to bring our usual stroller, the Baby Jogger City Mini. Knowing that we would be using it extensively at both Disney World and Legoland, I was happy to bring along the larger stroller for its ease of use and also for added comfort. We also traveled to and from the airport via metro on that trip, so it was nice to have it to push on the uneven sidewalks and pavement to/from our metro station.

    Baby Carriers:

    I’ll be the first to admit that I have a love/hate relationship with baby carriers. My oldest son hated all carriers. I tried quite a few with him – the Peanut Shell,  the Moby Wrap, a Baby Bjorn, but he only ever screamed bloody murder when put in a carrier.

    I remember having one successful carrier experience with him and that was at the airport on his first trip to California. Although he didn’t love the carrier, he seemed to like knowing that he was close and the surrounding environment was different enough that he was easily distracted.

    grudgingly hanging out in the baby bjorn carrier

    When my second was born a few years ago, I was willing to give carriers another try, but wasn’t overly optimistic.

    Cue the angels! My second child loves the baby carrier.

    hanging out in his carrier in DC

    We started with the original Ergo Baby Carrier, which he was happy to ride in during any number of walks we took around the neighborhood or through the grocery store. I also loved that the carrier had a handy zipper pocket in the back center that I could stash my phone and keys in. The limiting factor to the Ergo, however, is that even though it carries children up to 45 lbs, I found that once my son was 9 months or so, he liked to swing his arms over and out of the carrier. I frequently worried that it didn’t keep him secure enough and that he would come tumbling out.

    I’ll admit this was paranoia on my part, but I ended up purchasing a Tula Toddler Carrier just prior to our trip to Alaska. The Tula Toddler carrier has a higher back and even at almost three, my son will happily ride forward facing and the back fabric comes up to the base of his neck.

    comfortably napping on the Kenai Fjords harbor cruise in his Tula carrier

    Although the Tula carrier fits us much better, the one pocket it has is located on the waist belt instead of the back center, where the Ergo pocket is located. The pocket on the waist belt is difficult to reach and I stopped using it after I found myself frustrated from trying to reach it.

    As Catherine mentioned, carriers are limiting in that they restrict downward peripheral vision, so be careful when walking! I always hold onto the rail or use the wall for a guide when walking downstairs with a child in a carrier, just for added security.

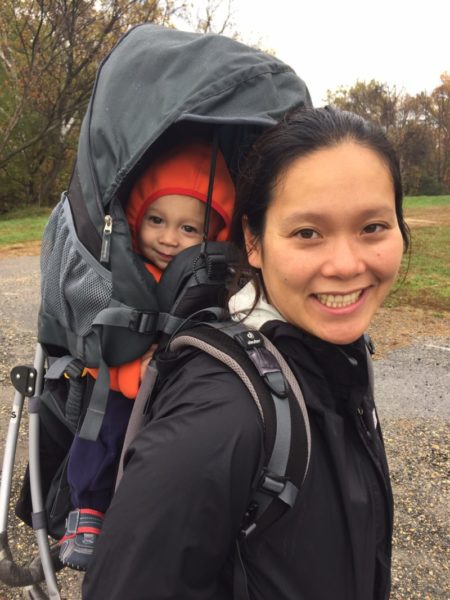
    In addition to soft carriers, we have also used a hiking backpack for our kids.

    We purchased the Deuter Kid Comfort 3 when my oldest was a toddler, but given his general dislike of being carried, it was rarely used.

    we did take some memorable walks around the neighborhood during Snowmageddon 2010!

    My youngest, however, has used it extensively for nature walks with our four legged friend, Wilson, and also for longer hikes around town and in Alaska.


    Lovin’ his Deuter Kid Comfort with Exit Glacier in the back

    I cannot recommend the Deuter carrier enough. Although it is large and expensive, it allows my son to sit high up and see the sights during our hikes and walks and he’s supported in an upright sitting position. As an added bonus, this carrier still looks brand new, despite being nearly 8 years old!

    As you can see, what works for one family or child may not work for you and what works in one situation might not work in another. Luckily, all of the gear identified in this post can be found at your local stores – Bed Bath & Beyond, Target, REI. I encourage you to take your child to the store and test out the gear to see whether you like not only the look and feel of the item, but also the fit. And know that in the world of revolving baby gear, you will likely be able to purchase whatever item you decide on used from your neighborhood listserv! I certainly know that I have bought and sold my fair share of strollers on craiglist, just looking for the perfect solution to my particular situation!

  • Travel With Infants and Toddlers:  Strollers and Carriers

    Travel With Infants and Toddlers: Strollers and Carriers

    Strollers and carriers are almost always travel essentials when you are traveling with a child under age three.  Nancy and I both shared our experience separately.  Check out her post at Travel with Infants and Toddlers:  Stroller and Carriers Take Two.

    Strollers

    Strollers are travel necessities simply because it can be too cumbersome to carry an infant or toddler and all your family’s stuff for long periods of time.  Even as a huge fan of my Beco baby carrier, there are limited circumstances where we did not need a stroller when traveling with an infant or toddler.  There are innumerable stroller options, but features to consider when traveling are size, weight, ability to lay flat, compatibility with your infant seat and how easy it is to collapse and storage capacity.

    Napping in the stroller

    Strollers are wonderful because they can contain your baby and baby gear (and honestly, your extra coat, water bottle, snacks and packages, too). Most babies and toddlers love their stroller and can easily nap there during the day if going to your hotel is not an option.  Our main stroller was the Peg Perego Aria, which I believe is discontinued (the new version of the Peg Perego Vela).  We loved it because it was compatible with our Graco SnugRide infant seat, had good underneath storage and was an ultra light 9 pounds. It has definitely seen better days, but on occasion, we still use it over nine years later.

    Our Peg Perego Aria – the early days
    Carrying luggage for our two day/one night trip to York

    You will need to get comfortable with abandoning your stroller in public at times, particularly if you are visiting Disney where there are large stroller parking areas.  After you remove any valuables, you can be relatively confident that no one is going to steal your wheels.

    Handicap accessibility is a Godsend for stroller users, but you will not always find stroller ramps or elevators available.  There are times when you will need to carry a stroller down a flight of non-accessible stairs or take your stroller onto an escalator.  We had to take our stroller onto an escalator so many times in London and Barcelona where infrastructure pre-dates accessibility requirements that we occasionally would do it in the US as well.  If you look like you know what you are doing with a stroller, you rarely get stopped.

    We used a side-by-side double stroller for many years because we found the tandems too unwieldy.  It could be awkward getting through doors at times, we were very happy with our Baby Jogger.  I believe we only brought it on an airplane when we went to Disney World with children aged one and three.

    There are a few times where a stroller is not a travel essential with infants or toddlers.  Due to uneven pavement, we found that the stroller we brought to India was not necessary.  After we gate checked it, we did not get it back until we retrieved our baggage, so it was not overly useful in airports, and the pavement was so uneven that we could only use it in a mall.  Because it was more cumbersome than useful, we wished we had left it at home.  Also, Iceland was so remote that there were very few places other than airports and Kringlan, the country’s only mall, where you can actually use it. We were glad that we did not bring a stroller.  Also, if you are visiting family domestically and do not plan outdoor walks or trips to the shopping mall, a stroller may not be needed.

    Carriers

    I almost always traveled with my Beco carrier when I had an infant or toddler with me. Because it was soft and very packable, I usually tucked it into the front pocket of my carry on suitcase so that I could access it easily and use in the airport if necessary.  There are many times when a stroller is impractical or impossible to use due to uneven terrain, uneven pavement, stairs or a fussy baby.  My children all loved riding in the carrier even more than the stroller and found the carrier to be an ideal napping location.  My Beco carrier could be worn on my front or back, but my personal preference was to keep the baby in front of me.

    Carriers are helpful because they help distribute the baby’s weight on your shoulders and back and also allow you to be hands free.  Carriers are ideal in warmer weather or indoors because it is challenging to wear a coat, but I discovered on a windy day that a nursing cover can serve as great protection from the elements.  The downsides are that carrying can lead to back pain, and there is no easy storage for any baby gear.

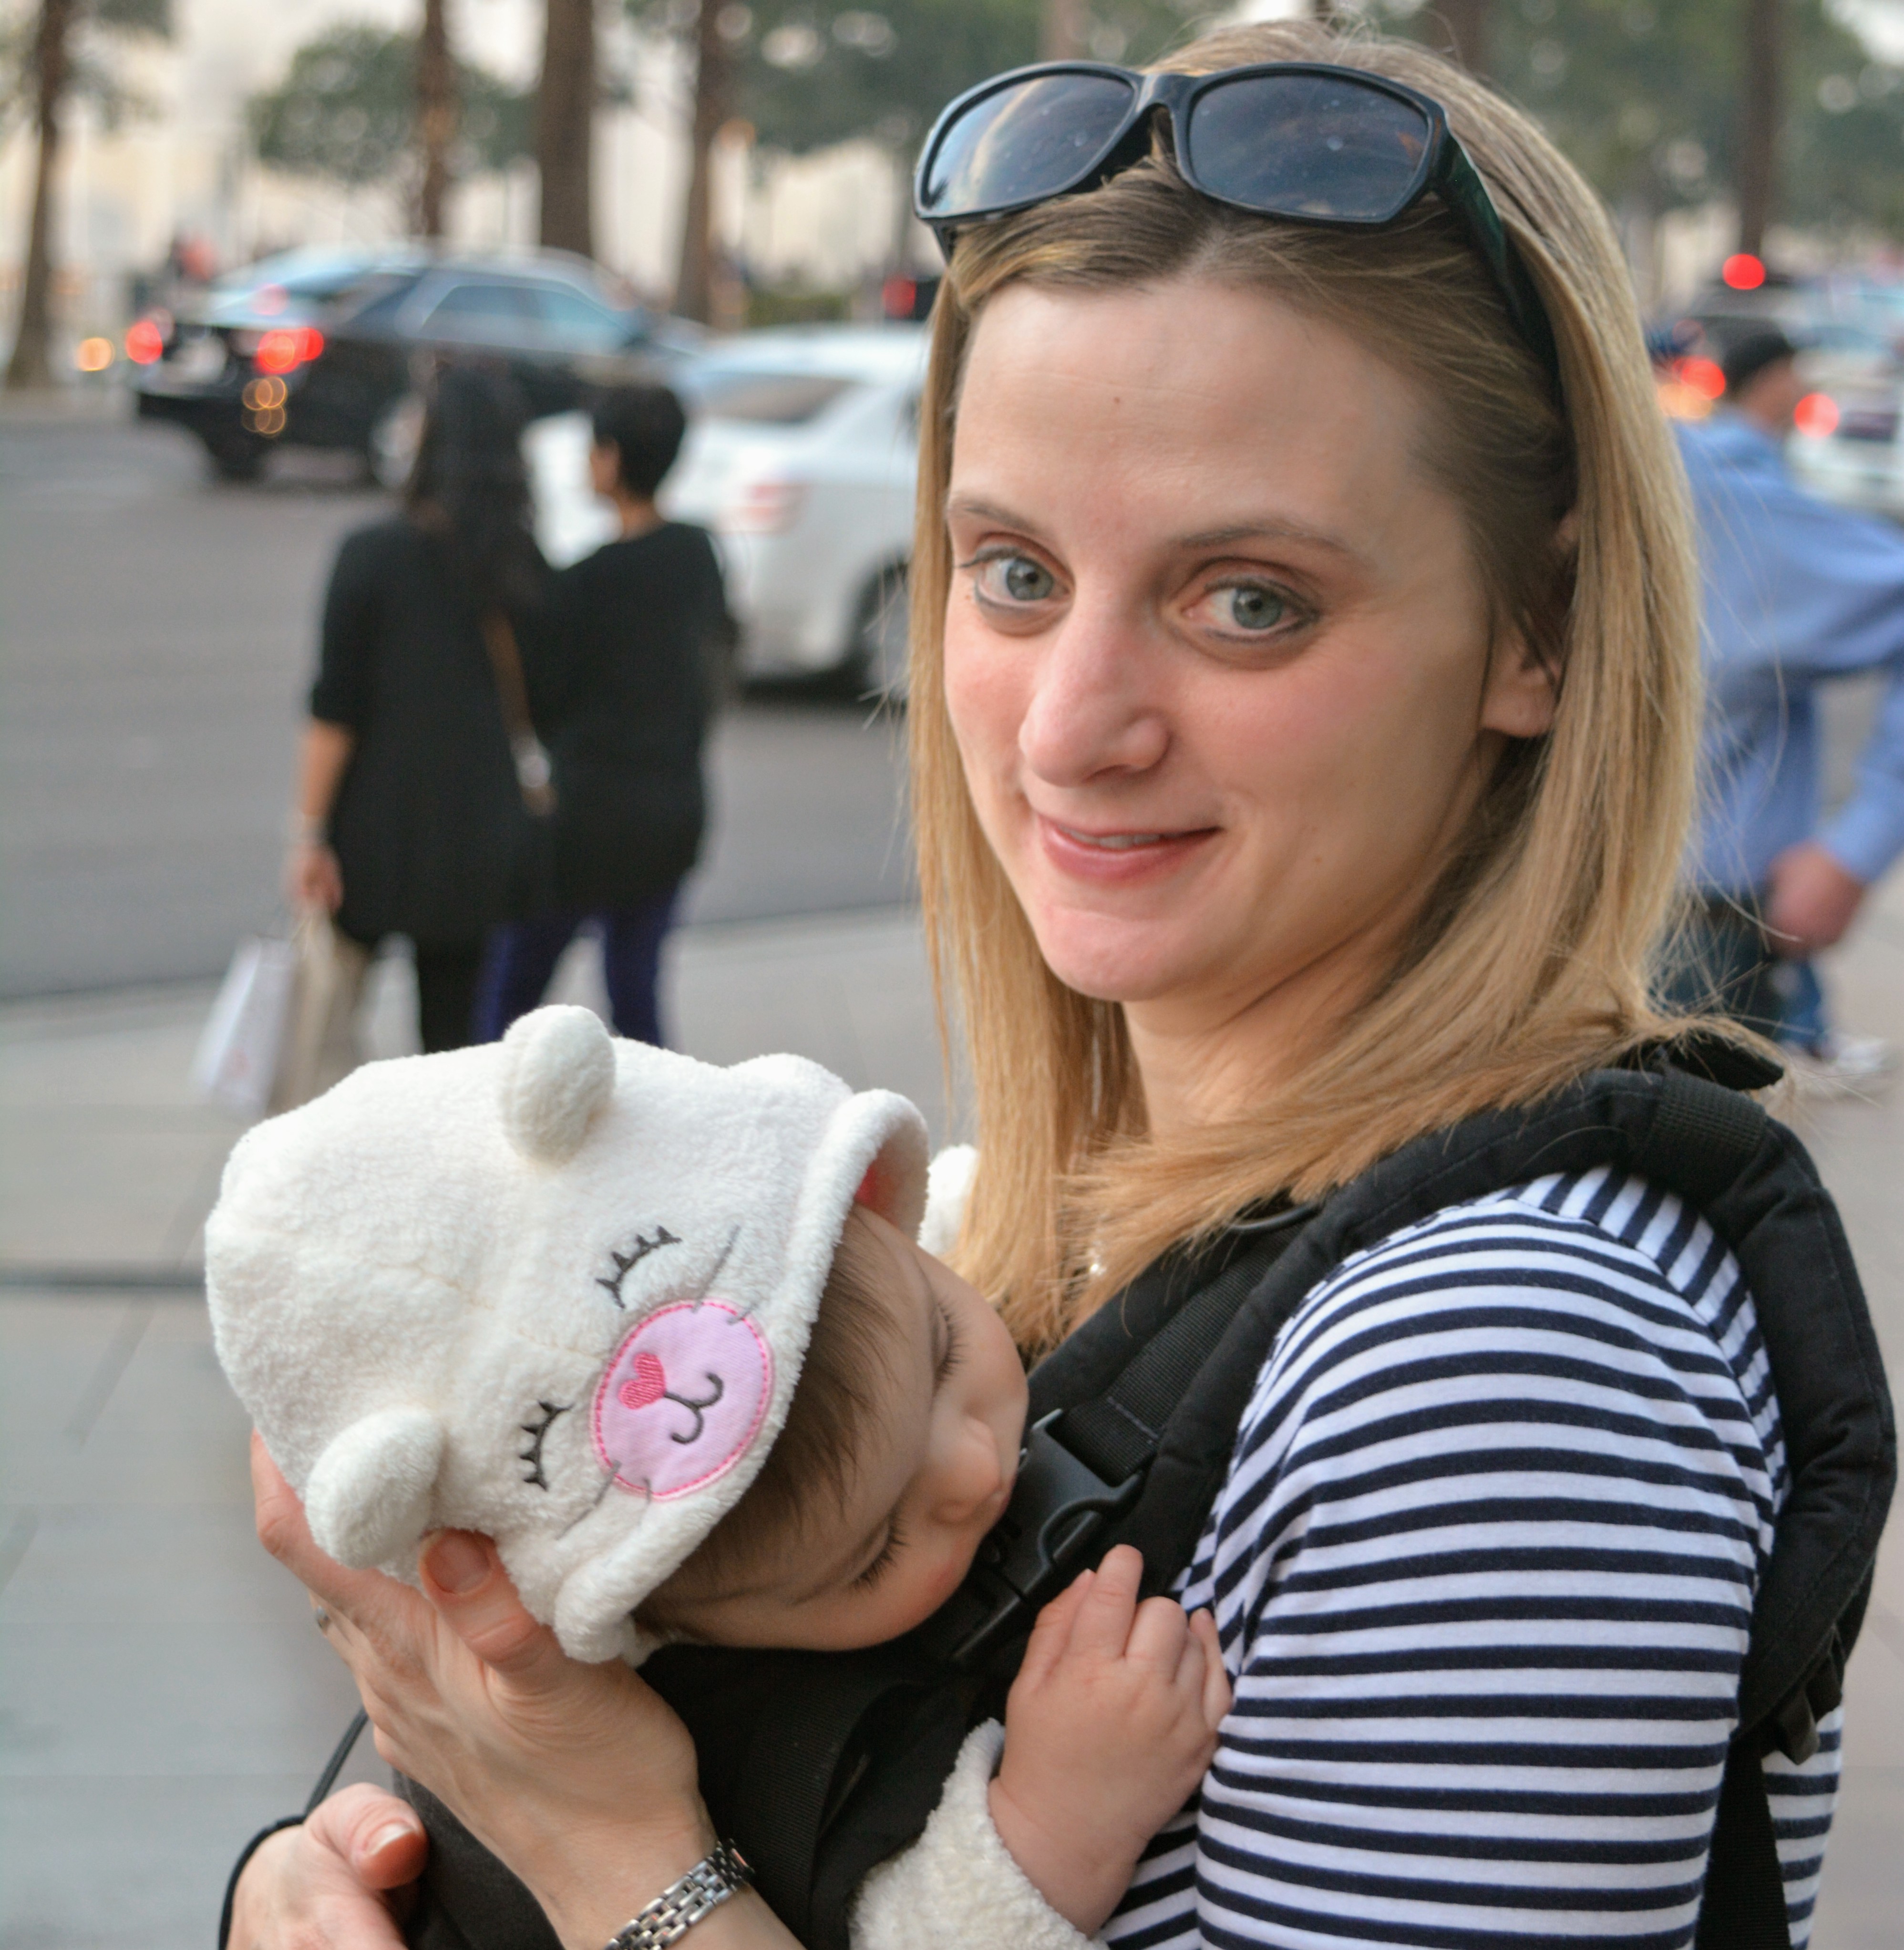
    Nap time in Las Vegas
    Nursing cover windbreaker

    There are some important safety concerns related to carriers.  First, the carrier should position in a seated position rather than hanging so that their weight is on their bottom rather than crotch.  Also, the baby should not be worn too low.  If you are not able to kiss the baby’s forehead, you are wearing them too low.  If the baby falls asleep, you may need to support the baby’s head.


    Kiss test on a sleeping baby

    The baby’s body can block your peripheral vision downward, so you have to be careful to watch your step, particularly on an uneven walking surface.  I often find myself using the “extra care” while walking that I used when pregnant.  But, I’ve used the carrier on numerous hikes, walking in a rocky lava tube and exploring the cave behind a waterfall in Iceland.  For us, our carrier was a great way to keep a baby or toddler close, comfortable and happy when traveling.  The only reason we did not use them more or exclusively was that the stroller did a much better job of carrying stuff, and carrying for long periods of time did lead to fatigue and even pain, but for us, a carrier was definitely a travel essential.

    Check out our other Travel Tips for advice about traveling with kids.

  • Travel With Infants and Toddlers: Nursing and Pumping

    Travel With Infants and Toddlers: Nursing and Pumping

    Travel for a nursing mom – with or without her baby – has some extra challenges, but they are not insurmountable.  In fact, I found that an exclusively nursed infant is one of the easiest travel companions.

    Nursing Covers

    When my first son was born, nursing covers had not yet gained popularity. In fact, I did not know one person who owned one and had never seen one in use.  Whenever I needed to nurse him in public as an infant, I took him to the car or inquired about a private room.  It was truly a struggle to discretely cover a fidgety baby with a blanket that I was really nervous about our trip to London when he was four months old and exclusively nursed.  We got through the plane journey and our first few days traveling into Central London.  Even without comments, glares or stares, I was on edge every time I needed to feed him in public.

    Bank of the River Thames
    Riviera Maya

    Then, we traveled to Barcelona. Our hotel was just outside the main tourist area, so it was not possible to retreat to our room for feedings every few hours.  During a short rain shower, we ducked into a restaurant for some food, and I began feeding my son at our table.  An older gentleman leaving the restaurant stopped as he passed, picked up the blanket and gently gave my son a soft pat on his head.  My husband and I were shocked at first and then we realized that Spaniards are less conservative than Americans, and he was just interested in seeing the baby and completely unaffected by the fact that I was nursing.  That one incident made me more relaxed while traveling in Europe.

    Thankfully, nursing covers made their debut before my second son was born. They were not widely available as they are now, so I ordered my Bebe Au Lait cover through the specialty online store  and carried it with me just about every time I left the house with a nursing baby since it arrived in my mailbox.  While nursing in public with or without a cover is legal in most places, nursing covers make discreet public nursing possible just about anywhere.  And, the new nursing scarfs and nursing ponchos picked up right where covers left off and added important back coverage. 

    National Gallery in London


    With my nursing cover, I never had an issue nursing my second two children in public. I would nurse anytime I was sitting – on a plane, train or bus or at a restaurant or stop and find a convenient seat or bench (preferably with back support) whenever my baby needed to eat.  If we were out shopping, I would use a fitting room.  At first, I used to carry in a few items to make it look like I was planning to try on, but in later years, I would simply ask if I could nurse in a fitting room and was never once denied.

    While at a museum, I would find a spot where I could sit for about 15-20 minutes.  Sometimes I had to get creative if no benches were available and perch myself on the floor up against a wall or even on the stairs.  Although Pope Francis told mothers to nurse during Mass, I never felt comfortable nursing during a religious service, except during Evensong at the York Minster when our family was seated in a small box that no one else could see inside.

    Tate Modern

    It really is possible to find a place to nurse wherever you are while traveling.  For example, I’ve nursed at all of these places:

    Plane Travel

    I think nursing moms have the advantage when traveling by plane with their babies.  Nursing is not only a great way to calm a baby, but swallowing is a also a cure-all for most ear pressure or pain.  Anytime my baby became slightly cranky on a plane, I would nurse, and that almost always immediately pacified the baby.  Before my first flight with an infant, someone recommended an inflatable travel nursing pillow.  It was a total life-saver.   The pillow fit easily in carry-on luggage and was easy to inflate after boarding.  Our babies (and our arms) were so much more comfortable when we brought this with us.

    Pumping

    If you are a pumping mom or traveling without your baby, there may be challenges finding an appropriate place to pump while traveling. I have sat in the back seat pumping while covered with my nursing cover many times. Although restrooms are generally not what I would consider an appropriate place to pump, I have pumped in a restroom during a wedding reception at least three times.

    Also, cleaning pump parts and storing pumped milk are also considerations. It is helpful to carry dish washing liquid in travel containers and also to notify your hotel in advance that you are a nursing mom and need a refrigerator in your room. Many hotels have additional fees for refrigerators, but I have always received one without charge when requesting for the purpose of storing milk.

    Nancy had more experience than me as a pumping mom and has this advice:

    “I exclusively pumped for four months with my oldest and six months with my second. As a result, I have way more pumping experience than I care to admit. I have pumped on numerous flights and on the Amtrak, have pumped in a disgusting janitor’s bathroom in Manhattan…. My advice to you is to approach it as you would nursing – if would you nurse there, then go ahead and pump.
    I usually travel with multiple sets of pumping parts – at least two pairs. The nice thing is that if I end up needing to pump 3-4 times because I’m away all day, I can just split up the pump parts and pump one side at a time for a total of four pump sessions. I also bring a stack of milk storage containers, a thin sharpie to use for labeling, and many, many gallon size ziplock bags. For transportation, I like using a medium size soft sided cooler which holds the milk, the pump parts (stored in gallon sized zip locks and clearly labeled as clean or dirty), and a few ice packs. I also have my pump (including AC adaptor), cleaning brush and soap, and milk bags in my carry on. When I’m ready to pump, I cover myself with a jacket or blanket and pump away. The times I have pumped on the plane or train I have been lucky to have the row to myself, or at least an empty middle seat, so I just turn my back to the other person and pump quietly. No one has ever said anything or even shown any signs of being aware that I was pumping.
    Once I’m done, I simply store the dirty parts in a ziplock bag to wash when I get to my destination. Most hotels now come equipped with mini fridges, so if I am away for 1-2 nights, I just lay it flat in the fridge, I don’t worry about it. I just store in the fridge, along with the ice packs, until I’m ready to go. On the day of my trip home, I fill gallon size ziplock bag with ice from the hotel’s ice machine, and securely pack my milk into the cooler with said bags of ice! I’ve never had any trouble traveling with the milk.  The one time I wasn’t allowed to bring the gallon size bags of ice across security, I simply asked a restaurant to give me ice when I got through security. Upon arrival home, I put the milk directly into the fridge and fed my baby from that milk first. If the milk froze or developed some ice crystals – even better, as that gave me less to worry about in terms of developing freshness. I always fed baby first from the milk pumped while traveling, though, just to be sure none of it went to waste!”

    Luckily, nursing rooms (aka “mother’s rooms”) are becoming common in airports.  My friend Kate shared an amazing US airport nursing room locator.    The Louis Armstrong New Orleans Airport offers mother’s rooms on each concourse, including this one that features comfy chairs, a power strip and a diaper changing station.  Traveling for a nursing mothers does require advance planning, but the challenges are not insurmountable, and availability of these types of facilities is making it easier.

    Mother’s Room in Louis Armstrong International Airport.

    Check out our other Travel Tips for advice about traveling with kids.

  • Travel Tips: International Travel With Kids

    Travel Tips: International Travel With Kids

    Passports, visas and immunizations are important considerations when traveling internationally with children.  The U.S. Department of State has a helpful tool that allows visitors to find passport, visa and immunization requirements for specific destinations.  It is necessary to plan in advance to make sure that you have everything taken care of before your trip.

    Passports for Kids

    It used to be possible for U.S. citizens to travel to a number of countries with only their birth certificate or for minors to travel on their parent’s passport when flying abroad, but this is no longer possible.  U.S. citizens can generally only travel within the U.S., to U.S. territories, to Canada or Mexico in limited circumstances or on certain closed loop cruises without a passport.

    All U.S. citizen children traveling out of the country by air must have a valid passport that complies with the requirements of their destination and where necessary, a visa. Note that many countries require not only a valid passport at the time of entry but also for the duration of your stay or some time period afterwards.  It is recommended that your passport will not expire for at least six months after your intended stay.  When applying for a new passport, you should aim for it to arrive at least several weeks before traveling.

    The U.S. Department of State publishes current processing times for passport applications. In our experience, children’s passports usually come more quickly than predicted, but you do not want to take the risk of not having your passport in time for travel.  Expedited processing is available at an additional fee.

    The passport application for children under 16 requires completed forms (available online in form filler and PDF formats), original/certified U.S. citizenship evidence (e.g. birth certificate), a photocopy for application, proof of parental relationship (e.g. birth certificate), form of identification for parents and photocopy for application, appropriate photograph of the applicant and the required fees. Make sure that you have completed (but unsigned) forms, all documentation, pictures and required copies before you go to the post office or library that you have confirmed processes passports.

    If you plan to apply for a passport for your child as soon as possible after birth, you need to inform the hospital to expedite the birth certificate. Birth certificates can take a long time to process, and even with expedited status and multiple phone calls, my daughter’s took 30 days to be issued.  My husband got certified copies on the day the birth certificate was issued, and we applied for her passport the next day so that we could travel to Mexico before the end of my 12 week maternity leave.

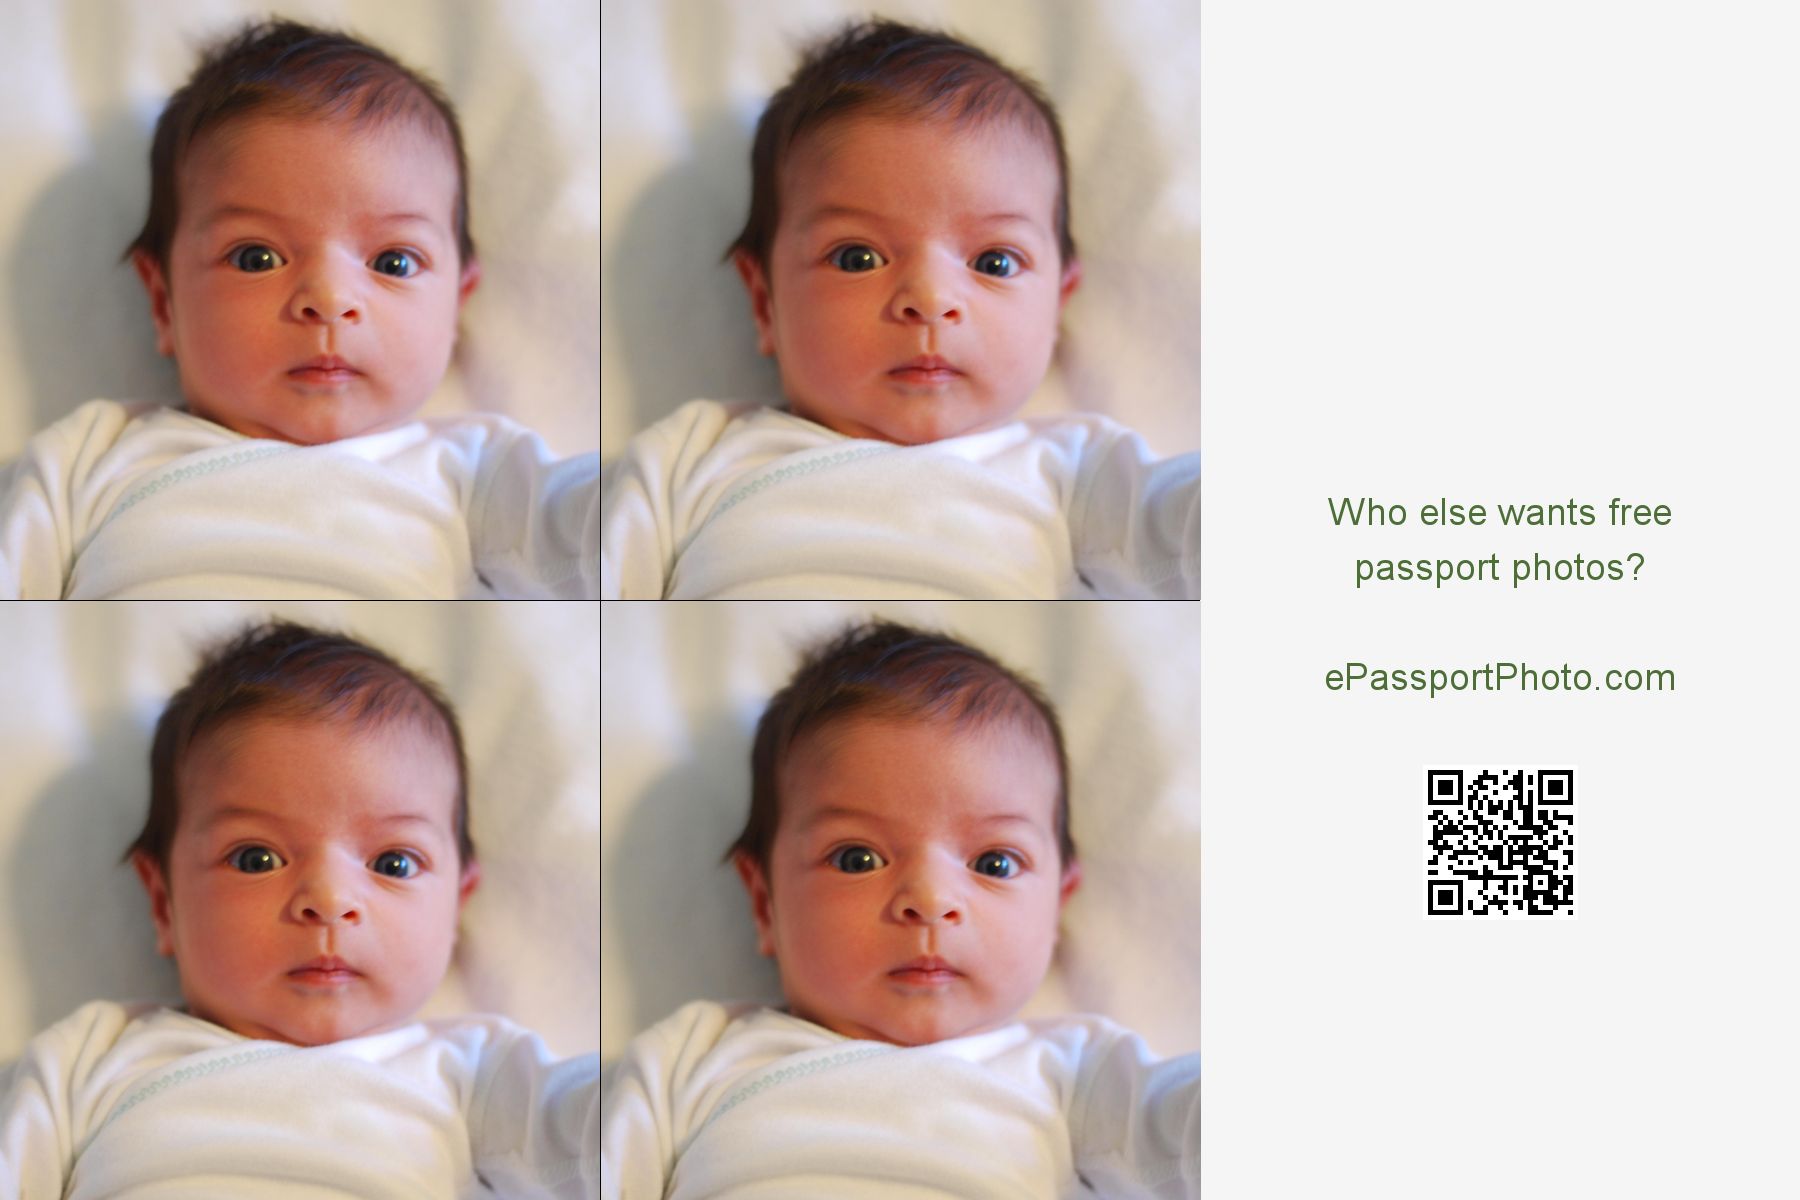
    If completing the forms and collecting the documentation was not enough of a hurdle, passport photos can also be a bit of a hurdle, especially for a baby. You can get passport photos at Costco, Walgreens, FedEx and even some Post Offices. The picture needs to comply with stringent guidelines. Check the picture yourself before going to the Post Office.  We once had a professional picture rejected and had to run to the closest CVS to the post office to have it retaken before submitting the application.

    Because all of our children have traveled abroad before five months, they have needed passport photos at very young ages. While there is some leniency with infants’ photos, it can be extremely challenging to wake an infant to have a professional photo taken.  After several failed attempts to get a professional picture of my daughter who was only a few weeks old, I took the picture myself with her sitting on a bouncy seat covered in a white sheet and then edited the picture using epassportphoto.com to make sure it complied with the size guidelines.  I took over 100 shots and even enlisted the help of a visiting friend, but the resulting picture had my newborn daughter’s eyes open and looking at the camera, printing at Target cost me $.20 and the outtakes were fun.

    To apply for a child’s passport, both parents and the child must go to the post office together with all completed forms (available online), required documentation and two copies of the child’s passport photo. Many post offices post the times that they handle passport applications.  These times are likely during mid-day during the week, and we have found that information on the website may not be correct, but it is also very challenging or not possible to call in advance to verify.  It’s ideal if you can go to the Post Office and verify passport application hours before you are actually near any sort of deadline, but we are typically not that organized.

    The good news about passports is that they are valid for five years of unlimited international travel for children under 16 and for ten years for all applicants over 16.

    Visas for Kids

    If a visa is required for your destination, you need to inquire into specific visa rules and the various lengths of validity. Typically, the longer the duration of validity, the more expensive the visa.  We traveled on 60-day e-tourist visas for India but had to apply during a specific window and complete final processing at the Bangalore Airport upon arrival.  It was a bit of an added hassle to our middle of the night arrival, but far less expensive than the one-year visa.  This option made sense for us because we did not expect a return trip in the near future.

    While visas add an extra paperwork and fees into international travel plans to certain destinations, it is far easier for US citizens to obtain visas to visit other countries than it is for non-US citizens to get visas to travel to the US.

    Immunizations for Kids

    In addition to identifying required immunizations by destination, the Center for Disease Control suggests necessary immunizations and travel considerations. Your pediatrician may be able to administer these immunizations.  We have found that our insurance generally covers the cost of non-standard immunizations such as Hepatitis A and typhoid, but it is important to call and inquire as soon as you know your travel plans because these immunizations might not be regularly stocked.  Our pediatrician was willing to write required prescriptions for our India trip but had only one dose of the typhoid vaccine available and was unable to secure additional dosages for our other children. We were glad we asked, but it is still necessary to visit a travel doctor for prescriptions and immunizations before travel.  There are not a lot of options in our area and most have very limited hours, so you have to schedule an appointment well in advance of your travel, if needed.

    Additional Considerations for International Travel With Kids

    It is important to travel with photocopies of passports and visas for your entire family.  If one ever goes missing, at least you will have your information.  If a child is traveling internationally with only one parent, the traveling parent needs to bring a copy of a Minor Travel Consent Letter signed by the non-traveling parent.

    When traveling abroad with kids, it’s important to find the best travel products that work for your family, including strollers, carriers, car seats and baby monitors.

    While paperwork is never fun, I promise it will be worth it when you get to your international destination!

    Check out our other Travel Tips for advice about traveling with kids.

  • Travel Tips: Traveling with Kids and Car Seats

    When traveling with kids car seats are a necessary evil – you have to keep your kids safe when coming and going, but they’re heavy and cumbersome and aren’t always the most pleasant thing to try and install after a long day of travel.

    Full disclosure: I am a bit of a car seat junkie and have always erred on the side of caution. My 8 year old can legally ride in the car without a car seat now, but he still rides in a high back car seat in our vehicles, and if given the choice, I always have him ride in a backless booster when carpooling or in grandparents’ vehicles. As a bone fide car seat junkie, however, I have now taken numerous taxi rides and plane trips with / without car seats and can share what has worked for us and what hasn’t.

    Will I need a car seat at my destination?

    The obvious first question is — do we need a car seat at our destination? There are many variables to consider:

    • Will you be doing a lot of travel by car? While a car seat may be critical for a trip to Los Angeles, it is less necessary and likely superfluous for a trip to New York City.
    • Can you rent/borrow a car seat? Most rental car companies give you the option of renting a car seat.  I have friends who have had awful experiences, but also friends who have had wonderful experiences. We rented a car seat once – for a 24 hour layover in Munich – and had a perfectly acceptable experience.  We also recently had neighbors who had family visiting from the UK and needed two car seats – happily, we were able to loan them our spare car seats during the duration of their trip.
    • Do you have alternative options? For a solo trip to LA where I needed a high back booster, I decided to just purchase a car seat and have it shipped to my mother. My brother installed it prior to picking us up from the airport and we happily left the car seat with them for future trips. This is an option to consider if you will be flying somewhere to visit family and plan on making frequent return trips.

    How will we get to/from the airport/train station?

    The second question we always have to answer is how we are getting to/from the airport or train station. When my son was 8 months old and we were flying to Orlando where we did not need a car seat, I opted to walk to/from the metro station with my son and metro to the airport in lieu of riding in a taxi cab with him unrestrained. I did the return walk to/from the metro station with him in a stroller on the trip home from the airport. Eighteen months later, when the same son was 2.5  years old and we were making a similar trip, I decided to just let him ride in the back of the taxi cab instead of making the trek to/from the airport via metro. Why? Because he was older and I felt safer riding in the backseat with him, versus a still relatively floppy infant who couldn’t be restrained at all. The fact that the airport is less than 5 miles from our house with a speed limit of no more than 40 miles per hour also informs that decision.  So, part of “how will we get to/from the airport/train station?” also involves “how much risk am I willing to take?” While legally, children in our state can ride unrestrained in a “for hire” vehicle, each parent needs to decide what they are comfortable with given their unique circumstances. Given the option, if we are bringing a car seat, I prefer to install the seat in the cab/uber because safety is almost the most important!

    What car seat do I need?

    Everyone’s favorite question when it comes to young kids – what gear do I need? The age/weight of your child dictates what gear you need and, of course, as the kids get older, the more options you have!

    Infant Car Seat:

    There is no replacement for the infant “bucket” car seat. We have owned two Chicco Keyfit 30’s and have been happy with them. Although it is one of the heavier bucket seats on the market, it didn’t really bother me much as both my kids outgrew them in terms of comfort well before we started seriously traveling with them by plane. Moreover, I loved the ease of the keyfit stroller caddy, which made it possible for me to transport sleeping babes to and from just about anywhere, providing me with a few precious additional minutes of peace and quiet!

    three weeks old and napping by the ocean in St. John’s Island, South Carolina while mom and dad enjoy a relaxing lunch

    The Convertible Car seat:

    The convertible car seat is the most difficult car seat to travel with, in large part because it’s so heavy and cumbersome and, during the age your child is in the convertible, there’s very little by way of “other” options. For both kids, we used the Britax Marathon and simply took them with us everywhere. We would install them using the LATCH mechanism on taxis/cabs, set them up in the airplane seat (if needed), and then install at our destination.

    rear-facing install on an airplane, prior to second birthday

    Although there are accessories you can purchase that are designed to alleviate the burden of hand carrying the car seat, we never used them. My husband simply tightened the car seat straps and carried them over his shoulder. If needed, he would double bag it in a black trash bag before checking it, but for the most part, we simply gate checked it and had no problems retrieving it on the other end of our trip. Both my sons loved the familiarity of having their same car seat on our trips and we never worried about the quality or condition of a rental company car seat.

    The Harness Booster:

    At some point, your child may outgrow the convertible car seat and you may decide that you’re not quite ready for your child to ride in a backless booster. I fell squarely in this camp and purchased a Graco Nautilus which is what my older son has been riding in for the past four years (since he was 4 years old)! The nice thing about these car seats is that they grow with the child. You can keep them in a five point restraint, then adjust to a high back booster + lap belt, before adjusting to a backless booster + lap belt. Unfortunately, the high back booster set up of this car seat is the opposite of built for travel as the back is not attached to the base (they simply click together), so there’s no way of carrying this car seat without it coming apart. I believe we took one trip with this car seat and quickly swore never again – it was large and cumbersome and extremely difficult to keep together. This was also definitely a car seat we had to check at the curb – there was no way we could have carried it with us to the gate without completely losing our minds.

    The Ride Safer Travel Vest:

    photo credit

    The “travel vest” was purchased immediately prior to a trip to NYC where we would be traveling by train – AMTRAK and Subway. I didn’t want to lug around a car seat with us, yet didn’t quite feel comfortable letting my 4 year old ride around in a taxi or friend’s car without some kind of restraint. A friend suggested the travel vest and it turned out to be a lifesaver! The seat comes in a little bag that is easy to carry and is extremely light and not-bulky. It can be tossed into a large carry on, or, you can even have your child wear it as a backpack.

    the ridesafer vest can easily be worn as a backpack

    Although it takes a few minutes to line the car seat belts into the appropriate buckles, we used this car seat on numerous trips where we didn’t plan to travel extensively in a vehicle, but wanted a safe option for car travel on the occasion we were in a vehicle. As an extra bonus, this car seat ended up being an easy solution for carpool and fitting three children across the backseat of my car, on the occasion when I needed to take a classmate of my older son somewhere, but my toddler’s convertible car seat prohibited me from squeezing in an extra backless booster.

    Note that this car seat comes in two different sizes and because it did end up being so useful for carpool, we purchased the bigger size to accommodate our son and his friends for carpool purposes in first and second grade – before they were old enough that I felt safe – both personally and legally – to allow them to ride without a car seat.

    Backless Boosters, the mifold, and the Bumble Bum:

    Although car seat safety guidelines vary by state, in our state, children who are 4 AND 40 pounds can legally ride in a backless booster. There was much rejoicing on our first trip with a backless booster because it not only meant we didn’t have to carry around a giant car seat, but also because it meant our son likely could carry his own booster! We have a basic Graco booster seat  that we reserve for travel and carpool purchases. It is cheap, relatively small, and does what it’s intended to do – lift up my kid so that the seat belt is properly positioned on his body.
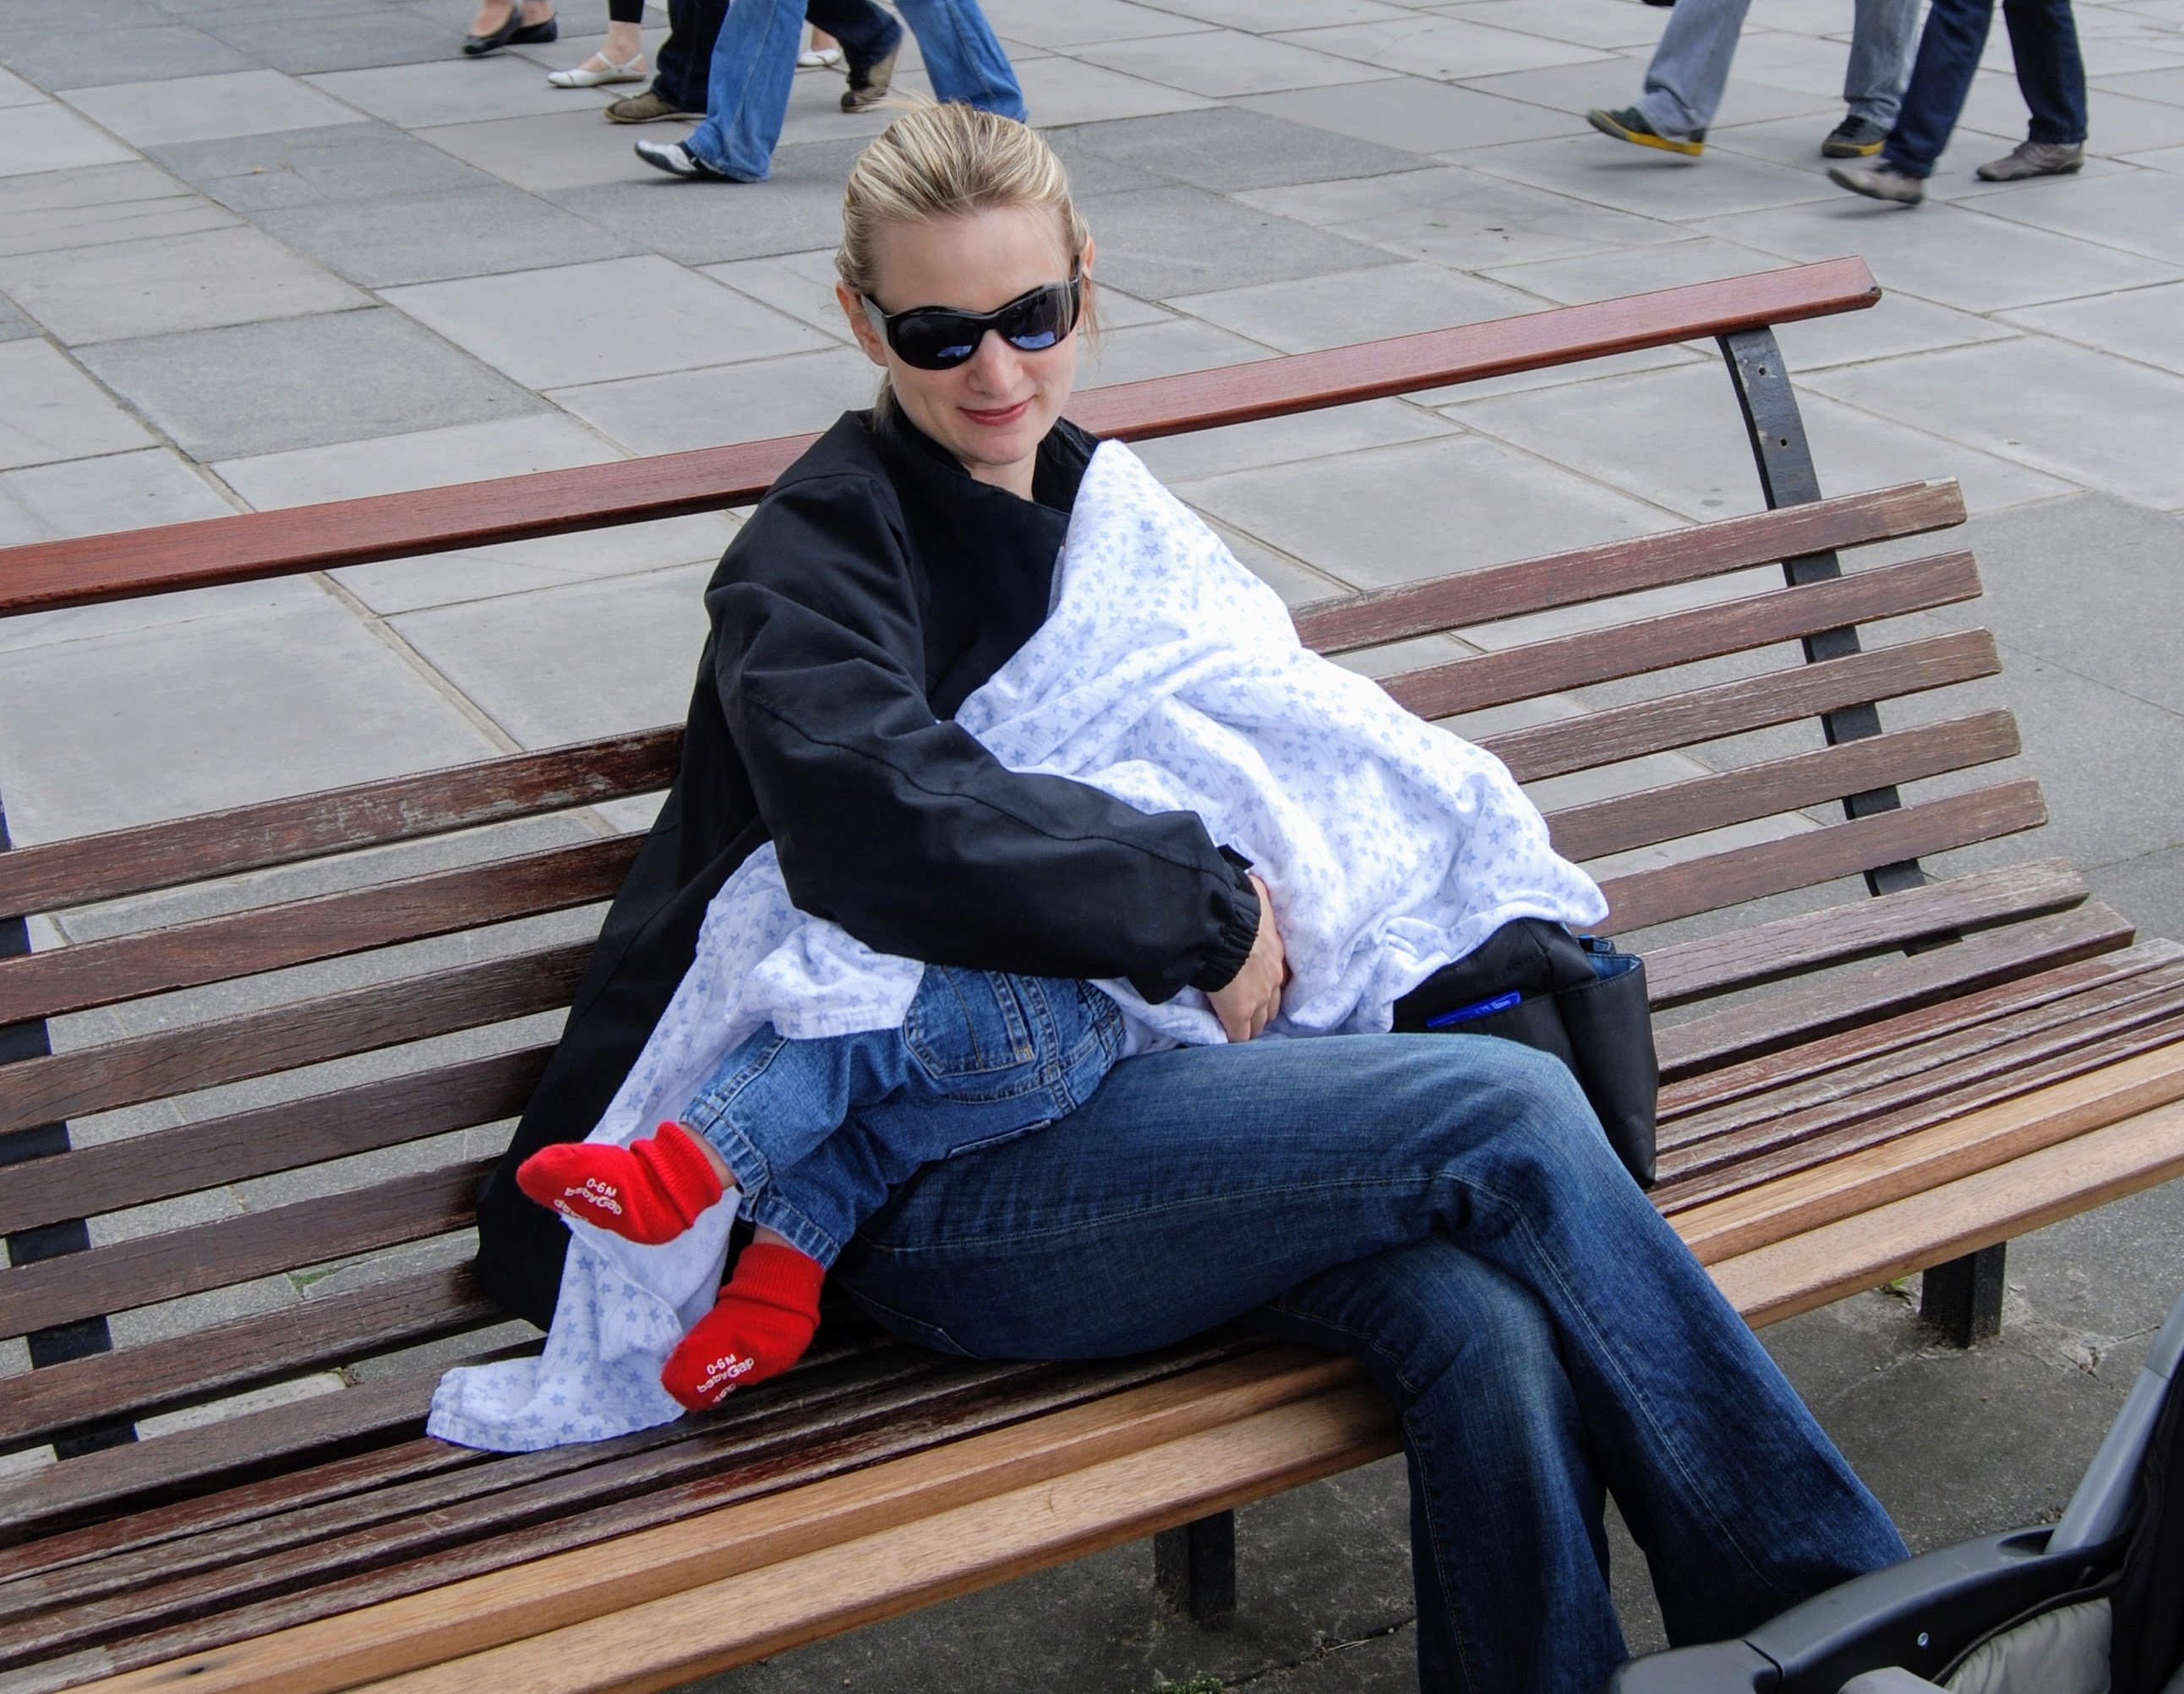
    photo credit

    In addition to the regular booster, we also have a mifold, which does the opposite of the regular booster seat – it brings the seat belt down to the child so that it is properly positioned on their body. Although we have not traveled – yet – with the mifold, I have loved the flexibility it has provided us in terms of fitting a third child between two existing LATCH car seats. And, it’s an easy thing to have tucked away in the trunk in case the need arises.

    photo credit

    Another option to consider in the category of backless boosters is the BubbleBum:

    photo credit

    Although my family has not used the bubblebum, I know Catherine’s did on a recent trip to Iceland and aside from having to reinflate it a few times a day, it worked perfectly and was a good, lightweight option for her older two children.  Another family who recommends the BubbleBum used it for their six year old during their family gap year.

    The IMMI GO:

    A car seat that I have yet to try is the IMMI GO.

    photo credit

    I heard about the IMMI GO a few years ago when UBER FAMILY came out, but never had occasion to try it. A friend of mine, however, mentioned that it was actually available for purchase and so we purchased one just prior to our last vacation. Unfortunately, because it arrived just the day before our scheduled departure, I didn’t feel comfortable using it without getting a chance to try it out. My son was just barely within the weight range for it and so, I decided to save it for our next trip. Although I haven’t had a chance to test it out yet, I can safely say, I find its small size to be impressive and look forward to using it on our next trip!

    Per the website, the IMMI GO is:

    Designed and tested for children:

    Height: 31” – 52”

    Weight:  22 – 55lbs.

    Airline Seat Restraints:

    Children don’t legally need a special seat restraint when flying, but as a parent, I know I agonized about whether it was safe for my young children to fly without a restraint. For that reason, prior to age two, we frequently carried on our son’s convertible car seat and strapped it into his airline seat. However, that quickly became undesirable because it took up a lot of space width wise and also because when upset, my son would kick the back of the seat in front of him and there was nothing we could do about it given the extra “lift” the seat gave him. As a result, we ended up purchasing a CARES harness for flights.

    CARES Harness:

    The CARES harness is designed for airline travel. It slides over the top of the child’s seat and provides an extra restraint across your child’s chest. The airplane seat belt is slipped into loops on the harness, which goes across your child’s lap. Although not essential, I did find this extra restraint to be comforting to have on turbulent flights.

    strapped into his CARES harness and ready to go!
  • Travel Tips: Flying With Kids

    Travel Tips: Flying With Kids

    When traveling with children, it is important to arrive at the airport early because getting to your plane will take longer than it would if you were traveling without children.  For families traveling with lap children under age two, make sure to go to the check-in desk upon arrival to inquire whether the flight is full.  There is no fee to make this request, but also no guarantee that the seat will stay open.  Nonetheless, many times, we were moved to a row where we could take advantage of an empty seat, and gate attendants often blocked a seat in the system or even assigned it to us so no one would take it when there were sufficient extra seats on a flight.  After I knew what to expect, flying with kids was so much easier.

    Car Seats for Kids

    There are few instances where it makes sense to bring a car seat on board. You have to weigh the difficulty of getting the car seat to the gate against the potential benefit of having the car seat onboard.  If you are guaranteed or likely to receive a vacant seat for your infant, and their infant seat locks into your stroller, it might be worthwhile.  The car seat will have to be installed at window seat because there is no access around it.  Many children sleep better in a car seat than in their parents’ lap.  We have done this a few times because it always “seems like” a good idea, but basically, my babies usually prefer sitting with Mom or Dad, and it is a struggle to get the seat to the plane and then also to figure out a way to fit the seat into the overhead compartment to take advantage of the empty seat.

    A car seat might be useful for a child under two and a half who is in a paid seat. If you have purchased a seat for your infant or toddler, you are likely going to want to take advantage of it, but a child under two and a half may have trouble sitting in their own seat with a belt during takeoff and landing.  We have not traveled with a child between ages two and two and a half, but flight attendants have double and triple checked on my petite children when flying in a required paid seat under aged three.

    Strollers for Kids

    We rarely check strollers during the check-in process because we find the stroller extremely useful in getting to the gate. It can be a long walk, and a stroller can also serve as a partial luggage cart to store a few backpacks and jackets underneath. I often tuck my baby carrier in a convenient spot and pull it out if our baby gets fussy or we determine it is more effective to use the stroller as a full-fledged luggage cart after relinquishing ours before security.

    TSA PreCheck for Kids

    We do not have TSA PreCheck but understand it is a great perk.  Going through security with kids can be a bit of adventure. Luckily, most airports shepherd us to the family/express line.  In addition to the usual TSA rules, strollers need to be collapsed and run through the x-ray machine.  It’s helpful to put your shoes in the first bin, and take the baby out of the stroller only after you have placed all other items on the belt and taken your shoes off, if necessary.  If you have a non-walker with you, an adult can carry the child through the metal detector, but the child generally has to be removed from a carrier or sling.  Walking toddlers are encouraged to walk through on their own, but I have been told many times that it is also fine to carry one of mine through.

    My husband and I often have a brief strategy session where we identify who is responsible for which items and even assign specific items to our boys to collect. After your items come through the x-ray, open the stroller and put your baby in first before gathering the rest of your items.

    Play Areas for Kids

    Play areas are becoming more popular in airports. Our favorite was in Doha, Qatar, which had a massive indoor playground and also smaller satellite playgrounds on different concourses.  My 20-month old daughter who had learned to walk at the end of the previous summer was finally steady enough to climb up a slide on her own.  So, she had her first independent playground/slide experience in Doha’s airport.

    Pittsburgh International Airport also has a play area sponsored by the city’s amazing Children’s Museum of Pittsburgh. Our kids had a blast in this interactive area.  I chuckled when I noticed that it was clear that a parent had actually not designed the space that had several full and half walls obscuring the view from the stadium seating created for parents.

    Play Area at Pittsburgh International Airport

    Boston’s Logan International Airport also has Kidport play area that is wonderful for kids and rocking chairs overlooking the planes.

    Kidport at Boston’s Logan International Airport
    Rocking chairs with a view of airplanes

    If you are traveling with a stroller, make sure to check in with the gate attendant and get a tag for gate-checking. Unless directed otherwise, you bring your stroller down the jet way and leave it as you enter the plane.  You may need to wait on the jet way after deplaning for the stroller to arrive.

    In the Airplane With Kids

    We found that traveling with babies was easier than toddlers.  Our babies really liked to be held and cuddle and could get comfortable in our laps.  When traveling with a baby, make sure to nurse or feed the baby a bottle during take off and landing to help prevent ear pressure.

    When flying during a time where it is optimal that your kids to sleep, do everything possible to make sure that they do sleep during the flight. This may require adjusting their bedtimes in the days before you travel.  Once the plane is cruising, you can raise the arm rests and have your child use your legs as a pillow and rub their backs until they fall asleep.  They generally should be able to remain belted while they rest.  We were really lucky when traveling from Boston to Doha because the plane had so many empty seats that my husband and two boys were each able to take a row of three seats for themselves and stretch out overnight while my toddler daughter and I shared the fourth row.

    If sleeping is not an option, I let each of my kids pick a few books and small activities to bring with them. I was really concerned about the 30 hours of transit time between Cleveland and Bangalore, but the in-flight entertainment on Qatar Airlines was so amazing that I generally found that I had over packed “activities” for the flight.  One book, a few Suduko puzzles, a small journal and a deck of cards is usually plenty, especially if you have in-flight entertainment or some shows downloaded on an iPad and necessary earphones.  Other family favorite travel games include picking a category (e.g. food or location) and going through the alphabet in order taking turns naming an item in the category that starts with your letter, e.g. Apple, Banana, Cucumber….

    If you are prepared for your airplane trip with kids, the experience will be smoother for everyone.

    Traveling with kids?  Check out our other Travel Tips, including Preparing to Fly.