Blog

  • Top Washington DC Kids Activities

    Top Washington DC Kids Activities

    Living and working in DC, it is rare that my family takes the time to visit the museums, monuments, and landmarks. Work, schedules, and activities get in the way and we always just figure that we will go and visit someday. Recently, my eight year old and I had the opportunity to spend the entire day together, without my toddler, and we decided to take advantage of the glorious 50 degree day in the middle of December and spend some time exploring downtown! Here are the top Washington DC kids activities that we took advantage of on our stolen day together!

    We left our home at 9:30am and, a short metro ride later, found ourselves in DC, just four blocks away from the Spy Museum.

    Unlike many museums in DC, the Spy Museum is not free and admission is steep at $21.95 / adult and $14.95 / youth (ages 7-11). The Museum offers a number of Interactive Spy Experiences, such as Spy in the City and Operation Spy, which you can add on a la carte, or combine with the price of admission for a slight discount. The Operation Spy experience is limited to ages 12+, so, by default, we chose to add Spy in the City to the price of admission for later in the afternoon.

    After purchasing our admission tickets, we were told to wait for the elevator ride to the start of the museum exhibits. We had no idea, but the Spy Museum has timed entry in an effort to minimize traffic and manage crowd control. We took the elevator up to the third floor of the museum where we were deposited into a room that introduced us to spy agencies all across the world. We were also encouraged to choose an undercover identity from one of the many “covers” posted on the beams throughout the room.

    After selecting our identities, we were allowed to enter the galleries, which were more standard museum fare. We poured over the exhibits of espionage artifacts. I personally loved seeing the old style hidden cameras tucked away in buttons, shoes, pens, and more.

    As you wind your way through the exhibits, there are a number of interactive opportunities for visitors to test out their spy skills. My son loved looking for clues on the interactive light-up maps and he also enjoyed practicing his hand at deciphering codes.

    Although we enjoyed the modern spy section, my son found the historical spy section to be underwhelming. There is a section on the origins of spying, beginning with Sun Tzu and The Art of War, and also an extensive section on James Bond, which went entirely over my eight year old’s head.

    Overall, I enjoyed the Museum and it was a great way to spend 90 minutes of our day, but my son did not enjoy it as much as I hoped as he isn’t one to be particularly fascinated by espionage and has not ever seen any of the James Bond movies. As we made our way out of the exhibits, we emptied into the gift shop, which is where we picked up our tablet device to do our Spy in the City interactive adventure.

    The Spy in the City interactive adventure is a guided “spy” adventure that takes you around 7-8 blocks of Washington, DC. The rental tablet provides visual instructions and cues that direct you along the way.

    The weather was beautiful that day, so we greatly enjoyed the walk through the City. My son, a total iPad/screen junkie, loved following the clues and deciphering code along the way. I enjoyed the opportunity to stretch my legs and to see some of downtown DC at a leisurely pace.

    Our journey took us past the FBI building, the Department of Justice building, the Trump Hotel (where we peeked inside to see the lobby decked out for Christmas), and much much more.

    The FBI Building
    Department of Justice
    The Trump Hotel
    The lobby of the Trump Hotel
    St. Patrick’s Church

    Although it was a fun walk and my son enjoyed the “mission,” I was honestly disappointed that the “mission” did not incorporate more of the historical landmarks in DC. Given that we were in DC and walking right past the FBI building, I expected more than to be directed to a random plaque in a plaza as the site of the next clue. The mission could have taken place in any city USA and no one would have been the wiser. Although it was worth the $7 to include the Spy in the City adventure with our admission ticket, I don’t think it is worth the $14.95 on its own and I would not go out of my way to do this experience if time was limited. Moreover, my son and I happily shared one tablet and unless you happen to have two children who are adamantly against sharing, I would not recommend renting more than one device as the instructions would be identical and we had no trouble hearing the instructions via the tablet’s speakers.

    Finally, the Spy Museum has an excellent gift shop so if you happen to be looking for a spy-themed gift but don’t have the time or desire to visit the exhibits, you can visit the gift shop via the separate outside entry.

    Direct entrance to the gift shop.
    Sign indicating that admission is required to enter the exhibits from the gift shop.

    It would also be remiss of me not to mention that the Shake Shack is located right next door to the Spy Museum. It’s an easy and convenient place to grab a bite to eat but note that it’s more expensive than your usual burgers and fries joint AND lines can get out of control very quickly.After the Spy Museum, we headed across the street to the National Portrait Gallery. As a Smithsonian, admission is free and it was completely deserted when we visited. There was no line to enter and security was a breeze. We had the entire presidential gallery to ourselves and my son loved the open space.

    We particularly enjoyed seeing the evolution from traditional oil paintings to more modern portraits and I loved the placement of the Bush presidents across from each other with Clinton in the middle.

    Although we did not visit the actual galleries on the third floor, we did head up there to peek at the stained glass ceiling which was stunning.

    Finally, no visit to the Portrait Gallery is complete without a glimpse at the atrium – the largest public enclosed area in DC.

    As the original home of the Patent Office, the building has served many purposes and the former courtyard has now been enclosed into a beautiful garden with ample space for kids to run around, people to lunch, and just generally enjoy a reprieve from the elements (humidity and heat in the summer, rain/cold/sleet in the winter).

    My coworkers and I used to regularly take lunch breaks in the Portrait Gallery, including packing in our lunch from the outside to eat in the atrium. There’s also a little self-service cafeteria, if you’d like to grab a bite to enjoy.

    From the Portrait Gallery, we headed off to our final destination of the day: the Botanical Gardens. Unlike most of the museums located near the mall, the Botanical Gardens are located across from the Capital and thus about a one mile walk away. For this reason, it’s a bit off the beaten path and not a place that many have visited. Along the way, we enjoyed the view of the Capital with the bright blue sky and also spotted the great blue chicken that has been roosting at the National Gallery of Art.

    The 15-foot blue chicken, roosting at the National Gallery of Art.

    Visiting the Botanical Gardens is an annual holiday tradition for my family. My kids started visiting the Botanical Gardens as young tikes with daycare and between Thanksgiving and New Year’s, there is an annual exhibit featuring model trains and replicas of DC landmarks made entirely of plant based materials. We have visited when the line to enter has been wrapped around the building, but on the day we visited this year, there was no line and we walked right in.

    He may be 8, but he still enjoys a good tunnel.

    After winding our way through the seasonal exhibit, we took a quick tour of the regular gardens, including the desert and rain forest.

    Well marked ramps, wheelchair and stroller accessible!

    After our brief walk through the gardens and having walked extensively downtown, we decided we were too tired to ride public transit home and called a Lyft instead. All in all, it was an action packed day in downtown DC and I am so glad we had this opportunity to explore the city in ideal temperatures. There is so much to do in DC it can be overwhelming to decide on the actual museums and activities. We had no real set itinerary or plan and just let the weather and crowds dictate our agenda and we managed to pack in more than I thought – a pleasant surprise! Moreover, because admission to the Smithsonian museums and the zoo is free, it is a very affordable way to spend a day with the family.

    Pin it to Pinterest!

  • Spotlight: Crooked Hammock Brewery (Lewes, DE) With Kids

    Spotlight: Crooked Hammock Brewery (Lewes, DE) With Kids

    Having visited many breweries and wineries with kids, I’ve generally found that most locations are relatively kid-friendly. Crooked Hammock Brewery in Lewes, Delaware really knocks the kid-friendly aspect out of the park, however, with their outdoor patio and play space for children!

    I visited Crooked Hammock in May with my then 2.5 year old and found the location to be ideal for families with young kids. There is abundant outdoor seating on the patio, plenty of games and activities for kids of all ages, and as an extra bonus, it is dog friendly too!

    As you can see from the photos above, the Crooked Hammock is really an ideal location to spend a few hours with kids. My son loved everything about it – from the outdoor space, the play structure and climbing wall, the hammock, the corn hole… he even made friends with some other kids who were there and was sad to leave when it was time to go!

    If you find yourself in Rehoboth / Dewey Beach, Delaware, be sure to stop in! It truly is a gem for those traveling with kids and should not be missed.

    Crooked Hammock Brewery can be found at: 36707 Crooked Hammock Way, Lewes, DE 19958

    Every so often, we encounter a place that is so fabulous for those traveling with kids that it is worthy of being featured on its own. For more fabulous locations, please check out our other Spotlight features!

    Pin it to Pinterest!

  • Things to Do in York, England

    Things to Do in York, England

    York is an unparalleled medieval city and one of the few places from all of my travels that I have called home.  I studied medieval history and sociology at the University of York as an exchange student during my junior year of college.  It was during that time many moons ago that my wanderlust began.  I explored literally every nook and cranny of the city – visited every museum, bought produce at the Shambles Market, watched Hamlet in the Yorkshire Museum’s theater, peeked inside York Minster several times each week and tried out dozens of pubs.  I met life-long friends while playing cards in the common room of my residence hall and also used York as my home base while traveling around the UK on weekends and to eight other European countries during my six-week Spring break.

    York is an easy two-hour train journey on England’s Northern line from Kings’ Cross station, and I have been back four times since my semester abroad.  When we planned our last trip to London in 2015, I was ecstatic that we would be able to fit in two days and one night in York.  We booked tickets a few weeks in advance online through Grand Central Railway.  Our kids (aged 11 months, 5 and 7) thoroughly enjoyed the lovely train journey, and we fit all of our things for the quick trip into two backpacks that we tucked in our daughter’s stroller.

    Traveling by train with a table is one of the most comfortable ways to go
    Baby and luggage on board

    When orienting yourself in York, it is important to remember that streets are called gates, gates are called bars, and bars are called pubs.   Most streets end in “gate” like Fishergate, Castlegate, Fossgate and Petergate.  The four main entries into the city are called Bootham Bar, Monk Bar, Walmgate Bar and Mickelgate Bar.  And, as is common throughout the UK, the corner establishments that sell beer by the pint are called pubs.

    We stayed at the Novotel York Centre, a modern hotel just outside the city walls between the city center and the University of York.  The only downside to our trip was that it was unseasonably hot.  The Novotel was not air conditioned but luckily did offer us a fan.

    I particularly enjoyed taking the kids to visit the University of York, the guesthouse where I lived and my favorite pub, the Rose & Crown.  We stopped by on the evening we were there and found that kids were not permitted after 8 p.m.  We returned the next afternoon when the pub was practically empty and were directed to a back room.  My husband and I enjoyed some beer, but it was clear that our kids were not really welcome.  Those stops would probably not be trip highlights for families with no connection to the University.

    The architecture of the University of York, which was established in 1963, starkly contrasts that of the medieval city
    My boys playing in my old back garden
    My favorite pub from my university days

    The city offers so many great things for any family, but these are our favorite things to do in York, England.

    #1:  Relax in Museum Gardens With Kids

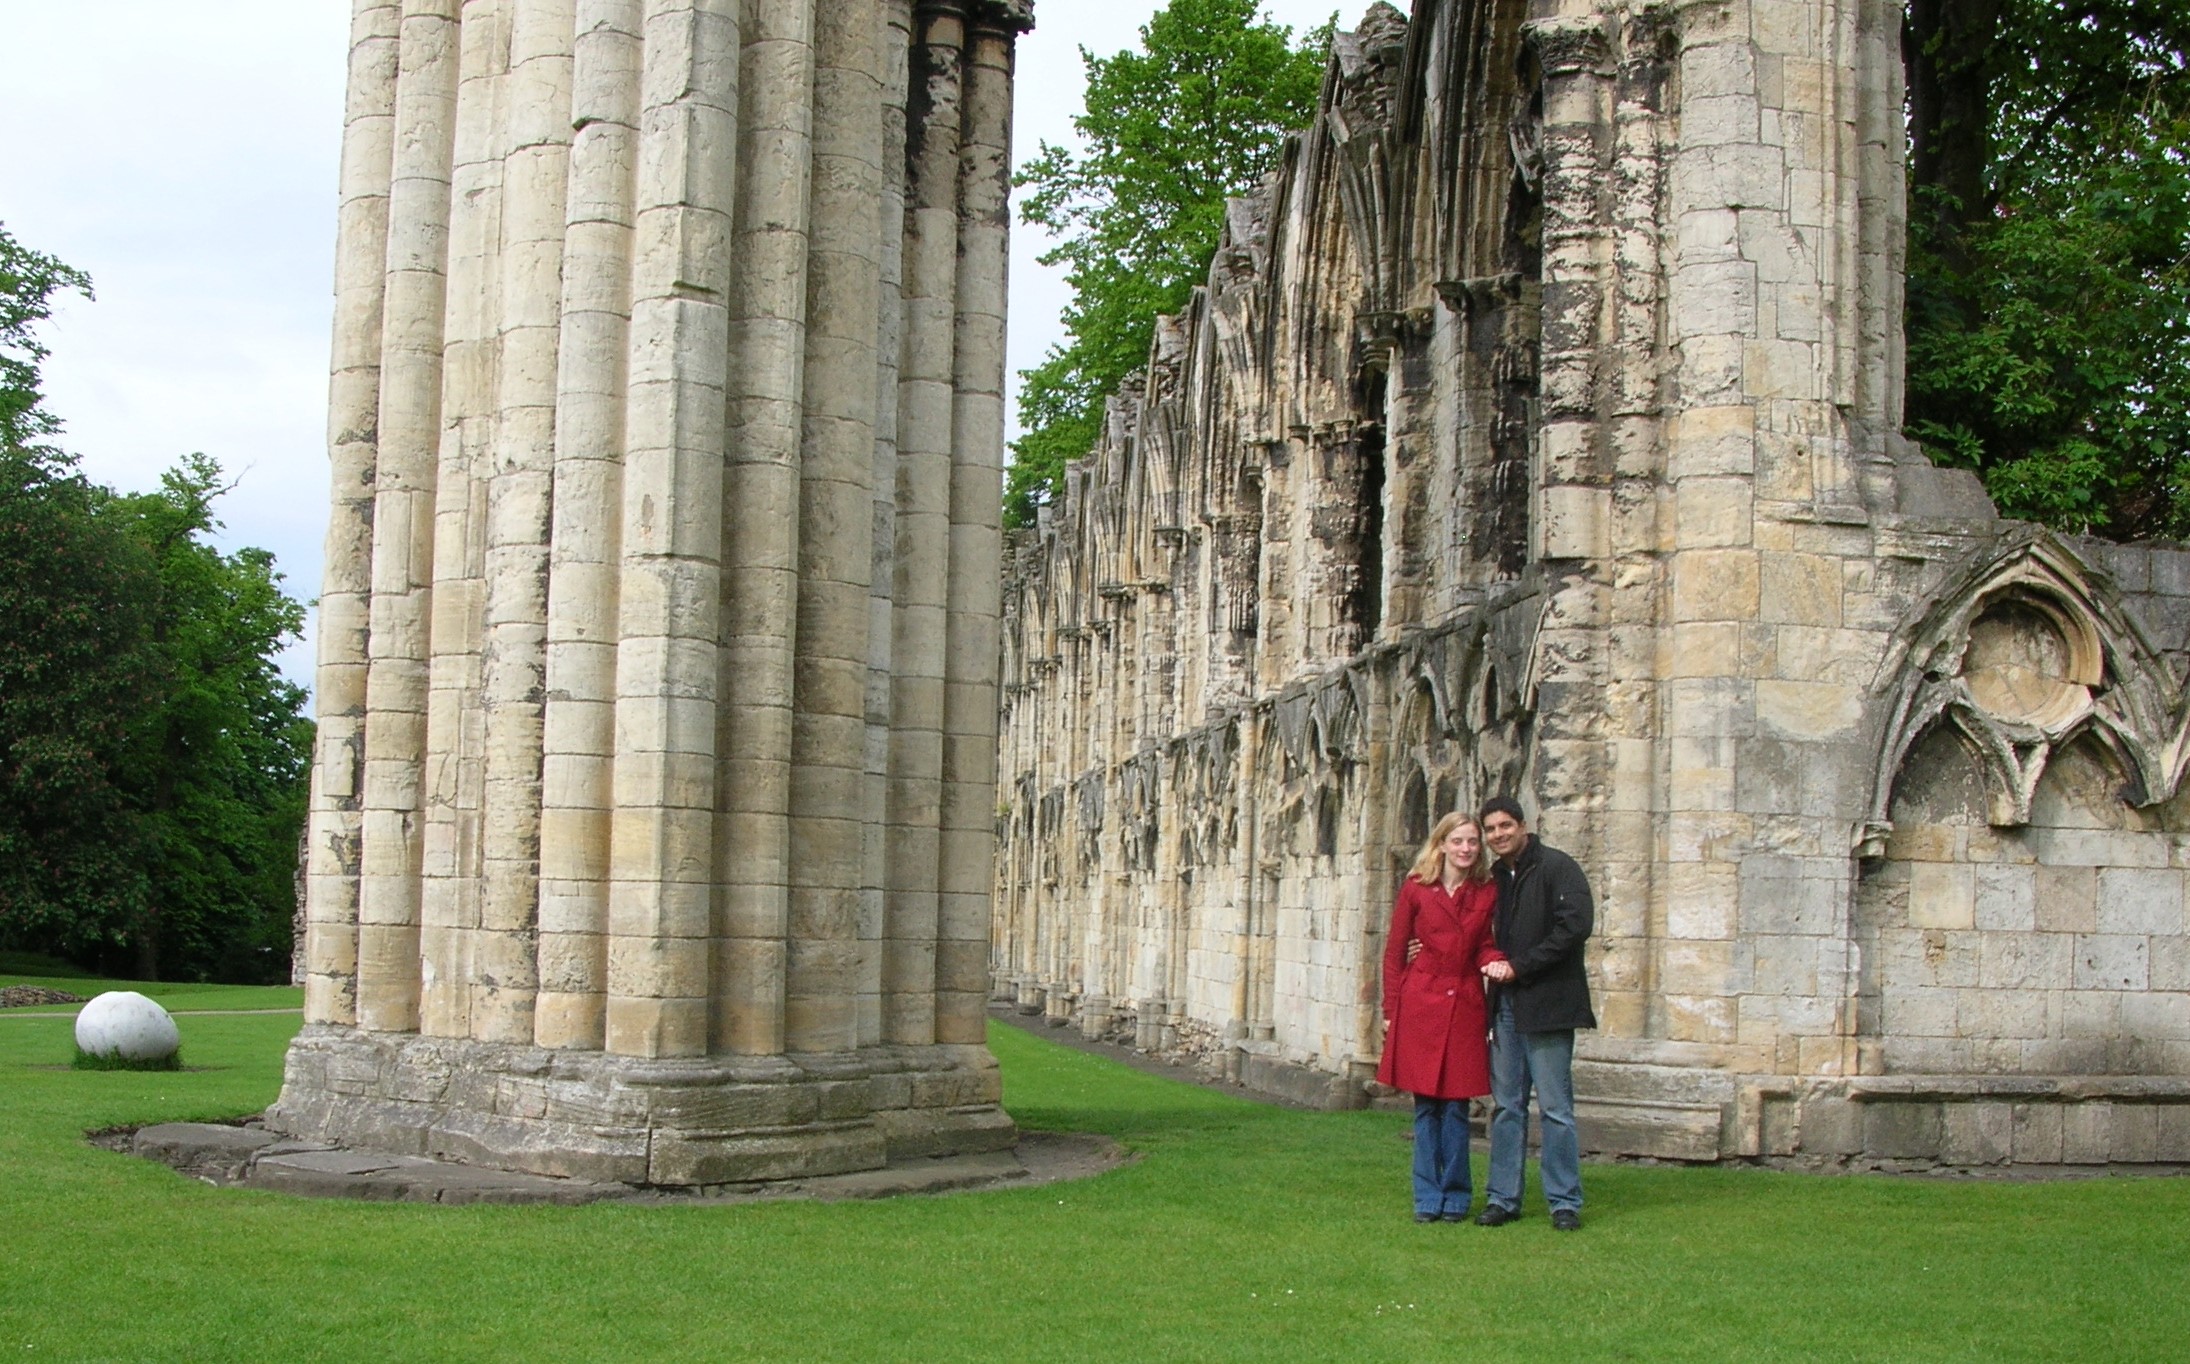
    Museum Gardens is a very special place – this is where my husband literally got down on one knee and asked me to marry him while surreptitiously filming with my digital camera years ago. These Gardens are known for the medieval ruins of St. Mary’s Abbey as much as they are known for the luscious green space.  When I was a university student, I walked through the gardens practically every time I went into York’s city center.  I was always in awe of the Abbey ruins, especially when they were illuminated at night.

    On our first trip to York with our children, the Museum Gardens were definitely at the top of our list.  Even though it was a quick overnight trip, we spent at least an hour relaxing in the Gardens each day.  We showed them right where their Dad proposed to me, but the exact spot was unfortunately under construction at the time.  And, the peacocks that used to roam in the Gardens have been removed since my last visit.

    It’s an amazing place to sit and think

    While climbing on medieval ruins is pretty cool, the highlight of our time in Museum Gardens was definitely the Birds of Prey Show.  Admittedly, the Birds of Prey Show more than made up for the missing peacocks.  A falconer brought six birds of prey to showcase during the free seasonal show that we happened to catch.  And, our five-year old son was chosen to hold a white barn owl, which is something he will never forget.

    The Gardens also contain the remains of the west corner of the Roman fort of Eboracum, including the Multangular Tower and parts of the Roman walls.

    The Multangular Tower with Roman stones on the lower portion

    The Yorkshire Museum is also located on the grounds and features archeology, geology, paleontology and natural history collections.

    • York Museum Gardens Facts for Kids:  If the medieval abbey ruins are not ancient enough, Museum Gardens also include the remains of a portion of a Roman fort, including the Multangular Tower and a portion of Roman wall.
    • Kid Moment:  The owl show seems to be a free seasonal attraction and was an absolute highlight of our trip to York.  Distinguishing the small Roman stones from the larger medieval ones on the Multangular Tower and adjoining wall is also a great activity.

    #2:  Evensong at York Minster With Kids

    York Minster is the largest cathedral in Northern England.  I’ve been to dozens of cathedrals, but York Minster is my hands-down favorite.  I can’t tell you how many times I’ve walked through its doors, and every time, I feel an overwhelming sense of awe at its enormity and beauty.

    The Minster’s West Window – the Heart of York
    York Minster has a way of making me feel quite small

    Because our trip was so short, and we had a baby with us, we did not take the guided tour.  Also, children must be at least eight to climb the narrow staircase to the top of the tower, so we had to save that for another trip.  We chose instead to visit during Evensong with Songmen and Choral Scholars.

    • York Minster Facts for Kids: Construction began on the Minster in the thirteenth century after at least three churches previously at this site had been destroyed.  Its classic Gothic architecture was modeled after Canterbury Cathedral (the archbishop of York is second in England only to the archbishop of Canterbury).  Its stained-glass windows are some of the best remaining examples from medieval times.  There was a disastrous fire in 1984 that badly damaged the south transept.
    • Kid Moment:  Make sure to request a free Explorer Backpack and the Blue Peter roof bosses in the south transept.  In 1986, the popular television show Blue Peter held the York Minster Contest and asked children to submit boss designs for the Minster’s vaulted ceiling.  They are the only cathedral designs I have ever seen created by children.
    Roof bosses, including those designed by winners of the Blue Peter Contest

    Downton Abbey fans will notice that the York Minster makes several cameo appearances in the series, which is set in Yorkshire.

    #3:  Climb Clifford’s Tower With Kids

    Clifford’s Tower is a tower that sits on top of a small hill and is reminiscent of Monty Python movies.  It is the largest remaining portion of the castle originally built on this site by William the Conqueror.  There isn’t much to see inside the Tower, but it does offer the best view of York.  We arrived after it closed, but the kids enjoyed running up the hill to get a closer view.

    Clifford’s Tower


    We reached the top

    Below Clifford’s Tower is the York Castle Museum that allows visitors to step back into time and experience everyday life in earlier centuries.  While it is named in honor of the castle that used to sit on this site, it is housed in prison buildings constructed in the 18th century.

    The Castle Museum
    • Clifford’s Tower Facts for Kids:  Clifford’s Tower is the only remaining portion of York Castle.  In 1190, about 150 Jews died inside the previous timber tower that stood on this hill – most from mass suicide to avoid being murdered.  The current stone tower dates from the 13th century.
    • Kid Moment:  My kids particularly enjoy towers in general, but the added excitement of the hill and stairs made Clifford’s Tower especially fun.
    • Kid Caution:  Clifford’s Tower is definitely not stroller accessible.

    #4:  Walk on the York City Walls With Kids

    Since Roman times, cities were walled as a defense mechanism.  York’s city walls are more intact than any other city in England and recently ranked by CNN as the third best medieval walled city in the world.  There are some remains of the Roman brickwork, as well as Norman and medieval portions with modern renovations.

    Visitors can access the remaining portions of the city walls by climbing the stairs at each of the four Bars.  The entire circuit is 4.5 miles, and the best stretch is between Bootham Bar and Monk Bar.

    Walmgate Bar is the only city gate in England with a working barbican, a fortified outpost of gateway.  Unfortunately, the 12th century stone archway did not contemplate the size of modern vehicles, and there are regularly accidents.  This is how it looked in 2015, and how I generally remember it.  I think a truck tried to drive through days after it was re-opened when I lived there.

    Walmgate Bar, the city gate closest to the University of York
    • York City Walls Facts for Kids:  Very little of the Roman walls remain, but the current 13th-century walls were built right on top of the Roman ones.
    • Kid Moment:  We imagined what it would be like to be a castle guard scanning the horizon for enemy forces as we walked along the walls.
    • Kid Caution:  Like Clifford’s Tower, the city walls are definitely not stroller accessible.

    #5Stroll Down the Shambles With Kids

    The Shambles is a very old and narrow street with overhanging timber buildings lining each side.  The architecture is classic 15th century Tudor.  Its name comes from “shamel,” meaning either slaughterhouse or the stalls or benches used to display meat.  In 1862, there were 26 different butcher shops on this small, cobbled pedestrian street.  The first-floor shops that used to be occupied by butchers are now predominately used as souvenir shops and cafes.  There are so many charming and irresistible shops in York’s city center.  Many people believe that the Shambles was an inspiration for Harry Potter‘s Diagon Alley.  Find out more about the Shambles and its recent wizarding shops.

    We caught the Shambles at a quiet moment, but it is usually crowded with tourists
    • Shambles Facts for Kids:  One advantage of the cantilevered buildings is that it maximizes available space without obstructing the street.
    • Kid Moment:  With the narrow street and the overhanging buildings, it is fun to stand in the middle of the street and look up.

    York is a great destination for families to get a chance to experience a bit of medieval times (and not the dinner theater variety).  Our trip was so short that we didn’t have a chance to make a day trip from York, but we hope to next time for sure.  Planning a family trip to England?  Check out all our posts on England and London.

    Pin it to Pinterest!

  • Lauritzen Gardens With Kids, a Hidden Gem in Omaha, NE

    Lauritzen Gardens With Kids, a Hidden Gem in Omaha, NE

    Guest Blogger: Joshua and his family live in Nebraska and like to travel on the cheap and keep costs as low as possible. They’re saving up to buy a travel trailer so they can be even more mobile. Follow along on Instagram!

    Omaha, Nebraska is a city many people have been through but not many have been to. Situated on the Nebraska-Iowa border with I-80 running through, Omaha has seen its share of cross-country travelers heading anywhere but there. The city is home to the College World Series, the ever-growing Henry Doorly Zoo and Aquarium, world-class hospitals, and numerous colleges and universities. Restaurants are everywhere and serve everything. There are shopping malls abound.

    But what if you find yourself in town for the day with a little time to kill? We recently had to take our two-year-old to the wonderful Children’s Hospital and Medical Center for a specialist visit. Children’s is an amazing place that you hate to need but love to have. They saved our little girl’s life, and we will be forever grateful! We had to make the 4-5 hour drive from our home, so we spent the night and had some free time after the appointment. You guys know how hard it can be to spend the whole day in the car with a two-year-old, but we also  have an eight-month-old tagging along. Yep, we definitely needed to stay the night!

    Omaha has been around for a while and hasn’t stopped growing. Since it is bordered by the Missouri River on the east, all of the city’s growth is to the west. Downtown is where we are heading today. Heading east on I-80, you can see the big glass Desert Dome at the zoo off to the south. Let’s exit there, but we are going to head north into a neighborhood. We’ll save the zoo for another day when it’s a little warmer outside. Down through the neighborhood on Bancroft Street is our destination. Several people on the street have RVs parked in the driveways, so you can probably get down there with yours. It’s so well hidden that we lived in Omaha for several years before having kids and never knew it was there.

    Parking at Lauritzen Gardens

    Lauritzen Gardens is a hidden gem that makes a perfect afternoon stop. For starters, parking is free and actually near the entrance. There’s even space for buses, so folks with RVs should be fine. You can stop at the park on the grounds to have a picnic before heading in, or you can eat in the café next to a fireplace with a nice view of a seasonal indoor display. This winter, it’s a huge poinsettia tree and model train sets weaving in and out of a winter wonderland.

    close up of beautiful poinsettia tree

    Admission is only $10 for adults, $5 for ages 6-12, and free for kids under age 6. We’ve found that prices for everything seem to be going up these days, so we thought $20 was a pretty good deal to get our family in.

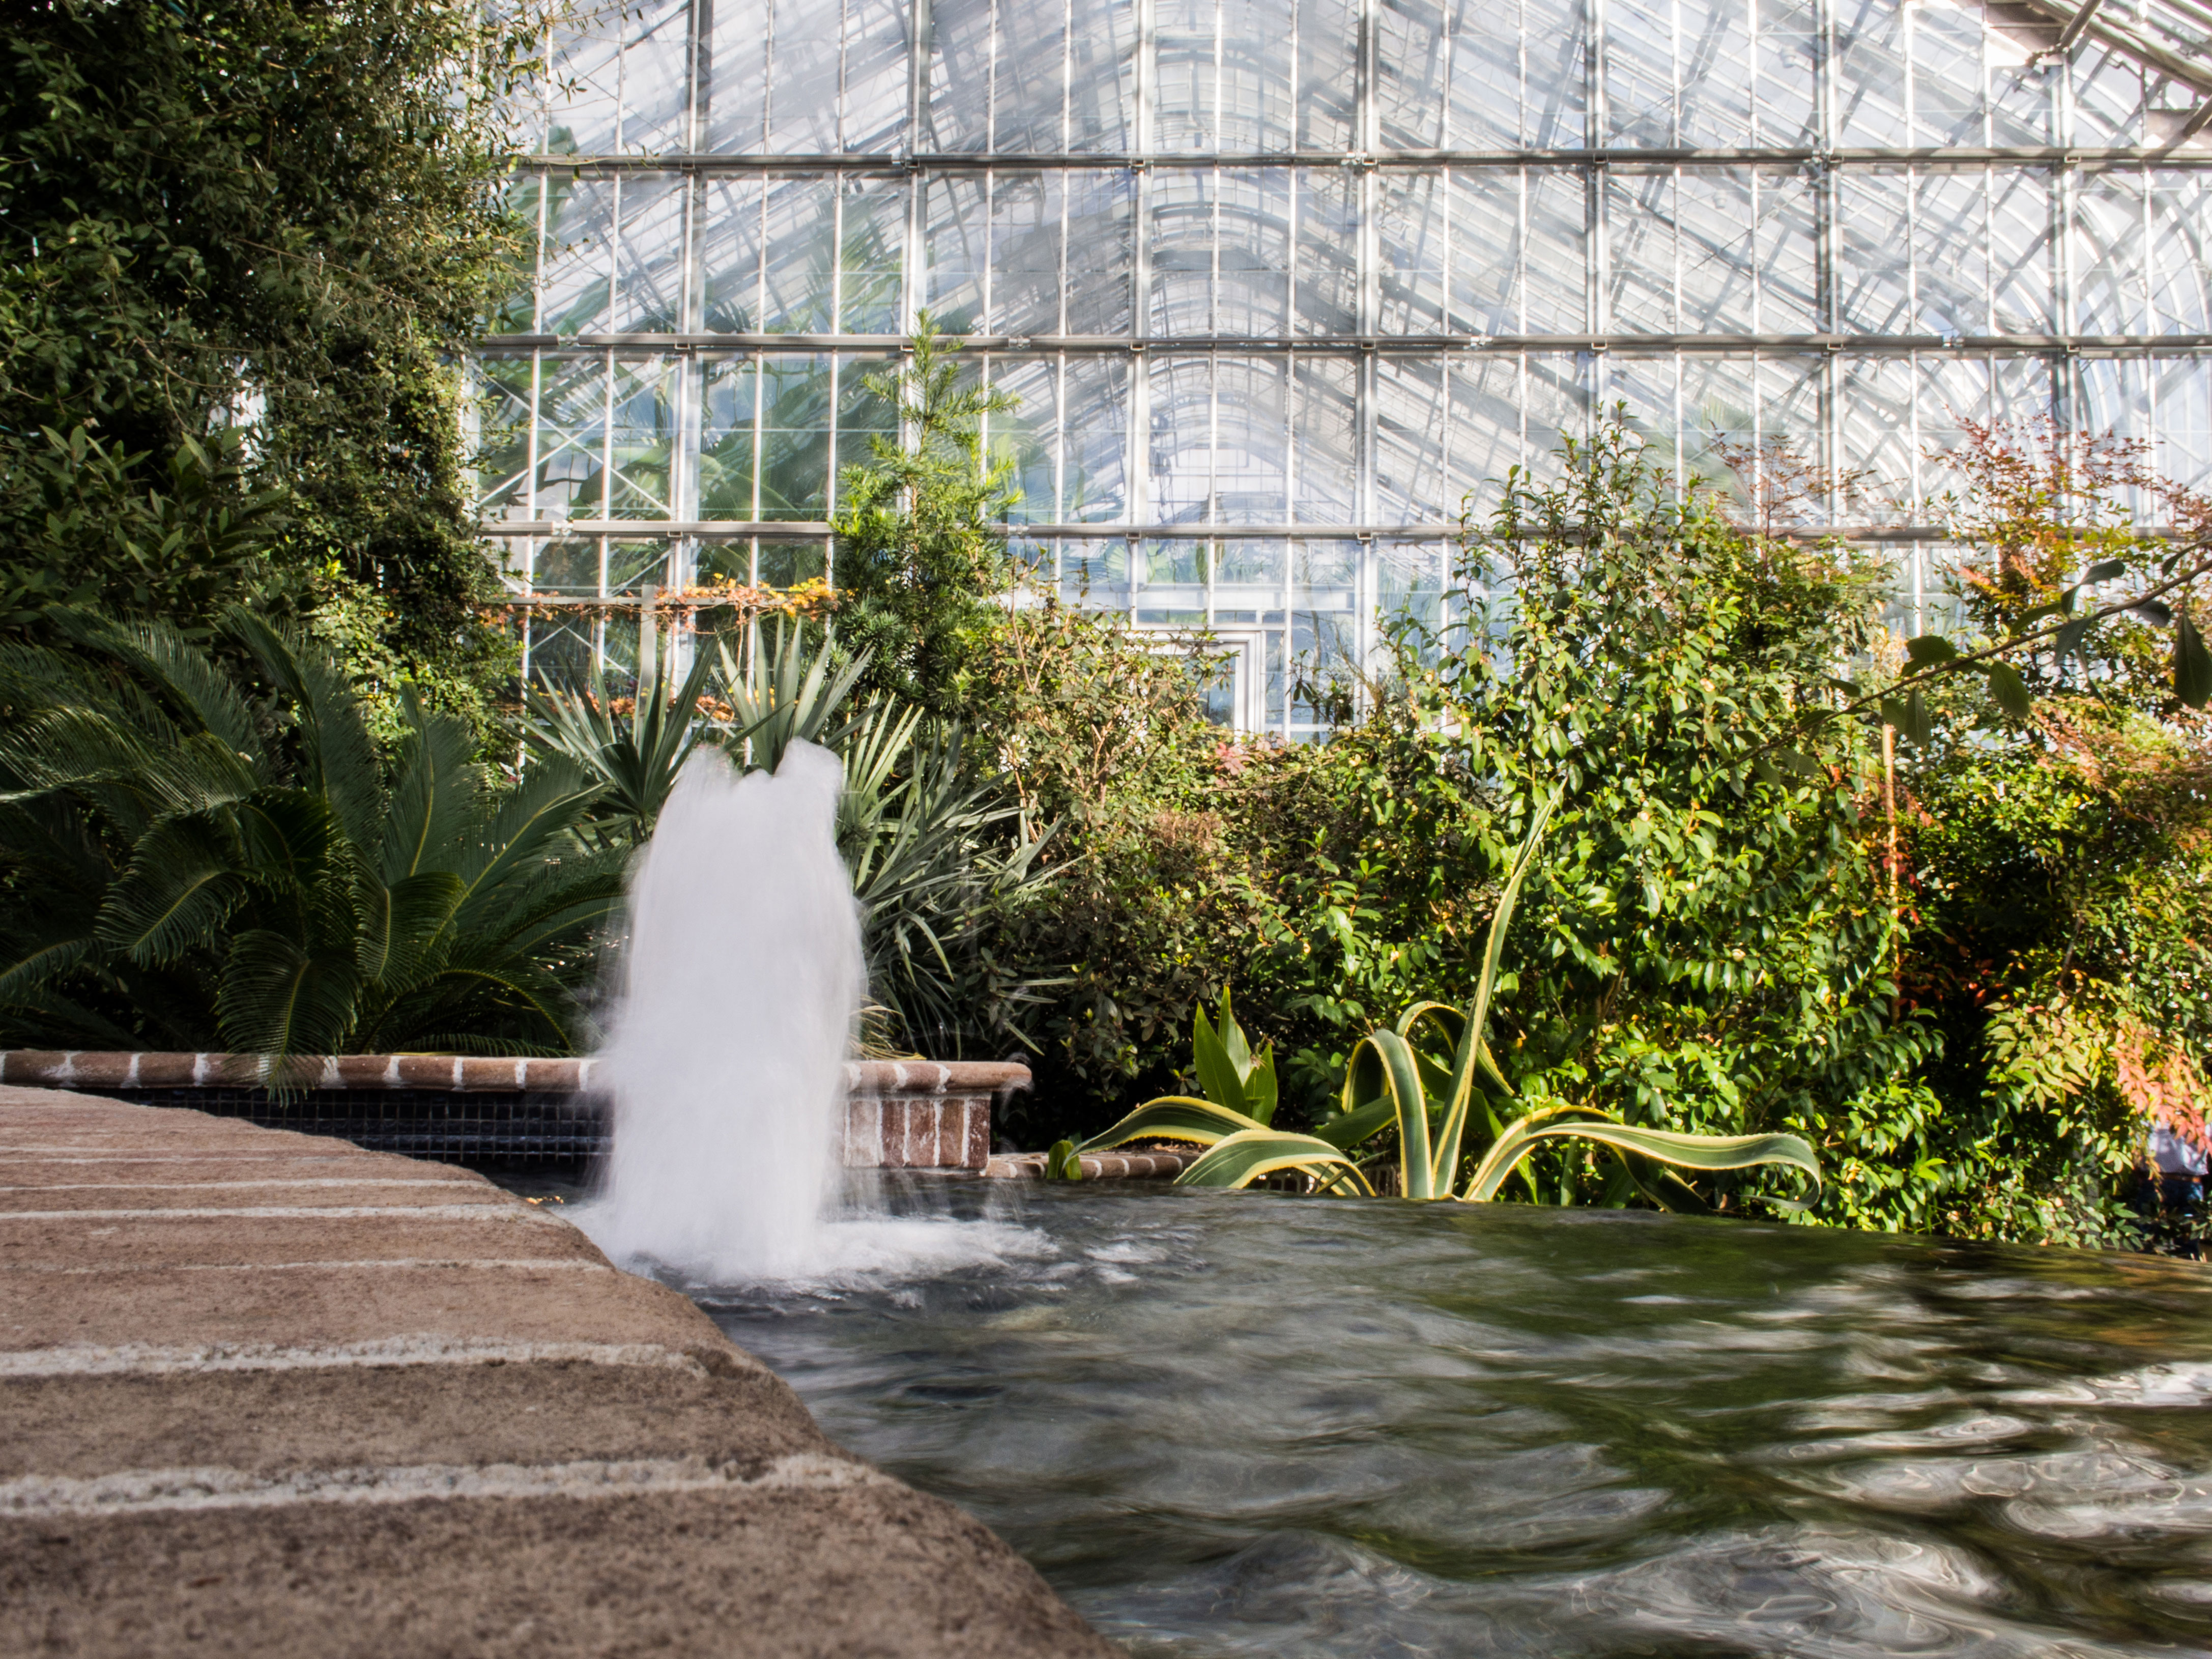
    One of the best things about Lauritzen is the enormous greenhouses. If you’re in Nebraska in December and need something warm to do, a greenhouse is the place to be! They have a couple of buildings with different climates, but everything is connected. There are elevators and paved paths through the buildings, but be warned of the slight incline. We would recommend leaving strollers at the entrance if possible. Kids big enough to walk will love stretching their legs and getting up close with all the unusual plants. After all, that’s why you came to a botanical garden, right?! We put the little guy in our baby backpack so even he could sit up to look out and touch. However, the building is accessible for strollers and wheelchairs for those who need them.

    ramps for accessibility
    rest area located throughout

    While the greenhouses at Lauritzen are big, they are very densely packed. This is a great place to spend as much or as little time as you want. You can stop and admire each plant and its unique characteristics, or you can quickly stroll through each building and still see everything. We spent about 90 minutes to 2 hours and found that to be sufficient. Little kids won’t last much longer than that, but you could spend longer with older kids and make quite a learning experience out of it. Keep in mind that I’m writing this in December, so there isn’t a lot to see outside at this time of year. I saw signs for an outdoor walking path and gardens, which must be fantastic in the spring and summer. A narrated tram tour runs in the summer and is only $3 extra. We can’t wait to go back in the summer and try that out!

    Speaking of going back…the multitude of special events convinced us to buy a membership! For $55 (today’s admission counts) you can upgrade to the yearly membership. Omaha is a sister city with Shizuoka, Japan, where we lived in a previous life, and Lauritzen has a couple of Japanese events every year in the spring and summer that we are really looking forward to. There’s also a photographer who hosts a couple of workshops for various skill levels throughout the year. The “Lil Sprouts” programs are specially designed for ages 3-5 and run August-May. Flower arrangement classes for adults are held during the winter. There’s a Mother’s Day Brunch in May with a menu that includes roast beef, coffee cake, and French toast casserole. Can’t go wrong there! Oh, and you get a free subscription to Better Homes and Gardens or Martha Stewart Living with your membership fee. Who doesn’t like a free bonus gift?

    The employees and volunteers were very helpful and courteous and did a great job interacting with our little ones. We found the building very easy to get around. The restrooms were clean. The visitor center provided plenty of brochures on all the activities available. Parking was convenient. Lauritzen Gardens is really a fantastic spot for the whole family and will make a great pit stop for you on your way through Omaha. And if you’re coming through town in the evening during the winter, be sure to head downtown to see some beautiful lights on the Gene Leahy Mall!

    Gene Leahy Mall

    We hope you enjoyed experiencing one of Omaha’s hidden gems! I know we’ll be stopping by on our cross-country drive next summer!

    Pin it to Pinterest!


  • Visiting Malaysia With Kids:  A Sabah Family Blog

    Visiting Malaysia With Kids: A Sabah Family Blog

    Guest Blogger: Melanie, her husband, and two kids are traveling the world from South Africa to Vietnam. Together, they’ve visited eight countries, with many more planned. Accompany them on their adventure on Instragram and YouTube.

    Sabah is a Malaysian state, located in the northern portion of Borneo Island. Sabah shares a land border with the Malaysian state of Sarawak as well as Indonesia’s Kalimantan and shares maritime borders with Vietnam and the Philippines. Sabah’s earliest human settlement can be traced back 20,000-30,000 years, and its trading relationship with China dates to the 14th century. Because of its location, Sabah is notably diverse in both ethnicity, culture, and language.  We recommend a Sabah family trip to anyone visiting Malaysia with kids.

    photo credit

    My family and I already planned to be in Malaysia, so we decided that no trip to Malaysia would be complete without spending at least a few days in Sabah. Intra-Asia flights are relatively inexpensive, thus making travel so much more affordable. We flew from Kuala Lumpur, the capital of Malaysia, into Kuching where we relied almost entirely on public transit and the ride hailing service Grab (a car service similar to Uber) to get around. Although the rules vary depending on which passport you hold, we were granted 90-days visa-free entry to Malaysia, which was also valid for traveling to Borneo, the island on which Sabah is located.

    With limited time and a limited budget, we narrowed our trip down to four primary destinations to add to any Sabah family trip itinerary.

    #1: Kota Kinabalu

    Picture from Kota Kinabalu family trip blog

    Kota Kinabalu is the capital of Sabah and where we chose to start our journey. Known by locals as “KK,” we loved walking from the marlin statute to the KK Central Market, which is located on the busy waterfront. The Central Market is lined with displays of the most amazing fresh seafood, which can be prepared at the onsite restaurant. My family and I were able to do this, and we highly recommend it.

    The marlin statute that marks the entrance to KK Central Market.
    KK Central Market

    The Central Market graduates into a Handicraft Market, formerly known as the Filipino Market. The Filipino Market is extremely busy and full of activity, but can be claustrophobic when extremely busy. Overall, this was a wonderful stop for us and we loved experiencing the true culture.

    The KK waterfront

    The KK Waterfront itself has a variety of upmarket restaurants to pick and choose from. Although not as local an experience as the Central Market, we enjoyed the lovely view from the waterfront with a sundowner.

    If you are in KK on Sunday, the Gaya Street Sunday Market is not to be missed. The market closes early (13h00), so go early for the best selection of cheap buys and good food.

    Gaya Street Market

    KK BUDGET ACCOMMODATIONS:

    Hotel Tourist – great location, close to Gaya Street and within walking distance to the waterfront.

    Switz Paradise Hotel – set in an old shopping mall, but clean and close to the waterfront.

    We stayed at both the Hotel Tourist and the Switz Paradise Hotels. The rooms are very basic, but clean and comfortable and located in the town center (thus minimizing the need for walking and car sharing services). Our entire family shared only one room, but since we were out and about most of the time, we only needed a comfortable and clean place to sleep. I was happy to be able to book our reservations in advance online.

    #2: Mount Kinabalu

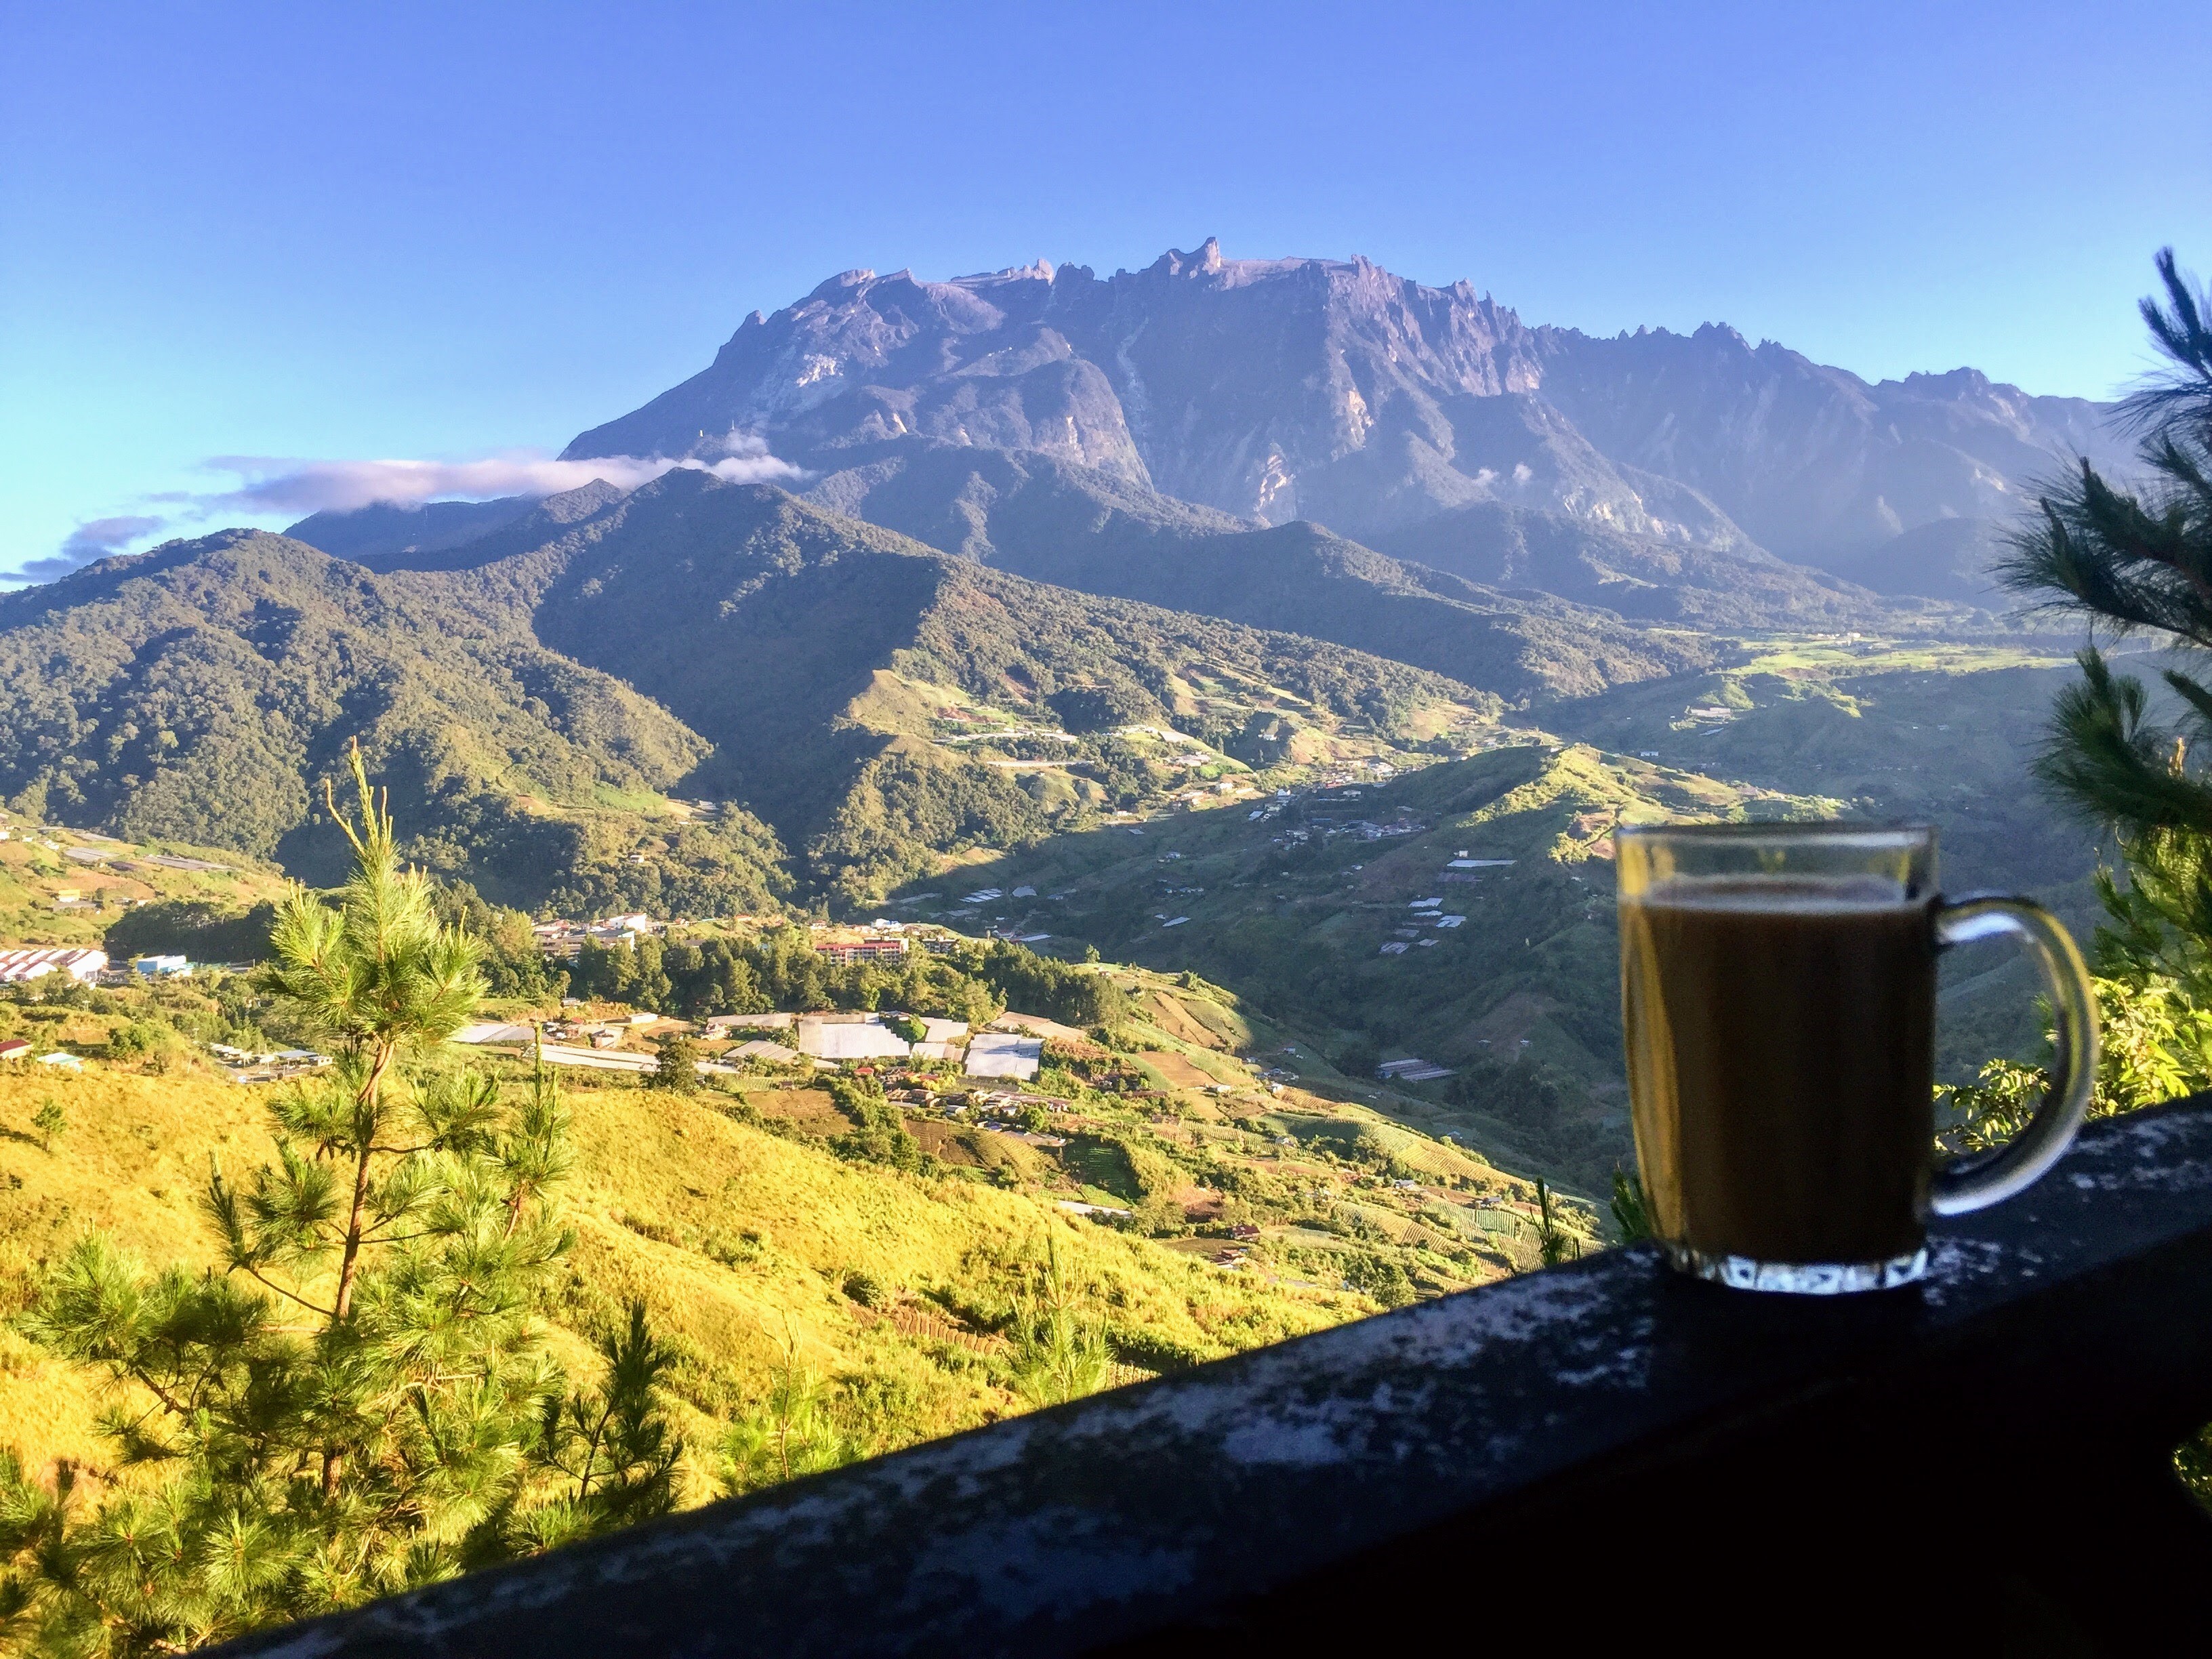
    Mount Kinabalu is a world heritage site and the highest mountain in Malaysia with a height of 4,095 meters! We made the trip to see Mount Kinabalu by renting a car and driving about one hour from Kota Kinabalu. If you are able to spend the night, wake up EARLY to see the mountain in all her glory as the mist sets in around 10am, thus obscuring the view. The weather gets chilly at night, so pack jackets. Although a hike up the mountain is challenging and NOT suitable for kids, we were able to take advantage of the surrounding jungle around the base of the mountain, and took a morning hike on one of several trails. If you are not comfortable renting a car, there is a tour bus that will take you on a day excursion.

    MOUNT KINABALU BUDGET ACCOMMODATION:

    Crystal Hill: We were able to book a room with a balcony and the most amazing view of Mount Kinabalu. Our reservations were booked online in advance of our arrival and the hotel provided free WiFi and also had a serviceable restaurant. It was approximately 15 minutes driving time away from the entrance of Mount Kinabalu and the main hiking trails.


    #3: Kokol Hill

    From Mount Kinabalu, we did a road trip to Kokol Hill, a city set on a hilltop with the most amazing views of Kota Kinabalu and Mount Kinabalu. Kokol Hill was approximately 2.5 hours away from Mount Kinabalu by car, but it is a beautiful place to stop and enjoy the view.

    KOKOL BUDGET ACCOMMODATION:

    Our balcony at Kokol Haven Resort

    Kokol Haven Resort – We spent one night at the Kokol Haven Resort, which is set on a hilltop with the most spectacular views.  They have the best pizza that we have had in the whole of Malaysia and a lovely restaurant overlooking Kota Kinabalu on one side and mountains on the other side. The hotel was very secluded, with no other shops or attractions nearby.

    #4: Kinabatangan River

    The Kinabatangan River is Malaysia’s longest river. There are cabins nestled in the woods amongst pygmy elephants, orangatuns, and proboscis monkeys. There are a number of attractions available – guided night walk in the forest, overnight camping in the forest with the sounds of the jungle. You can also take a river cruise during the day and see the proboscis monkeys fall from branch to branch as well as the airborne flying lizards. This is definitely a place for nature lovers and adventurers but be forewarned: no hot showers! Our kids absolutely loved the rainforest, which was very kid friendly and save – we encountered no snakes! We used the public bus system to get to Kinabatangan from Kota Kinabalu and the trip took about 7 hours. We were able to book our bus tickets online, but hotels are also very helpful in assisting with bus schedules and bookings, so ask if you have questions!

    KINABATANGAN RIVER BUDGET ACCOMMODATION:

    Tungog Rainforest Eco Camp – The camp offers numerous packages that you can tailor to your liking. There are several different activities to choose from and a guide can be included during your stay. The food at the camp was fantastic and our guide provided us with a lot of information about Sabah’s wildlife.

    Travel Tips:

    • We typically relied on public transportation, including the bus system, which is extremely organized and easy to use and can also transport you to nearby national parks. While in Kota Kinabalu, we used Grab to get to places that were not near our hotel, but did rent a car to travel to the mountains when we wanted to escape the crowds.
    • For currency, we found it best to withdraw money from ATMs, which we found nearly everywhere.
    • Of the Asian countries we have visited, Malaysia is the country with the best English and thus, we had no language barriers whatsoever.

    We really enjoyed our stay in Sabah. We were welcomed with open arms, and we learned so much about the culture and the food. We would definitely recommend visiting Sabah with kids. There are so many more places to explore in and around Sabah, which we did not get to this time, but hopefully will another time!

    We hope you enjoyed Melanie and her Sabah travel blog as much as we did!

    Pin it to Pinterest!


  • Tropical North Queensland With Kids!

    Tropical North Queensland With Kids!

    Guest Blogger: Cris, her husband “J,” and their four kids live in Europe, but have spent the last year traveling the world and have visited over 21 countries. They can be found on Instagram.

    “Hey honey, we’re going to Australia for five weeks!” – J

    When my husband first told me we were going to Australia for five weeks in October, I began researching the best places to visit with our four children, ages 8, 7 (twins), and 6. J had appointments in Noosa, Sydney, and Melbourne on specific dates, but the rest of the time would be dedicated family holiday time. As I started researching Noosa, I realized quickly that it would be a sin not to visit Tropical North Queensland.

    The Itinerary:

    During our five weeks in Australia, we spent one week exploring Tropical North Queensland. Our itinerary was as follows:

    Day 1 – Fly into Cairns and hire rental car

    Day 2 – Tour of Green Island National Park

    Day 3 – Four hour drive, overnight in Townsville

    Day 4-7 – Airlie Beach, including tour of Whitehaven Island

    Day 7 – Depart via Proserpine Airport (also known as Whitesunday Coast Airport)

    What We Did:

    Tropical North Queensland is home to several world heritage sites, including the Great Barrier Reef, the largest coral reef in the world. Queensland itself is a land of white sandy beaches, boasting year round summer temperatures and incredible wildlife. Home to crocodiles, sharks, deadly snakes, kangaroos, cockatoos, and sweet wallabies, my biggest concern was whether I would be able to keep my four children safe! We all know children have selective hearing when it comes to “dos and don’ts” and my worries haunted me even as we landed in Cairns.

    The Cairns Esplanade has been a focal point for locals and visitors in Cairns city since the region was founded in the late 1800s.

    Upon landing in Cairns, I immediately fell in love with the warm breeze, tropical vegetation, and the sweet sound of song birds. After checking into our hotel in Cairns, we took a walk around town in an effort to stay awake until an acceptable time for dinner, thus helping us adjust quickly to jet lag. Beaches are off-limits in Cairns and there are crocodile warnings everywhere, but the town compensates with the most family friendly promenade we’ve ever visited. The boardwalk is elevated above the beach and a perfect place for children to run along and play. There is plenty of free entertainment and, within walking distance from the town center, we found a skate park, BBQ areas, and the Cairns public swimming pool, which is a fantastic amenity for locals and tourists alike.

    The crocodile warnings!
    Walking along the beach in Cairns.

    During our visit, we loved stopping for snacks at Muddy’s café, a nice beach front coffee shop with great food and an incredible playground, complete with a splash area for children. J and I sat outside and enjoyed coffee, while watching our children play on the gigantic hamster wheel!

    My husband and I joked that we need one of these for our yard at home!

    Our stay in Cairns was sadly shortened by a flight mix-up in Bali, so we only had one full day to explore. To maximize our time, we decided to take a boat tour to Green Island National Park.

    Green Island National Park

    Green Island National Park consists of powdery white beaches and tropical trees, thus making it the perfect castaway vacation destination. After being assured by no less than five different people that there was no danger of crocodiles, we set off to explore the deserted white sand beaches. We enjoyed a packed picnic lunch on the beach and also enjoyed a glass bottom boat excursion to the coral reef that my children absolutely loved. They went wild looking at corals, different species of fish, giant starfish, and even a turtle – all without getting wet!

    Glass bottom boat ride.

    Back in Cairns that evening, we did what we always do when traveling abroad: sample the local cuisine! The excitement was sky high when we ordered kangaroo and crocodile skewers – so yummy we had to order more!

    Early the next morning, we headed off to our next destination, Townsville. To get there, we drove for four hours along the infamous “Bruce Highway,” which was lined with mango and avocado trees and banana plantations. Along the way, we pulled into one of the many farm stalls to sample some fresh melon. It was delicious, but also a little expensive! Our decision to spend the night in Townsville was entirely motivated by our desire to give the children a break from being stuck in the car. We spent the night at the Mercure Townsville, after receiving an offer from Emirates and Rocketmiles that would earn me 3,000 miles for a one night stay.

    After our overnight in Townsville, we headed off to our next destination, Airlie Beach. I had tried to get a cabin at the BIG4 Resort, which has water slides and great reviews, but because late September is a popular holiday time for Australians, the resort was fully booked and we ended up staying at the Airlie Beach Eco Cabins nearby, which was an ideal location for my family. Because we had our own transportation, it did not matter that we were located in the middle of an Australian forest/bush as we could get anywhere we needed. The cabins were well-equipped, and included washing machines, WiFi, and small torches that we used to see wild animals at night. The only thing missing was a dishwasher, but we remedied that by purchasing paper cups and dishes when we got tired of washing dishes by hand.

    Our first night at the cabin, as I was unpacking our bags, the owner knocked on our door and asked if the children wanted to see the wallabies! We all wanted to see the wallabies, so we grabbed the torches and dashed out into the gardens. It was pitch dark and we had to be silent so as not to scare the animals away. The owner instructed us to direct our lights towards the bushes, where the wallabies were hidden. The light caused the wallabies to freeze momentarily, so we were able to see them up close before they unfroze and disappeared into the woods.

    Airlie Beach night outing.
    Airlie Beach Wallabies!

    The Airlie Beach Lagoon is located in the town center. The Lagoon is an immense public swimming pool surrounded by sand and patches of grass that are perfect for laying down and sunbathing. What started as a splash break for the kids quickly turned into a whole day of lounging and swimming. The Lagoon has a shallow end, a shaded children’s area, and public toilets and water fountains at every corner. Our children could not get enough of it and J and I took the opportunity to relax and read a book under a tree!

    Airlie Beach Lagoon

    During our stay in Airlie Beach, one activity we signed up for was a guided trip to Whitehaven Beach. If you have older children in their teens, an ideal trip would be an overnight sailing trip to Whitehaven Beach. Our children were too young for an overnight stay, so we booked a day trip on a tour boat instead. The tour company collected us in the morning from the BIG4 resort and drove us to the port. Our tour boat then took us through the Whitesunday group of islands, a collection of continental islands located off the central coast of Queensland. The islands are in varying states of habitation, with Daydream Island still undergoing construction following a hurricane and Hamilton Island being a VIP island where you can stay in a villa that comes equipped with a four person golf cart that you can use to explore the island.

    Whitehaven Beach

    Our tour stopped on Whitesunday Island, the main island around which the Whitesunday group of islands are centered. There is no resort on the island, but Whitehaven Beach will make you blink twice in disbelief. The white sand stretches as far as the eye can see and words cannot describe the way the sand twists into the turquoise sea. While I was hypnotized by the magic of the beach, my children ran along the infinite stretch of white beach. We learned that because the sand is so full of silica, it makes a squeaking noise as you walk!

    Our children playing on Whitehaven Beach.


    Picnic lunch on Whitehaven Beach.


    The tour boat provided a picnic lunch, which we enjoyed on the beach. There was a bit of friction between the children and the free-roaming iguanas, which resulted in my children choosing to have lunch on the table/bench instead of on the actual beach! We also encountered a small group of starving backpackers who had spent the night sleeping in tents on the island and our guide was kind enough to share food with them. No one is really prepared for how deserted Whitesunday Island can be with no fresh water, no coffee shops – nothing. I guess sleeping under the starry sky on this unspoiled piece of paradise requires sacrifice!

    After lunch, our tour boat took us snorkeling along the Great Barrier Reef. All snorkeling gear was provided, including flotation tubes. Unfortunately, my children found the water to be too cold and were nervous about snorkeling in open sea. Luckily, the guide was prepared and took the children on a smaller boat to look for stingray. Although I also found the water to be cold, it’s not every day that you get to snorkel along the Great Barrier Reef, so I held my breath and braved the frigid waters.

    Looking for stingray.

    Whenever I think of North Tropical Queensland, a heart will always appear next to its name. It truly was an ideal family destination. The towns we stayed in had great facilities for children (including toddlers!), and the tour companies are able to accommodate all ages. Because it is summer all year round, the beaches are simply stunning and listed as the best in the world. What makes North Tropical Queensland truly special, though, is how man and nature coexist.

    Travel Tips:

    • The island trips get booked up very quickly, so book in advance, especially if you are traveling during Australian school holidays.
    • We purchased a mobile SIM card for one of our phones and for $50 AUD, we had 3 GB of internet and free local calls for two months. This allowed us to use our phone’s map app instead of paying for an expensive GPS rental.
    • Although there are many islands to visit in North Tropical Queensland and options range from expensive villas and luxury resorts to camping, we chose to stay on the mainland and visit the islands as part of day tours. This was not only a logistical lifesaver, but it was also lighter on the budget.
    • Sailing is an ideal way to explore the Whitesunday islands.

    We hoped you enjoyed the beautiful white sand beaches as much as we did!

    Pin it to Pinterest!

  • Chicago With Kids:  Five Fun Family Activities

    Chicago With Kids: Five Fun Family Activities

    Chicago is a city of iconic architecture, stunning lake views, renowned museums and recent renovation practically everywhere.  With its metropolitan atmosphere and dash of Midwestern charm, Chicago is not surprisingly one of our favorite cities.  It is a quick flight away from Cleveland, so we are lucky to visit the Windy City almost every year and have taken children aged two months to five years.  We are definitely planning a long overdue Chicago trip with all three kids in 2018.

    When traveling to Chicago by plane, there is easy access to downtown on the “El” (elevated) train from Midway on the Orange Line or O’Hare on the Blue Line.  We usually arrive at Midway during morning rush hour and always take the El downtown.  Once downtown, we walk almost everywhere or occasionally take an Uber.

    We have stayed in many hotels in Chicago, but here are a few of our centrally-located favorites:

    • The Ritz Carlton, Chicago – This is probably my favorite hotel in the US.  It is located in the Water Tower Place right next to the John Hancock Center on the Magnificent Mile and has indoor access to the mall.  The rooms are impeccable, and the lobby is an absolute delight.  The hotel completed a $100 million renovation in July 2017, and its delightful lobby has been completely transformed.  The fountain was replaced with a floor to ceiling art installation.
    • Palmer House – A Hilton Hotel – We have stayed at this historic hotel several times.  It is located in the center of the Loop and was also recently renovated.  The lobby magnificently maintains its original splendor with a stunning mural on the ceiling and seems right out of Downton Abbey.
    • Hyatt Regency Chicago – This is Chicago’s largest hotel with comfortable guest rooms located in two towers.  Also recently renovated, the lobby features BIG Bar’s stunning liquor tower.

    There are so many fun family activities in Chicago, but here are our top five.

    #1: Navy Pier

    With about 9 million visitors each year, Navy Pier is a major Chicago tourist attraction.  It’s a bit of a hike to get there from downtown, so we hopped on one of the seasonal free trolleys after dinner on our last night in Chicago.

    The Pier was constructed in 1916 as a commercial-shipping pier and redesigned as a tourist attraction in 1995.   The Ferris wheel is the obvious centerpiece of the Pier.  We enjoyed a night ride in 2013 on the pictured Ferris wheel that was retired in 2015.  The new bigger and better $26.5 million DW60 opened in May 2016.

    The carousel on the Pier was a big hit with our kids.  We were lucky that there was almost no line, and we able to ride many times in a row.

    Navy Pier offers fun for all ages, including a mall, the IMAX Theatre, the Chicago Children’s Museum, a house-maze, the Smith Museum of Stained Glass Windows, the Chicago Shakespeare Theatre and an 18-hole minigolf course in the summer.  You’ll also find the expected souvenir shops, restaurants and bars.

    #2:  River Cruise

    Chicago architecture was world-famous long before the Trump International Hotel and Tower became the fourth tallest building in the world upon its completion in 2009.  The city practically had a blank slate after the Great Chicago Fires of 1871.  Chicago’s architectural icons include the skyscrapers such as the Willis Tower (the world’s tallest building from 1974-1998 and formerly known as the Sears Tower) and the John Hancock Center, the neo-Gothic Tribune Tower (home of the Chicago Tribune), Frank Lloyd Wright’s Rookery Building, the art deco Merchandise Mart and the mixed-use Marina City with an exposed parking ramp that has been likened to Sagrada Familia.

    With many of the landmark buildings located along the river, several tour companies offer architectural river boat tours.  The most popular is offered through a partnership between the Chicago Architecture Foundation and Chicago’s First Lady Cruises.  We planned to take that tour with our three and five year old sons but waffled after learning that children are discouraged and also require a full price ticket.  We opted for the more family-friendly Mercury Skyline Cruiseline, which offers a narrated architectural tour and a bit of cruising on Lake Michigan.

    Trump Tower
    Marina City Towers
    City view from Lake Michigan

    #3:  The Field Museum of Natural History

    The Field Museum is one of the world’s largest natural history museums.  It opened in 1893 and was named to honor its first major benefactor, Marshall Field, the founder of the Chicago-based department store who donated $1 million to the Museum in 1894.  It is located on Museum Campus along Lake Michigan.

    The Field Museum boasts one of the world’s best dinosaur collections.  Sue, the world’s most complete Tyrannosaurus Rex skeleton, has been prominently displayed in the main hall of the Museum since 2000.  However, Sue will be moved upstairs in early 2018 when a cast of the world’s largest dinosaur, which was found in 2014, moves in.

    With two young boys who were excited about prehistoric creatures, we definitely did not miss the dinosaur exhibit.

    We also explored an Egyptian tomb in the three-story Inside Ancient Egypt exhibit.  This exhibit includes one of the world’s largest collections of human mummies.  This was our boys’ first exposure to Egypt, but they were fascinated and have since enjoyed Egyptian exhibits at the National Museum of Natural History and the Cleveland Museum of Art.

    As members of the ASTC Passport Program, we also enjoyed free admission with our reciprocal membership to the Cleveland Museum of Natural History.

    #4:  Adler Planetarium

    Our kids love space as much as they love dinosaurs.  My older son wanted to be an astronaut through pre-school and had a great time visiting the Adler Planetarium.  The Adler Planetarium was the first planetarium in the western hemisphere and named for philanthropist Max Adler, who donated funds after visiting a planetarium in Munich.  The beautiful stone building houses many interactive exhibits and three theaters, including the most technologically enhanced planetarium theater and a high-definition 3D theater.

    Our boys enjoyed the interactive exhibits focusing on the planets, solar system and space exploration, and, of course, the planetarium show.  As members of the Association of Science-Technology Center’s (ASTC) Passport Program, we also received free admission with our reciprocal membership to the Cleveland Museum of Natural History.  However, we did have to pay extra to attend the theater show.

    At the tip of Museum Campus, the Adler Planetarium boasts one of the best views of the Chicago skyline. 

    #5:  Millennium Park 

    Millennium Park was designed in the late 1990s to honor the third millennium.  Construction costs ballooned from $150 million to $475 million, and the opening was delayed until 2004. Today, the park is a widely popular destination for both Chicago residents and tourists and attracts over 25 million people each year.

    The centerpiece of Millennium Park is the Jay Pritzker Pavilion, a bandshell used for outdoor music performances.  The Pavilion was designed by Frank Gehry using his characteristic curved stainless steel plates and features a sound system designed to replicate the sound experience of an indoor concert hall.

    Cloud Gate is a public sculpture located at the center of AT&T Plaza in Millennium Park and nicknamed “the Bean” because its shape.  The Bean is created with stainless steel plates that have been welded together and highly polished so that there are no visible seams.  Sir Anish Kapoor designed the sculpture to resemble liquid mercury and the sculpture’s curved surface creates a distorted reflection of the city’s skyline. Construction costs escalated way above the original estimate of $6 million and ultimately cost almost four times that amount.  The Bean was privately funded through donations and unveiled in 2006.  This is a highly interactive sculpture that visitors are encouraged to touch, and it is so popular that we have never been able to get a picture without also capturing dozens of other visitors.

    Baby meets the Bean
    Skyline reflection
    Visitors can walk underneath the Bean

    Chicago is an amazing city to visit that definitely offers something for everyone.

  • Breckenridge With Kids: Five Fun Family Winter Activities

    Breckenridge With Kids: Five Fun Family Winter Activities

    Guest Blogger: Leslie Stranathan is an educator from Windsor, Colorado. After teaching public school for 10 years, she began homeschooling her two children and has written an activity guide for families interested in exploring and learning about Colorado. Leslie’s family recently began a traveling adventure and they are on a mission to explore all 50 states in their RV. You can find them on YouTube and Instagram.

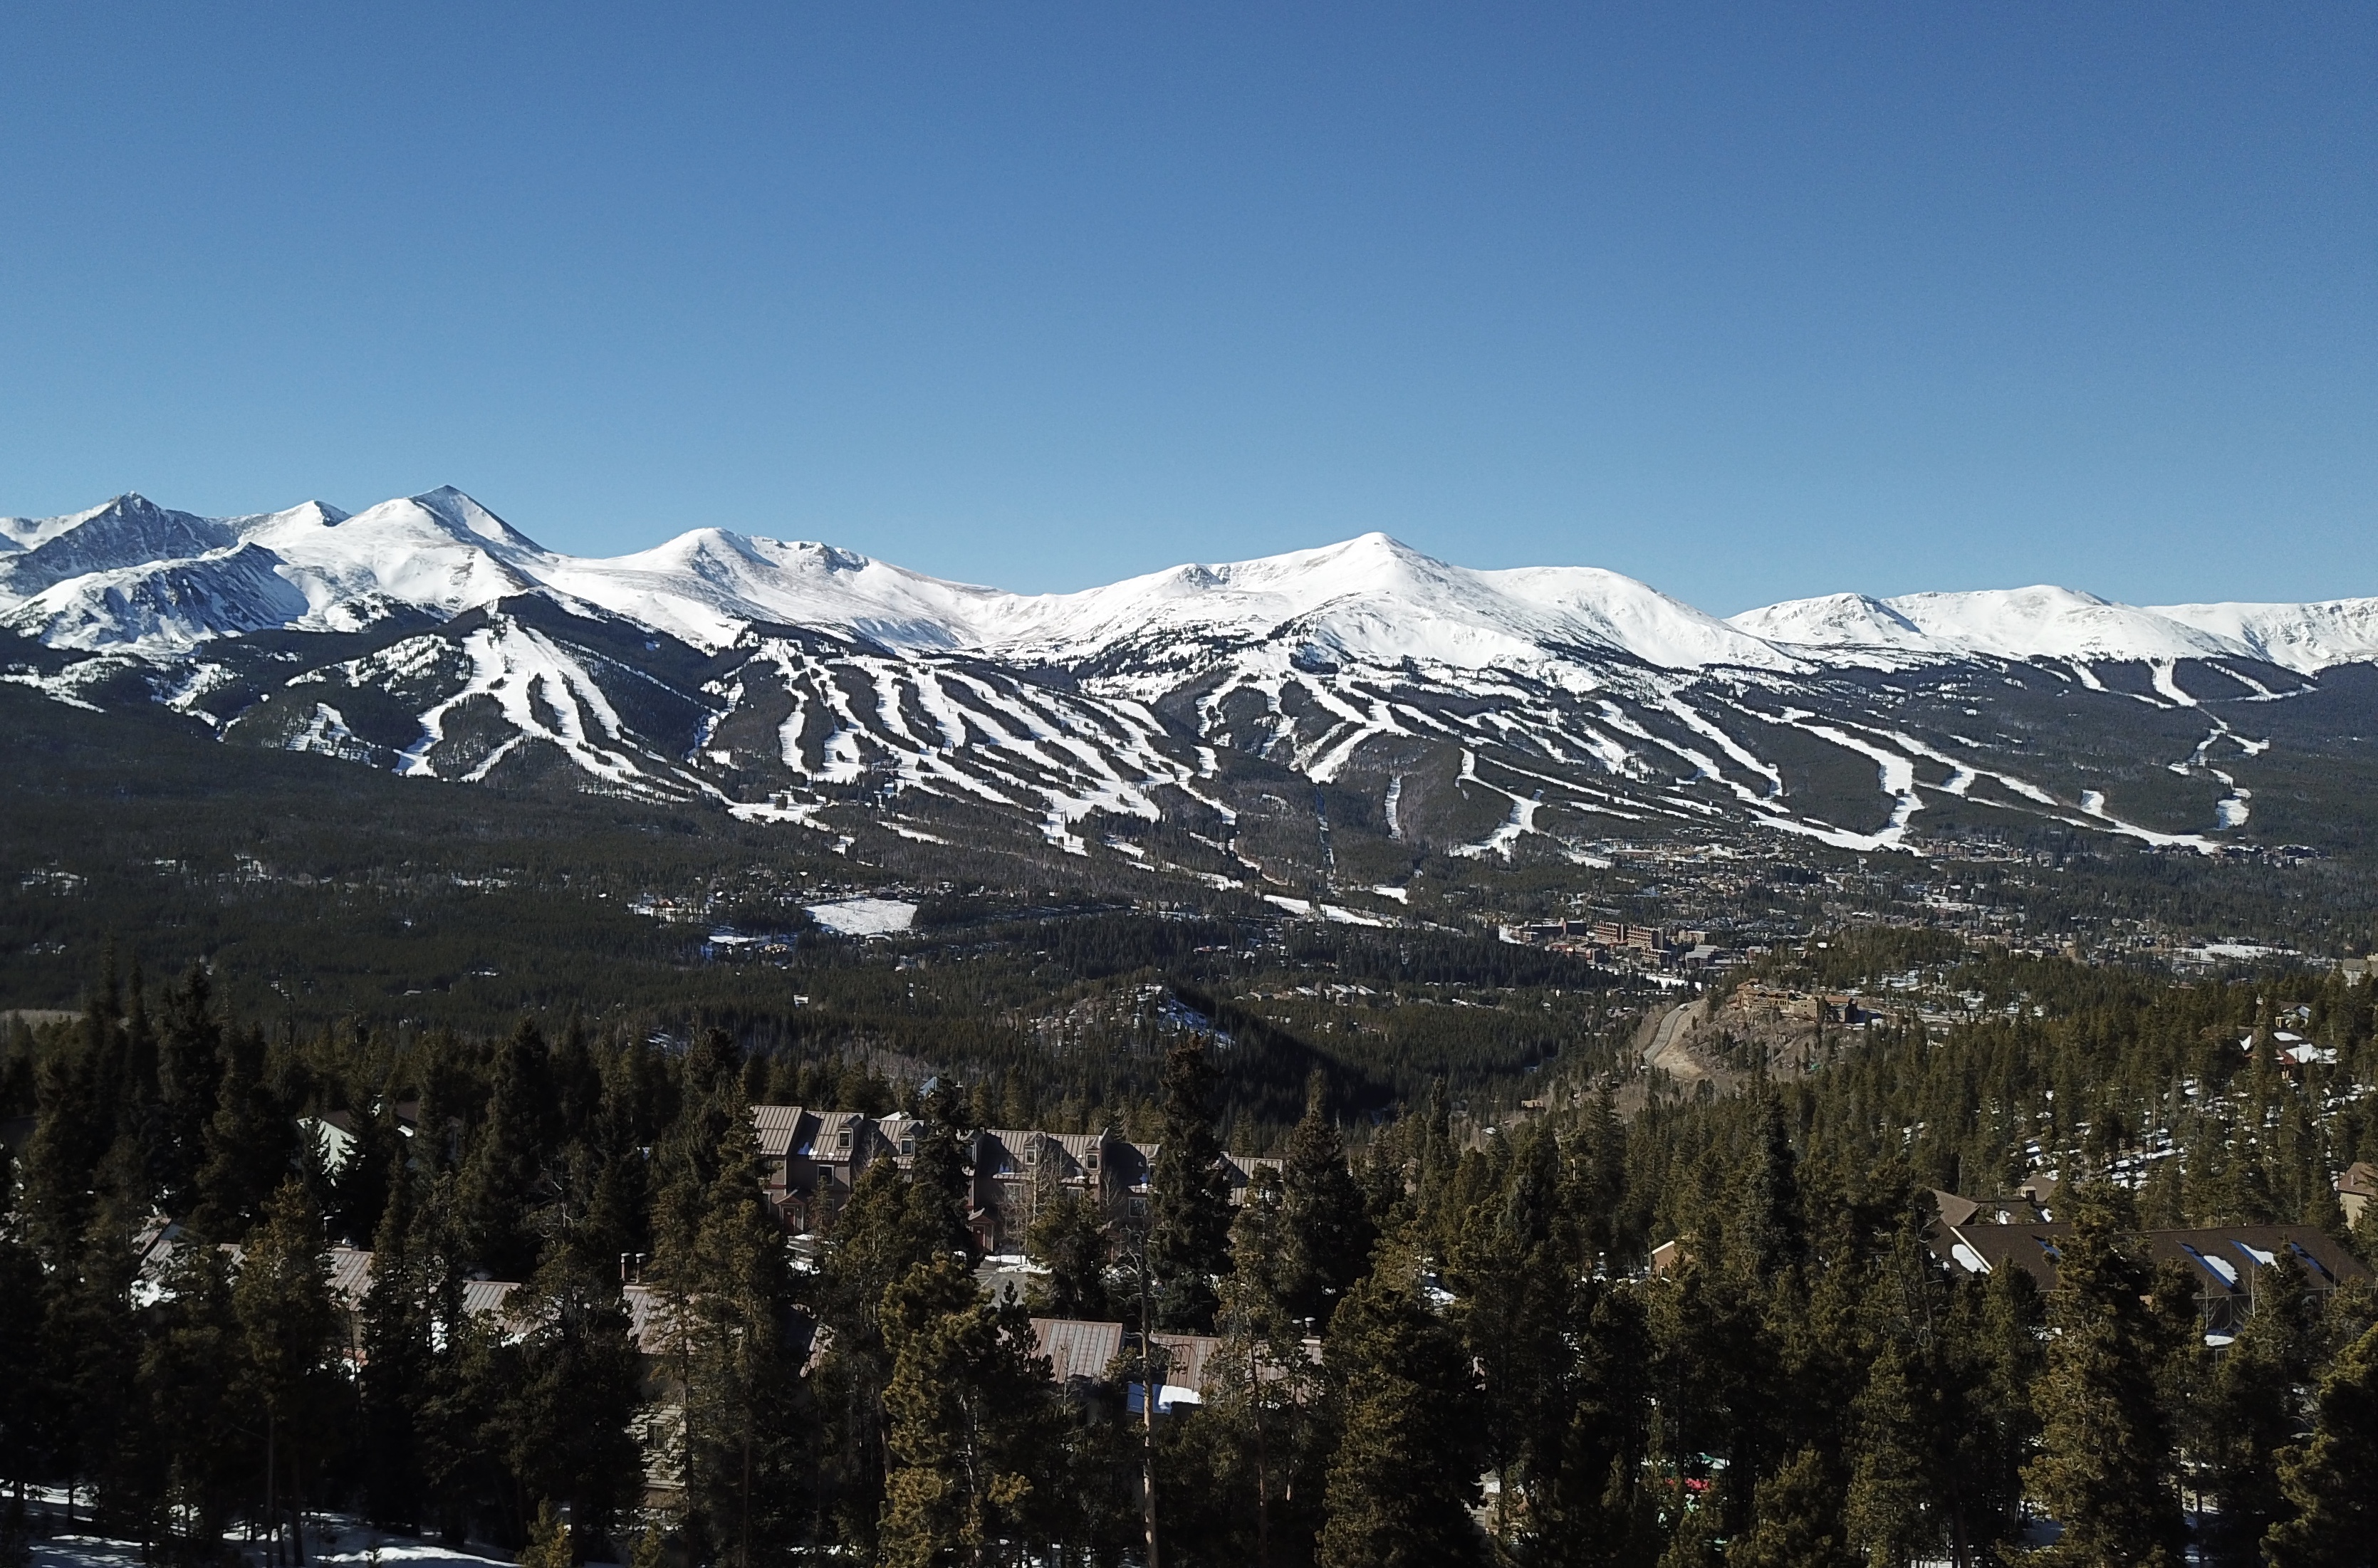
    Nestled in the mountains at 9,600 feet is Breckenridge, a small town with big charm. With beautiful ski slopes covered with snow, a quaint main street draped in holiday lights, and plenty of spots to stay warm, Breckenridge is the perfect winter destination for families. Located just an hour and a half west of Denver, Breckenridge is easily accessible to locals and those traveling to Colorado from out of town. Our extended family has met up in mountains for a week every winter after Thanksgiving for many years. My husband and I have skied for over 20 years and enjoy all of the amazing ski resorts in the Rocky Mountains, but this year was the first time my kids got on skis!

    Here are five fun family activities for all ages to enjoy in Breckenridge!

    #1: Explore the Mountains!

    My family, exploring the mountains by snow shoe!

    Even if you’ve never stepped on snow, the experts here can teach anyone, of any age, to get down the hill safely. Lessons are available daily, with options for private or group instruction at the Ski and Snowboard School. For kids, the Kids’ Castles provides ski rentals, drop off care, meals and fun activities to make the experience that much more special. My kids (aged 5 & 9) loved meeting new friends and learning to ski with other children their age. By the end of the first day, they could control their turns and stop using their “pizza” wedge. Most importantly, they were excited to come back the next day. The EPIC SchoolKids Pass provides up to 4 days of lift tickets in Breckenridge and includes one full day of lessons with ski or snowboard rental all for free if your child is in Kindergarten – 5th grade (not limited to Colorado residents).

    #2: Ride the Gondola

    source

    Breckenridge is known for its excellent transit system. Free shuttle buses get you almost anywhere you’d like to go and are accessible from most lodging locations. The Breckenridge transit center acts as a hub for the shuttle system and is also home to the BreckConnect Gondola. This completely free 10-minute ride will whisk you from the town of Breckenridge to the bases of Peaks 7 and 8. At the top you can enjoy watching the skiers on the slopes, warm up with hot chocolate, or enjoy lunch in the lodge. On the days we skied, we took the shuttle from the door of our condo to the gondola, which carried us right up the mountain, all while in our ski gear. It was the perfect way to travel. The ride and beautiful views make this a fun activity for any age.

    #3: Play at the Children’s Museum

    Kids aged 0-10 will be entertained for hours with all there is to explore at the Mountain Top Children’s Museum. Located in the heart of downtown, the exhibits  include a Wonder Lab, Creation Station, Kidstruction Zone, Tot area, Medical Center, and a Rocky Mountain wildlife section. The museum is packed with hands on toys and games, and encourages imaginative play. Several evenings a week parents can choose to drop off their children and enjoy a night out on the town while the kids are supervised and entertained by the incredible staff at the museum.

    #4: Savor a Crepe!

    Breckenridge is home to so many amazing restaurants! Family friendly and full of character, your biggest dilemma will be trying to choose just one place to eat each evening. There is one spot you can’t miss though. Crepes A La Cart has two locations in town. The main street food truck stand nearly always has a line – and it is well worth the wait. Crepes A La Cart has a huge menu of both sweet and savory options that will satisfy everyone in your family. It is always fun to watch the friendly staff members cook delicious fresh crepes while you wait. Ask ahead, and they’ll cut your crepe so it’s easier for hungry kids to share.

    #5: Glide on the Ice

    There are a few winter activities that always pop into my mind when I picture a mountain vacation. Ice skating is always at the top of the list. Fun for all ages and great exercise, the indoor and outdoor public ice arenas at the Stephen C. West Ice Arena are easily accessible from town. The facility has a variety of skates available to rent, and provides helmets free of charge. There are also support slides in both child and adult sizes for those that aren’t comfortable yet on the ice to use to stay upright. If skating isn’t for you, try hockey, curling or broomball!

    We hope you enjoyed Leslie’s list of Five Fun Family Activities in Breckenridge!

    Pin it to Pinterest!


  • The Final Frontier Part IV: The Ins and Outs of Traveling via RV to Alaska With Kids!

    The Final Frontier Part IV: The Ins and Outs of Traveling via RV to Alaska With Kids!

    Of the 50 states, Alaska is the one least traveled. Located in the most northwestern extremity of North America, Alaska is “out of the way” and unlike Hawaii, with its gorgeous beaches, is often relegated to the bucket list of items that never get completed. Those who decide to travel to Alaska, however, typically fall into one of two camps: the cruisers or the road trippers.

    In July of 2016, my family of four, along with my in-laws, traveled to Alaska in celebration of my father-in-law’s milestone birthday and to cross off my husband’s 50th state with his parents! The 49th state was Hawaii, which we visited with my in-laws in September 2013. I’ve written previously about our experiences in Seward, Talkeetna/Denali National Park, and Wrangell-St. Elias, but this post is dedicated strictly to the ins and outs of road tripping in a large RV for those of you who have never done it but may be interested in exploring a large RV as an option in the future.

    Choice of Vehicle:

    The first crucial decision to make is what vehicle to take? There are a number of options beginning with a vehicle you already own, a rental SUV or minivan, or any number of trailer/rv type vehicles that you can pull behind or drive independently. My in-laws strongly considered pulling a fifth wheel camper behind a pick up truck they already owned (the “fifth” wheel is the hitch in the bed of the truck), but my father-in-law had long dreamed or road tripping to Alaska in an RV and a necessary part of this dream involved eating sandwiches and reading a book on the Alaska Highway as my mother-in-law did the driving.

    A Fifth Wheel Camper that can be pulled behind a pick up truck.

    Source

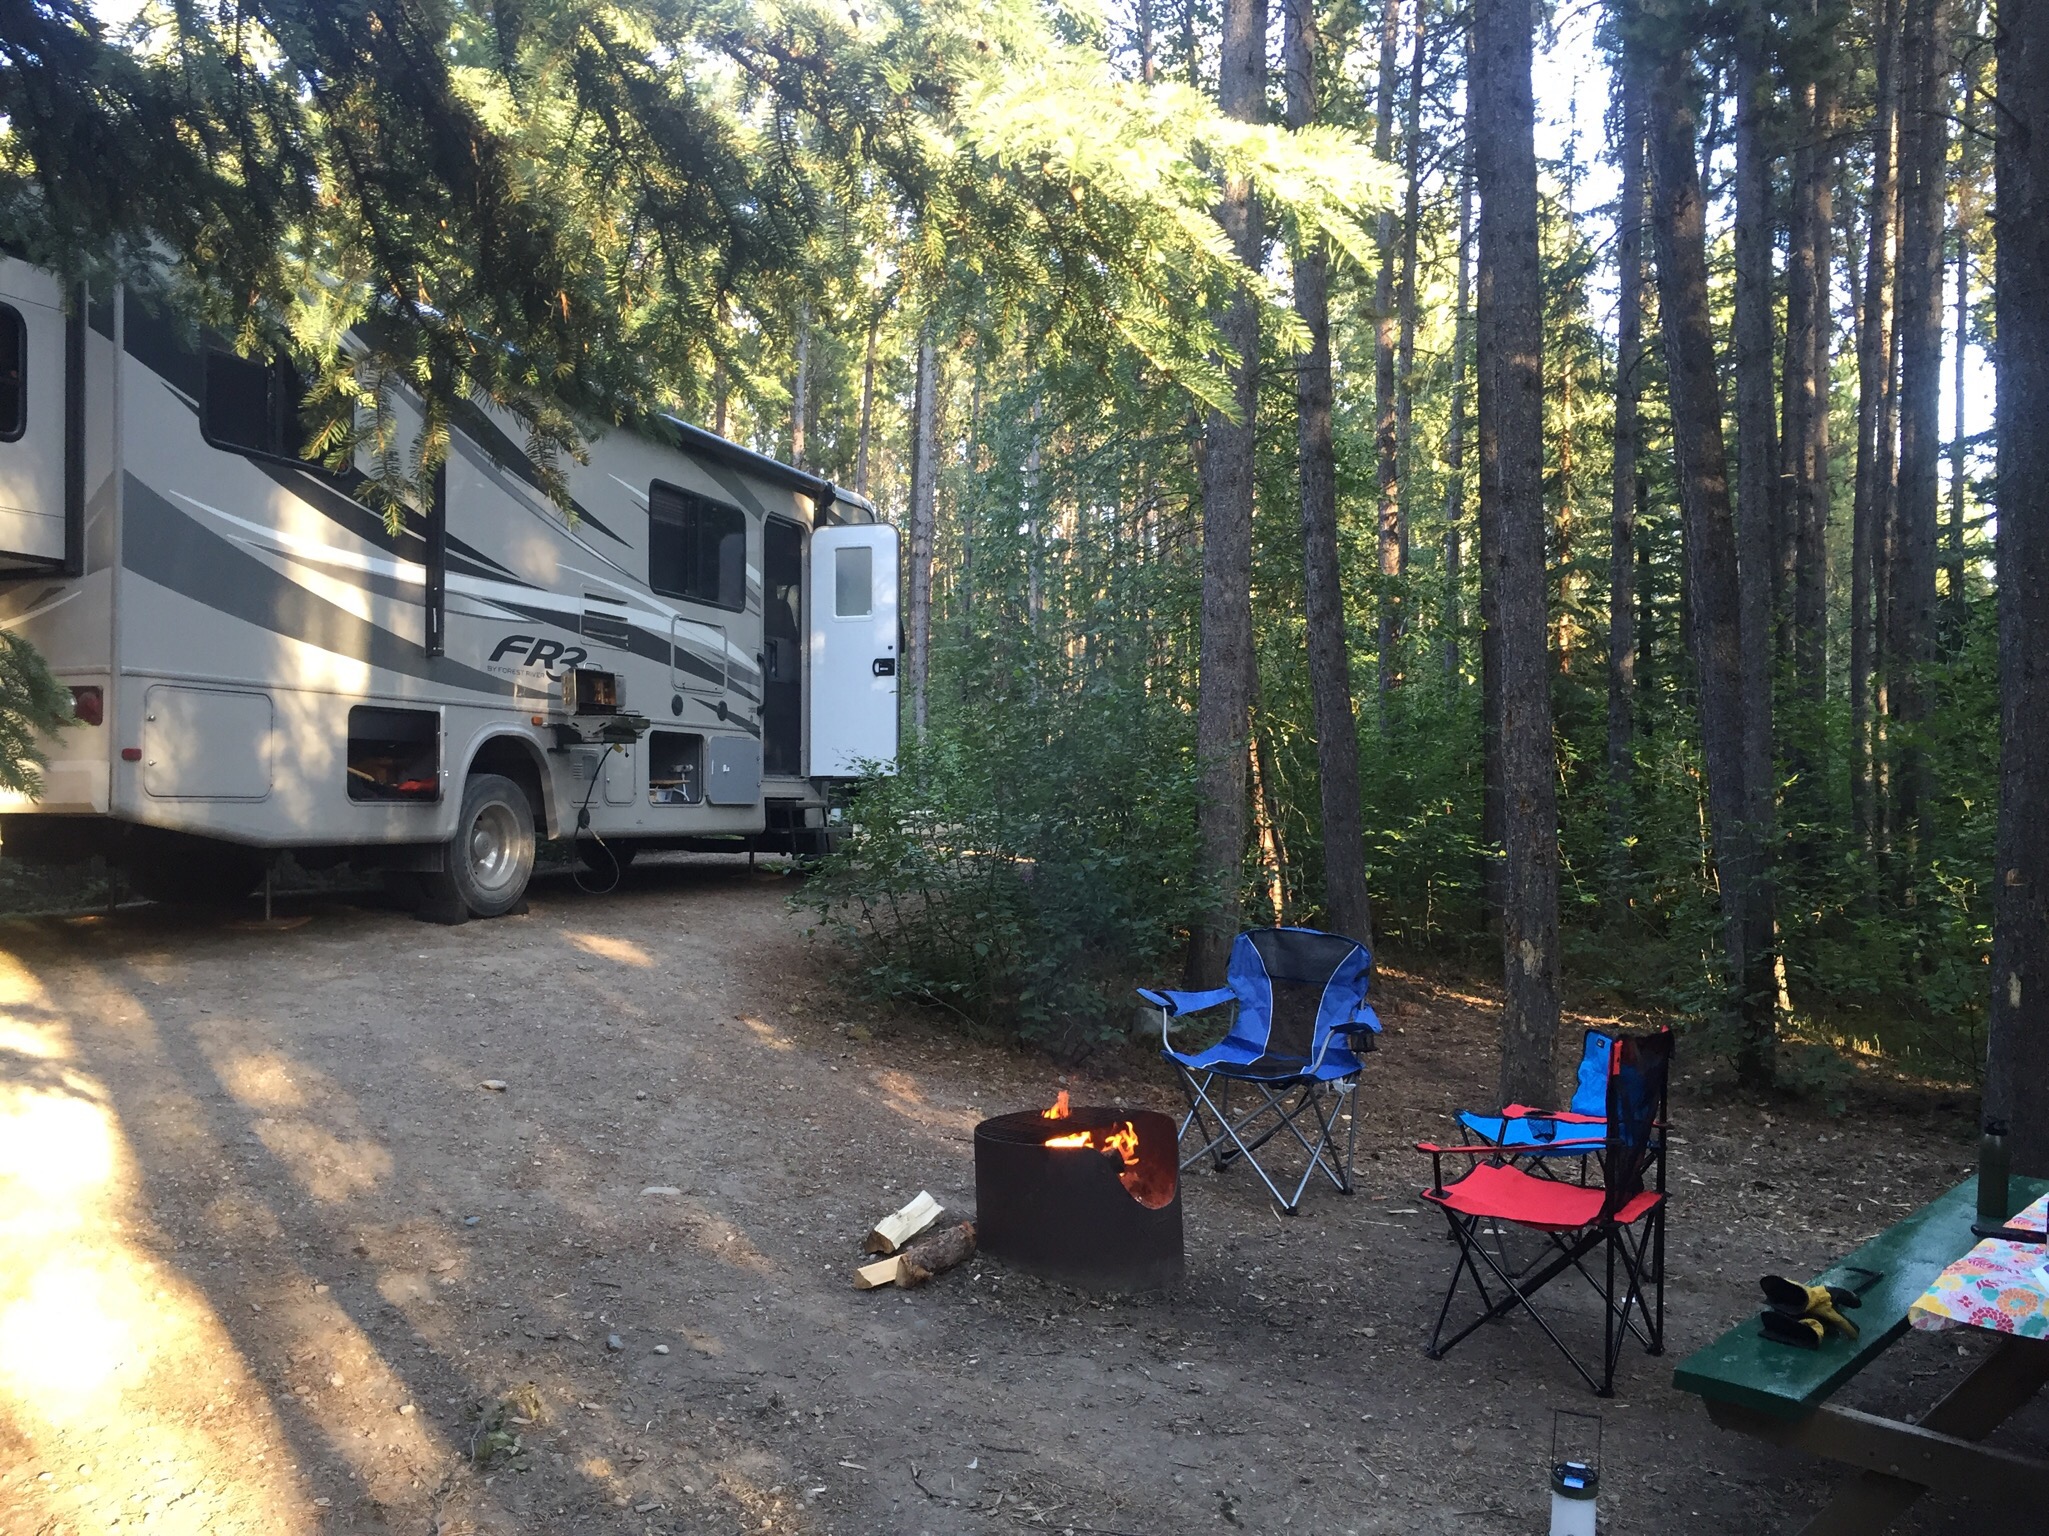
    In researching their RV options, my in-laws visited an RV Show and Camping Expo one full year prior to when they expected to take the trip. They did this knowing that they needed to fully research their options, order the vehicle, have it customized (if necessary), and take it on at least one trip prior to departing for Alaska. Given that they knew my husband and young son would be traveling with them, they wanted a large enough RV that everyone would be comfortable for the long trip and they ended up purchasing an FR3 RV  They strongly considered purchasing an Airstream, but ultimately decided that the layout of the FR3 worked out better for them.

    View from the driver’s seat.


    my husband in the driver’s seat of the FR3

    The FR3 was massive and amazing and my son loved it. My in-laws however, ended up with mixed feelings about the RV. My husband reports that although it was very nice to drive and they had plenty of space, it was an extremely loud vehicle and they could not actually talk while driving because the noise of the vehicle prevented them from hearing one another clearly, even sitting side-by-side. Furthermore, my father-in-law’s dream of leisurely eating a sandwich while my mother-in-law did the driving did not come to fruition as the vehicle was too large for my mother-in-law to feel comfortable driving and, it turns out, they did not feel comfortable being unbuckled while the RV was moving on the road. Although it was nice to have the luxury of the FR3, especially in remote areas in Yukon, my husband’s overall verdict was that if given the opportunity to make this trip again, he would choose instead to drive a large SUV and stay at hotels or camp overnight in the wildness.

    Buckled up and ready to go!


    Pro-Tip: A key consideration for people with kids who don’t already RV is to do several low stakes nights close to home to learn everything before you are out in the middle of nowhere. Heck, this is a key consideration for anyone, kids or not!

    The Itinerary:

    During World War II, the Alaska Highway was built, connecting the lower United States to Alaska via Canada. Months prior to their departure, we purchased a copy of The Milepost, the definitive guide to traveling the Alaska Highway. My father-in-law used The Milepost and mapped out a route that would take the four of them from their starting point in Indianapolis, IN to their first destination in Alaska: Tok. Knowing that they would be traveling with a seven year old, my in-laws planned the journey to place over 11 days, with the longest day of just under 600 miles. The goal, of course, was to survive the journey without forever ruining road trips for my young son and so they built in at least one day in which they traveled only 120 miles and made sure to build in enough time for bike rides, tree climbing, and other leg stretching activities.

    Climbing a tree after their first day of travel (500 miles down, many many more to go).

    Their itinerary, with corresponding mileage, was as follows:

    Indianapolis, IN
    Unalaska, WI 500
    Wall, SD 581
    Mt Rushmore, SD 120
    Lewistown, MT 463
    Calgary, AB (Canada) 423
    Grand Prairie, AB 443
    Fort Nelson, BC 475
    Lake Watson, YU 320
    Destruction Bay, YU 432
    Tok, AK 225

    The Logistics:

    One the trip was a go, my in-laws sprung to action in terms of planning the logistics. My father-in-law was in charge of the RV, making advance reservations at RV parks, ensuring that any and all equipment they might need for the RV was packed and ready and my mother-in-law was in charge of the packing of the RV and ensuring that they had the supplies they needed to make it to Alaska and back. With plenty of storage space, my mother-in-law purchased large plastic rubbermaid containers that fit snugly into the containers and began planning the items she would need. Among others, she needed to ensure that she had all the cooking and dining supplies they might need as well as whatever linens and other cleaning supplies they might need. To that end, one item I found and purchased for her was this 14-piece kitchen in a box set that provided her with many necessary kitchen items all packable into one neat little box.

    source

    Pro-tip: Make sure you pack your flatware in napkins or felt so that you aren’t driven crazy by jingling flatware on the road!

    The Daily Routine:

    Stopped for a light lunch of sandwiches.

    The daily routine while on the road was relatively simple. Wake up, pack up, start driving. Stop for lunch somewhere (usually a light lunch of sandwiches or something else that can be easily prepared), drive some more, stop for the night. Once stopped for the night, they would “open” up the RV, which essentially meant opening up the various storage compartments to get out what they needed to make dinner.

    The FR3 had so much storage space there was never any concern that they would not be able to bring along something they needed. Indeed, they packed their own portable grill, tables, seats, napkins, wine, flatware and dinnerware… pretty much anything you can think of.

    In the evenings after dinner, they liked to play baseball or go for short bike rides around the RV park.

    Once in the Yukon, they spent many evenings by the fire, roasting smores and just generally enjoying the midnight sun.

    In terms of bedding down, my in-laws had a king bed in the back of the RV, with a sliding door that closed it off from the rest of the RV. The dining table opened up and turned into my son’s full-sized bed. My favorite bed, however, is the one my husband slept in. His bed dropped down from the roof ceiling and was literally suspended over the front driver/passenger seats!

    As you can imagine, therein so much to remember to do every morning in terms of tidying up and making sure you secure all belongings. I wasn’t surprised to learn that there’s actually a thing called pre-departure checklists that you can print out and bring (even laminated!) along with you on your trip to ensure that you do everything needed prior to pulling away. Sample lists can be found online and include everything from reminders to “put away lawn chairs” to turning on/off your water pump! I know that my in-laws had a pre-departure check list that they followed every morning prior to getting back on the road.

    The RV Scene:

    In general, my family found the RV scene to be severely lacking. Not only were the RV parks in the United States generally run down and nothing more than glorified parking lots with hook ups, the atmosphere was also lacking. My husband reports that the main evening activity was to sit outside of the RV and watch tv. Needless to say, after a long day of driving and being cooped up in the RV, my family was desperate for something active to do, but they seemed to be in the minority.

    Biking in Wall, SD

    In contrast to RV parks in the United States, the provincial parks in Canada were amazing. Not only were they in wooded and semi-private spots (versus in a parking lot right next to another RV), the surrounding scenery was beautiful and there was always an excellent firepit to roast marshmallows late into the night. My family absolutely loved the provincial parks in Canada and would recommend it for anyone looking to camp, RV or otherwise. Unlike US campgrounds, they generally provide free, well-seasoned firewood. The Alaska state campgrounds were also great for camping, but in general commercial, for-profit US RV parks left something to be desired.

    Other Considerations:

    The major drawback to driving an RV to/from/around Alaska is that it is a large, unwieldy vehicle. Although the FR3 was a nice and spacious ride for the long drive to and from Ohio, my family ended up needing to rent two vehicles during our stay in Seward and Talkeetna. Moreover, my family elected to fly into Wrangell-St.Elias because although the road from Chitina (where they parked the RV) to Wrangell-St.Elias is only 60 miles, it would have taken hours for the RV to make the trip. As a result, unless you are willing to restrict yourself to RV friendly roads, traveling via RV will require additional expenses, like a rental vehicle and paying for a “parking spot” for the RV, should you choose to leave it behind. Although parking the RV in an RV park without hook ups costs approximately $10-20/day, parking an RV at a location with full hook ups can cost upwards of $50-75/day. In other words, an RV is hardly a “free” way too travel and stay. It may be slightly less expensive than a hotel room, but it also has significant draw backs and I would recommend that anyone looking to save money do the math very carefully to determine whether or not they will actually save money by traveling via RV.

    Final Thoughts?

    My family loved the RV experience and my son still talks about it fondly. But, having done the great journey to and from Alaska, I believe they are ready to put the RV days behind them. My husband has said that he would love to drive the Yukon and British Columbia with me someday, but that we will be traveling via SUV and staying at lodges, instead of an RV. And that’s just fine with me.

    Pin it to Pinterest!

  • Top 8 Gift Ideas for Young Explorers!

    Top 8 Gift Ideas for Young Explorers!

    Guest Blogger:  Ophélie is originally from France but moved to Belgium from McLean, Virginia five years ago.  She and her husband have found that kids didn’t have to stop them from doing what they love.  Instead, they shared their passion for travel and the outdoors with their young son and daughter. Ophélie can be found on Instragram and Facebook

    Disclosure: Some of the links below are affiliate links, meaning, at no additional cost to you, We Go With Kids will earn a commission if you click through and make a purchase. Opinions are the author’s.

    Let’s face it, buying gifts for kids is not the easiest especially when you feel like they have absolutely everything already. Do you know a little traveller or a budding adventurer? Here are 8 gift ideas for this holiday season!

    #1: Camera

    I love that my kids can capture their own memories! Although hundreds of pictures consist of their feet and favorite teddy bears (hurray for the digital era!), having their own camera has become a big part of my kids’ discovery process. Either at the museum or in the forest, the camera stimulates them to look around to find the most beautiful mushroom, painting, flower, etc.  They also love to take pictures while travelling, and a camera is a great way to keep them entertained during long road trips! We even dedicate a few pages of our vacation photo albums to their pictures and it is a lot of fun to look back at them.

    For our 6 and 8 years olds, we chose the Nikon Coolpix W100 and are thrilled with it. The camera is easy to operate, robust, dust and waterproof. The selection of buttons is simplified to keep things basic, which is helpful for those just learning. Available in multiple colors, including pink, blue and yellow, they are very attractive to children!

    Kid’s review: “I love to take pictures when we are outside, and I love even more to watch them again once we get back home. Especially pictures of my sister when she is being silly. ”

    Budget: $100-$180

    #2: Microscope

    There is a mysterious and marvelous universe beyond the Earth that draws the attention and imagination of many children. However, there is also a fascinating world much closer to us: the microscopic world. Everyday objects when viewed close up reveal a new and normally invisible world that captivates children from a very early age. A microscope enables children to peer into this world! Flowers, leaves, bugs, their hair, our dog’s hair, piece of paper, saliva, dust: name it, probably they have looked at it. A microscope is more than just a toy, it really nourishes a child’s curiosity and helps them learn a great deal while having fun! My kids are fond of their microscope! Nerds for the win 🙂 !

    The National Geographic Microscope is a good device for a first insight into the microscopic world. It comes with a kit so that you can prepare your own thin section. A set of dissecting instruments or a separate eyepiece are available so that you can expand the beginner´s model. However, for a first dive into the world of microscopy, the Ravensburger SmartScope is definitely our favorite! The SmartScope uses your smartphone or tablet to magnify objects! No special preparation is needed – we simply place the object under the Smartscope and activate the camera function on our smartphone or tablet. And the significant advantage of the Smartscope is that kids can carry it around with them, as the mounted device only measures about 15×20 cm.

    Kid’s review: “I love to use the Smartscope because it’s easy and fun. The microscope is cooler because we see things even bigger and better. However, I would like to see bacteria, but we can’t with that one. But still I like it a lot.“

    Budget: $50-$150

    #3: World Globe

    Having a globe is a great way to let your children explore the geography, countries, and oceans of the world without having to turn on the television or a videogame. My kids love having a cool, decorative item in their bedroom that they can also play and learn with. They enjoy looking for the countries they have already visited, as well as planning their own travel bucket list. I would definitely recommend an illuminated globe, which would be much more fun for kids!

    source

    Kid’s review: “I love to learn the names of countries and cities I don’t know. I love to look for all the places I want to go. I want to visit the desert in Australia. Also, I want to go to Patagonia to watch penguins and do dog sledding in Alaska”

    Budget: $30- $60

    #4: Binocular or Monocular

    Kids love nature, and providing them with fun discovery tools definitely increases their engagement. A great set of binoculars for kids does exactly that. Capable of eight times magnification, the LuWint Kids Binocular is designed for children, and available in many colors. You should be able to find them in your kid’s favorite, making it that much more likely he or she will actually like and thus use them. For our daughter, who is visually impaired and has trouble finding the focus on a binocular, we purchased a Eyourlife Monocular, which turned out to be even more practical. Although the binocular is not designed for children, its small size makes it suitable for a tiny 6 year old hand. Requiring less adjustments than a pair of binocular, it also is significantly lighter, which is very convenient to carry on while traveling.

    Kid’s review: “It’s great! I don’t see very well and with the monocular I can see the squirrels and the birds like they are really close”

    Budget: $15-$30

    #5: Compass

    Do you know that compass needles spin because of the Earth’s magnetic field? No matter where you are in the world, your compass needle will always point north. How cool is that? That’s probably why kids love the compass, a tool every young explorer should have. There are tons of options when it comes to choosing a compass. For my kids, I purchased compass clips, easy to hook on a backpack but not so accurate, and a real compass. There are many good quality compasses out there, such as the Suunto.

    source

    Being able read a map or use a compass is a valuable skill in multiple outdoor activities (hiking, boating, etc). Map and compass reading is fun and easily taught to kids, but also provide skills that will prove useful for years.

    Kid’s review: “I like to have a compass, so I always know where the North is.”

    Budget: $5-$50

    #6: Flag of the world game

    If you have a child who is interested in flags, you need this game! Flag of the World includes a card for every flag, which also tells you the capital of the country, along with a map and some interesting facts about the country. There are many ways to play this game, but the cards by themselves are already great. My son plays a lot by himself with the cards: sorting them by continents, visited countries, or color of the flags! The small size of the game makes it perfect for travel.

    source

    Kid’s review: “I love flags, I learned a lot of them with this game. We play with the cards a lot when we are in the car for a long time. But my sister is always complaining because she loses.”

    Budget: $10-$15

    #7: Knife

    source

    A knife may be a controversial gift, but my kids are very happy with it and so am I. A knife is the adventurer tool par excellence. My children are not allowed to play with their knives and are not even allowed to keep it in their own rooms. But, when we go on one of our micro-adventures they are very proud to carry it in their backpack, and use it when needed and under supervision. Because we are French, we chose the traditional Opinel folding knife, which is now offered in a junior edition with rounded-tip and a wide choice of colors. Another great option for your little adventurer would be a classic Victorinox Swiss Army knife, which includes a large blade, small blade, corkscrew, bottle opener with large screwdriver, and can opener with small screwdriver.

    Kid’s review: “I have a red knife. I love it because it’s a really grown-up tool!”

    Budget: $15-$30

    #8: Head lamp

    source

    Head lamps are a great stocking-stuffer gift for pretty much anyone who enjoys the outdoors. Not only are head lamps useful, but they can help keep you safe. They are a must if you go family camping and the kids just love them. This summer, my kids played hide and seek in the garden at night, using their head lamps to look for their friends. There were TONS of fancy toys, but they were all fighting for their turn to wear that head lamp!

    Kid’s review: “My lamp is really cool. Once, we went wild camping with my mom and her friend. There were noises so they got scared, so we hiked back to the car in the forest by night. I was the one watching the trail with the headlamp. It was really cool.”

    Budget: $5-$25