Blog

  • Travel With Infants and Toddlers: Strollers and Carriers Take 2

    Travel With Infants and Toddlers: Strollers and Carriers Take 2

    For Catherine’s take on strollers and carriers, visit her post, Travel with Infants and Toddlers Strollers and Carriers.

    As anyone with kids knows, what works for one family frequently doesn’t work for another. In my experience, what has worked for one kid hasn’t worked for the other kid and so, I thought I’d add my two cents on what worked for us and didn’t work for us when traveling with infants and toddlers in terms of strollers and carriers.

    Strollers:

    My oldest child was not a fan of strollers. He never really cared for them and was fully out of them by 18 months, preferring instead to walk or push the stroller. As you can imagine, fighting with an 18 month old over whether or not he could safely push a stroller in a public space quickly became more trouble than it was worth and we essentially stopped using it at that time.

    Although the stroller was never a big part of our life with him, we did find that it was essential for one trip that we took to California, prior to his first birthday and before he could walk.  Since we were visiting family in Los Angeles, I decided to purchase a stroller and have it sent to my mother’s house prior to our arrival. Knowing that we would use the stroller in limited circumstances (malls!), I wasn’t too worried about the stroller’s ability to maneuver in rugged terrain or its ease of handling. I did, however, want something 1) inexpensive, 2) small when folded up, and 3) light. A quick amazon search and ~$40 later, I ended up settling on a Jeep umbrella stroller which served us perfectly for our week in Los Angeles.

    our inexpensive jeep stroller which worked great for our stay in Los Angeles

    Although this stroller was perfect for that trip (and a subsequent trip a few months later), it did have certain limitations.  First, as a bare bones umbrella stroller, the stroller did not recline and thus was not suitable for children who are unable to sit upright and support their bodies. The stroller also did not have a telescoping handle and was too short for my brother, who is 6’3″, to use comfortably. Nonetheless, for $40, I was happy to have it for the handful of times we needed it in California.


    Six years later, I found myself in a similar predicament of needing an umbrella stroller for a trip with a young toddler. Although I considered purchasing something inexpensive like the Jeep stroller, I decided to purchase a Maclaren Mark II stroller instead. Weighing in at less than 8 lbs, this was the lightest stroller I could find on the market and, importantly, it had a carry strap. As I was traveling alone with my toddler from our home base in Washington, DC to Alaska, I wanted something light and portable – that I could maneuver without too much difficulty.

    napping in the United Club lounge during our extended layover

    The Mark II ended up being the perfect stroller for use in the airport, as it provided my son with a spot to nap during our long layover in Seattle, and it was also easy to fold up and throw over my shoulder, thus freeing up my hands to wrangle my squirmy toddler.

    The Mark II has also proven useful on short sightseeing trips around town. Here’s my little one pictured in front of the White House during a Mommy+Son solo trip downtown

    I am a huge fan of the umbrella stroller for traveling with older infants/toddlers as they fold up small and are lightweight. However, these bare bones strollers are limiting in that the child must be able to sit upright and support their head (6+ months is the typical manufacturer recommendation) and umbrella strollers require both hands to push and don’t maneuver as well as other more robust strollers.

    For a trip to Disney World when my youngest was 10 months old and not walking, we elected to bring our usual stroller, the Baby Jogger City Mini. Knowing that we would be using it extensively at both Disney World and Legoland, I was happy to bring along the larger stroller for its ease of use and also for added comfort. We also traveled to and from the airport via metro on that trip, so it was nice to have it to push on the uneven sidewalks and pavement to/from our metro station.

    Baby Carriers:

    I’ll be the first to admit that I have a love/hate relationship with baby carriers. My oldest son hated all carriers. I tried quite a few with him – the Peanut Shell,  the Moby Wrap, a Baby Bjorn, but he only ever screamed bloody murder when put in a carrier.

    I remember having one successful carrier experience with him and that was at the airport on his first trip to California. Although he didn’t love the carrier, he seemed to like knowing that he was close and the surrounding environment was different enough that he was easily distracted.

    grudgingly hanging out in the baby bjorn carrier

    When my second was born a few years ago, I was willing to give carriers another try, but wasn’t overly optimistic.

    Cue the angels! My second child loves the baby carrier.

    hanging out in his carrier in DC

    We started with the original Ergo Baby Carrier, which he was happy to ride in during any number of walks we took around the neighborhood or through the grocery store. I also loved that the carrier had a handy zipper pocket in the back center that I could stash my phone and keys in. The limiting factor to the Ergo, however, is that even though it carries children up to 45 lbs, I found that once my son was 9 months or so, he liked to swing his arms over and out of the carrier. I frequently worried that it didn’t keep him secure enough and that he would come tumbling out.

    I’ll admit this was paranoia on my part, but I ended up purchasing a Tula Toddler Carrier just prior to our trip to Alaska. The Tula Toddler carrier has a higher back and even at almost three, my son will happily ride forward facing and the back fabric comes up to the base of his neck.

    comfortably napping on the Kenai Fjords harbor cruise in his Tula carrier

    Although the Tula carrier fits us much better, the one pocket it has is located on the waist belt instead of the back center, where the Ergo pocket is located. The pocket on the waist belt is difficult to reach and I stopped using it after I found myself frustrated from trying to reach it.

    As Catherine mentioned, carriers are limiting in that they restrict downward peripheral vision, so be careful when walking! I always hold onto the rail or use the wall for a guide when walking downstairs with a child in a carrier, just for added security.

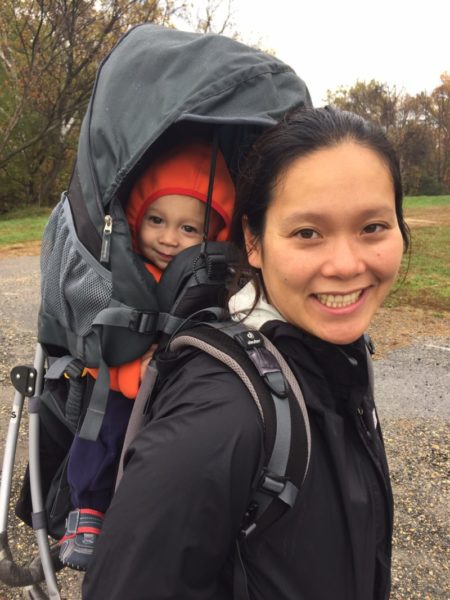
    In addition to soft carriers, we have also used a hiking backpack for our kids.

    We purchased the Deuter Kid Comfort 3 when my oldest was a toddler, but given his general dislike of being carried, it was rarely used.

    we did take some memorable walks around the neighborhood during Snowmageddon 2010!

    My youngest, however, has used it extensively for nature walks with our four legged friend, Wilson, and also for longer hikes around town and in Alaska.


    Lovin’ his Deuter Kid Comfort with Exit Glacier in the back

    I cannot recommend the Deuter carrier enough. Although it is large and expensive, it allows my son to sit high up and see the sights during our hikes and walks and he’s supported in an upright sitting position. As an added bonus, this carrier still looks brand new, despite being nearly 8 years old!

    As you can see, what works for one family or child may not work for you and what works in one situation might not work in another. Luckily, all of the gear identified in this post can be found at your local stores – Bed Bath & Beyond, Target, REI. I encourage you to take your child to the store and test out the gear to see whether you like not only the look and feel of the item, but also the fit. And know that in the world of revolving baby gear, you will likely be able to purchase whatever item you decide on used from your neighborhood listserv! I certainly know that I have bought and sold my fair share of strollers on craiglist, just looking for the perfect solution to my particular situation!
  • Travel With Infants and Toddlers:  Strollers and Carriers

    Travel With Infants and Toddlers: Strollers and Carriers

    Strollers and carriers are almost always travel essentials when you are traveling with a child under age three.  Nancy and I both shared our experience separately.  Check out her post at Travel with Infants and Toddlers:  Stroller and Carriers Take Two.

    Strollers

    Strollers are travel necessities simply because it can be too cumbersome to carry an infant or toddler and all your family’s stuff for long periods of time.  Even as a huge fan of my Beco baby carrier, there are limited circumstances where we did not need a stroller when traveling with an infant or toddler.  There are innumerable stroller options, but features to consider when traveling are size, weight, ability to lay flat, compatibility with your infant seat and how easy it is to collapse and storage capacity.

    Napping in the stroller

    Strollers are wonderful because they can contain your baby and baby gear (and honestly, your extra coat, water bottle, snacks and packages, too). Most babies and toddlers love their stroller and can easily nap there during the day if going to your hotel is not an option.  Our main stroller was the Peg Perego Aria, which I believe is discontinued (the new version of the Peg Perego Vela).  We loved it because it was compatible with our Graco SnugRide infant seat, had good underneath storage and was an ultra light 9 pounds. It has definitely seen better days, but on occasion, we still use it over nine years later.

    Our Peg Perego Aria – the early days
    Carrying luggage for our two day/one night trip to York

    You will need to get comfortable with abandoning your stroller in public at times, particularly if you are visiting Disney where there are large stroller parking areas.  After you remove any valuables, you can be relatively confident that no one is going to steal your wheels.

    Handicap accessibility is a Godsend for stroller users, but you will not always find stroller ramps or elevators available.  There are times when you will need to carry a stroller down a flight of non-accessible stairs or take your stroller onto an escalator.  We had to take our stroller onto an escalator so many times in London and Barcelona where infrastructure pre-dates accessibility requirements that we occasionally would do it in the US as well.  If you look like you know what you are doing with a stroller, you rarely get stopped.

    We used a side-by-side double stroller for many years because we found the tandems too unwieldy.  It could be awkward getting through doors at times, we were very happy with our Baby Jogger.  I believe we only brought it on an airplane when we went to Disney World with children aged one and three.

    There are a few times where a stroller is not a travel essential with infants or toddlers.  Due to uneven pavement, we found that the stroller we brought to India was not necessary.  After we gate checked it, we did not get it back until we retrieved our baggage, so it was not overly useful in airports, and the pavement was so uneven that we could only use it in a mall.  Because it was more cumbersome than useful, we wished we had left it at home.  Also, Iceland was so remote that there were very few places other than airports and Kringlan, the country’s only mall, where you can actually use it. We were glad that we did not bring a stroller.  Also, if you are visiting family domestically and do not plan outdoor walks or trips to the shopping mall, a stroller may not be needed.

    Carriers

    I almost always traveled with my Beco carrier when I had an infant or toddler with me. Because it was soft and very packable, I usually tucked it into the front pocket of my carry on suitcase so that I could access it easily and use in the airport if necessary.  There are many times when a stroller is impractical or impossible to use due to uneven terrain, uneven pavement, stairs or a fussy baby.  My children all loved riding in the carrier even more than the stroller and found the carrier to be an ideal napping location.  My Beco carrier could be worn on my front or back, but my personal preference was to keep the baby in front of me.

    Carriers are helpful because they help distribute the baby’s weight on your shoulders and back and also allow you to be hands free.  Carriers are ideal in warmer weather or indoors because it is challenging to wear a coat, but I discovered on a windy day that a nursing cover can serve as great protection from the elements.  The downsides are that carrying can lead to back pain, and there is no easy storage for any baby gear.

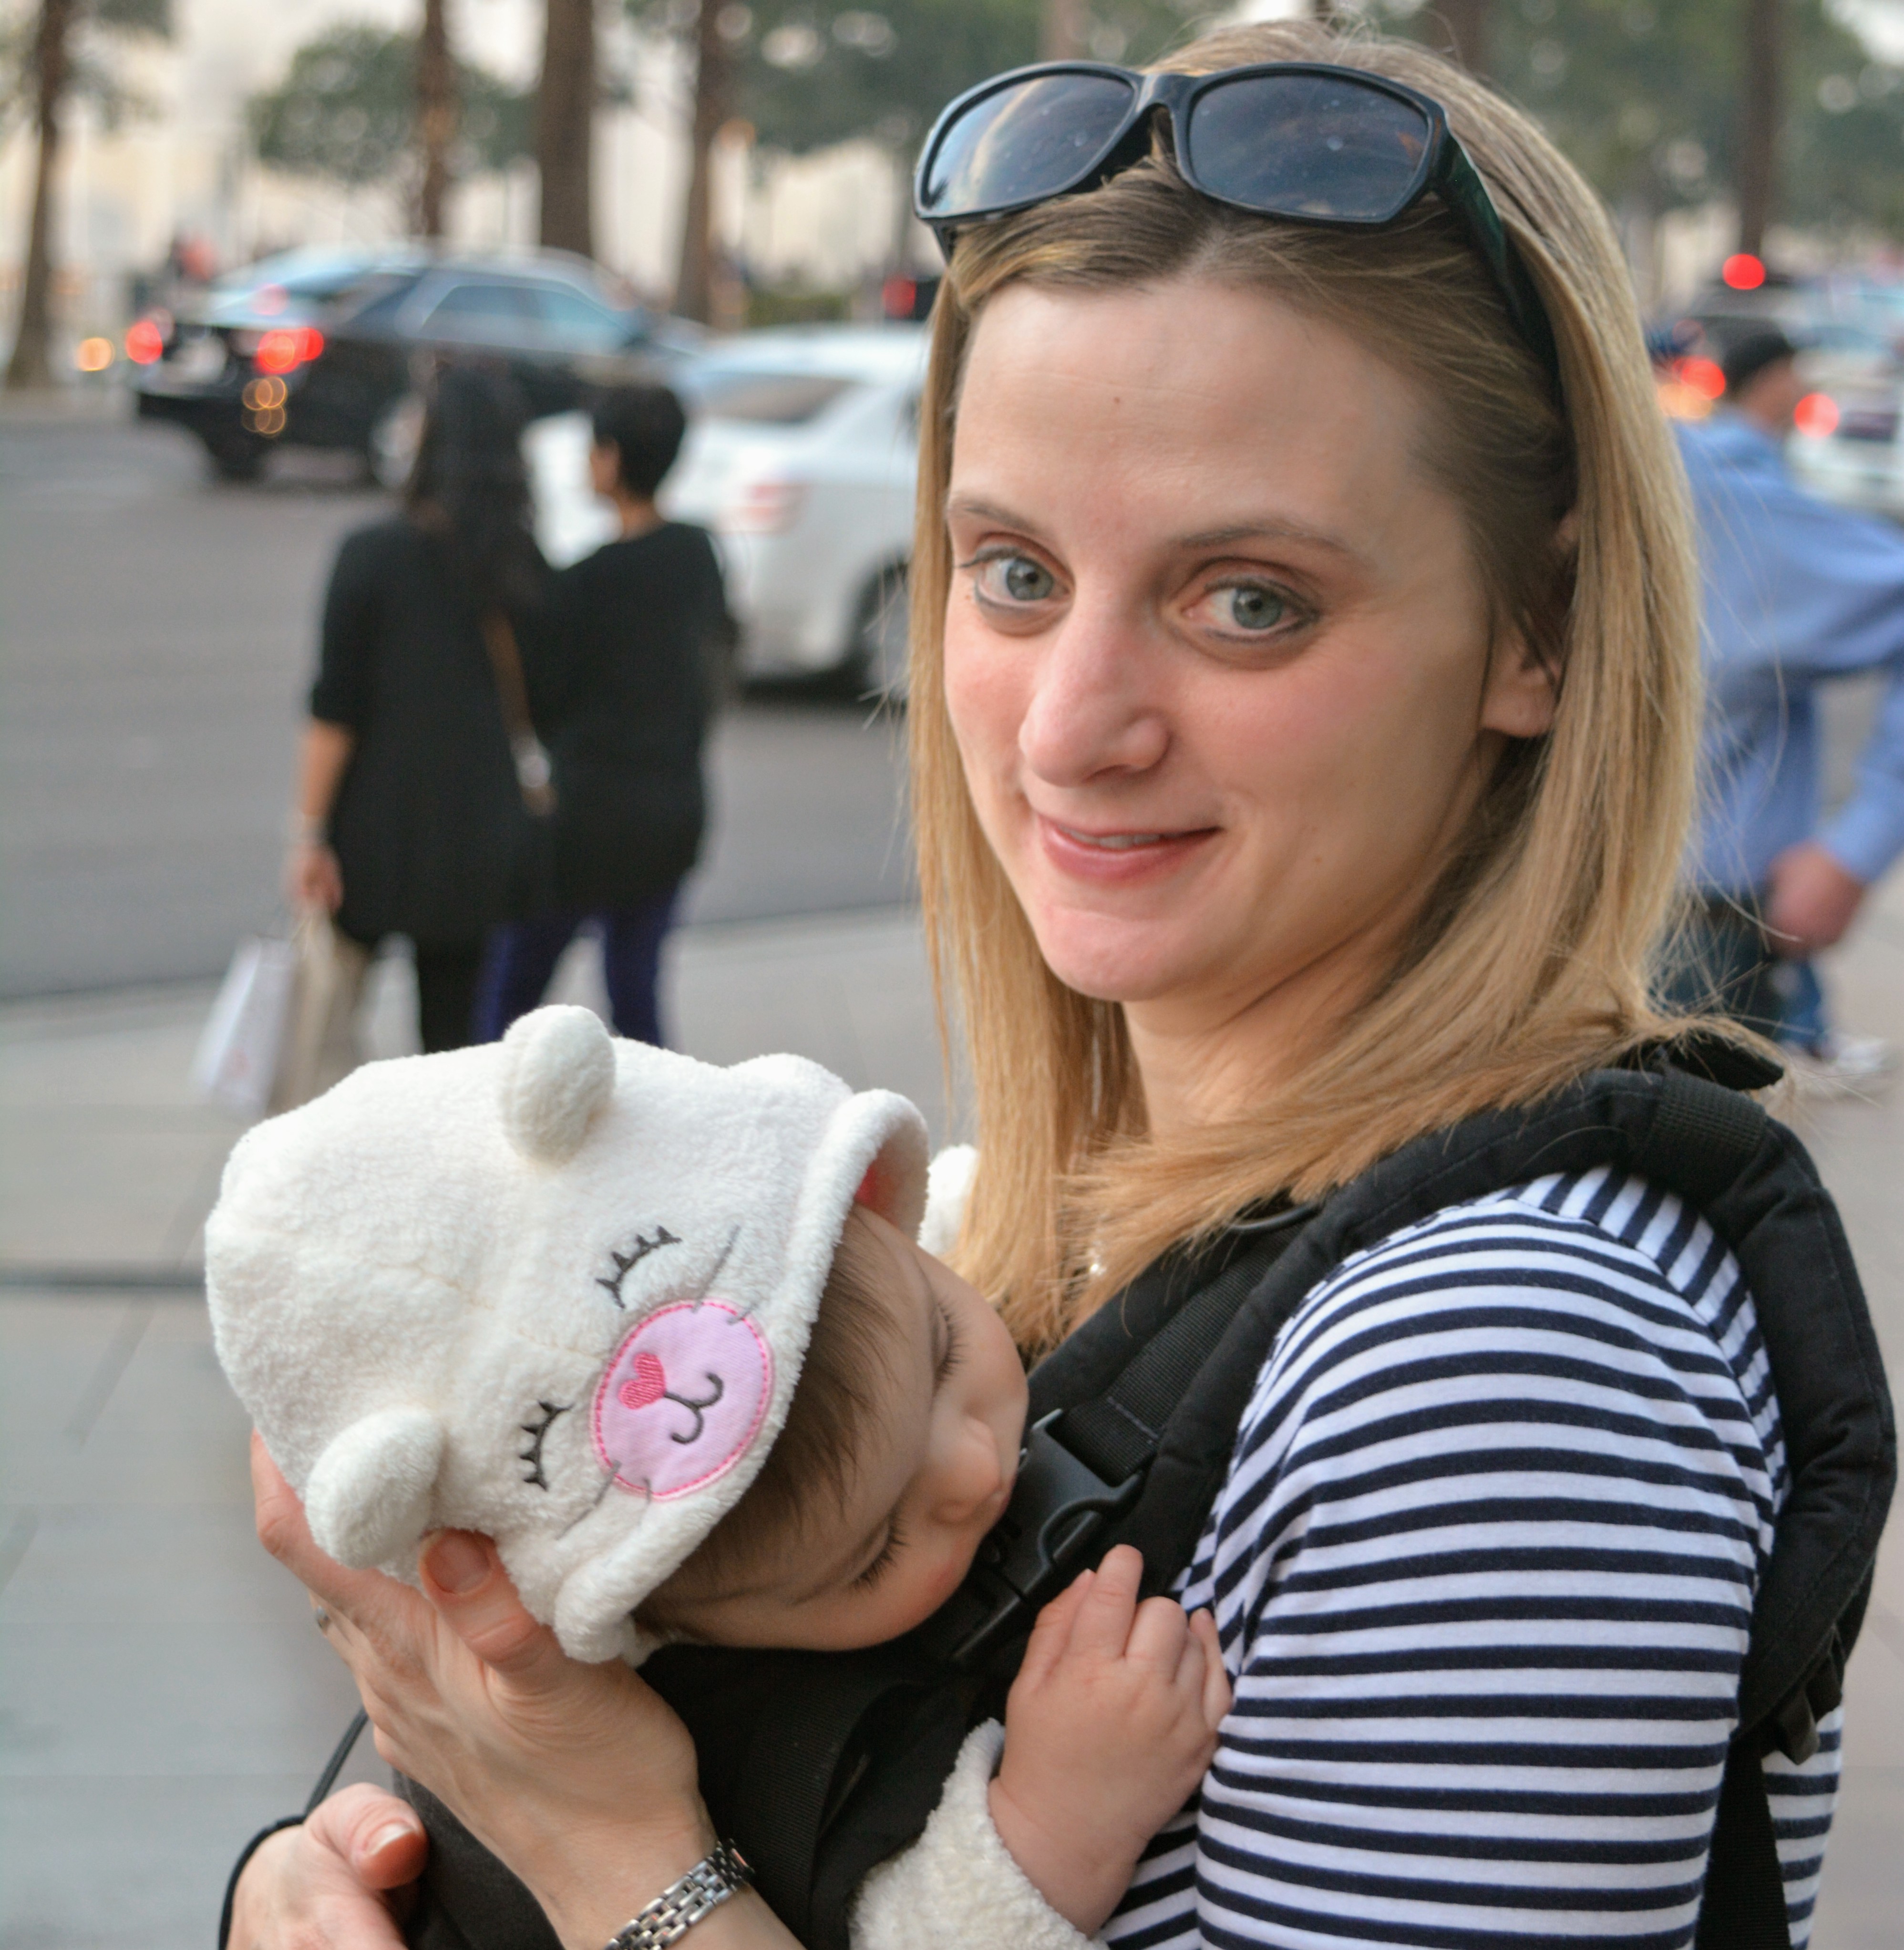
    Nap time in Las Vegas
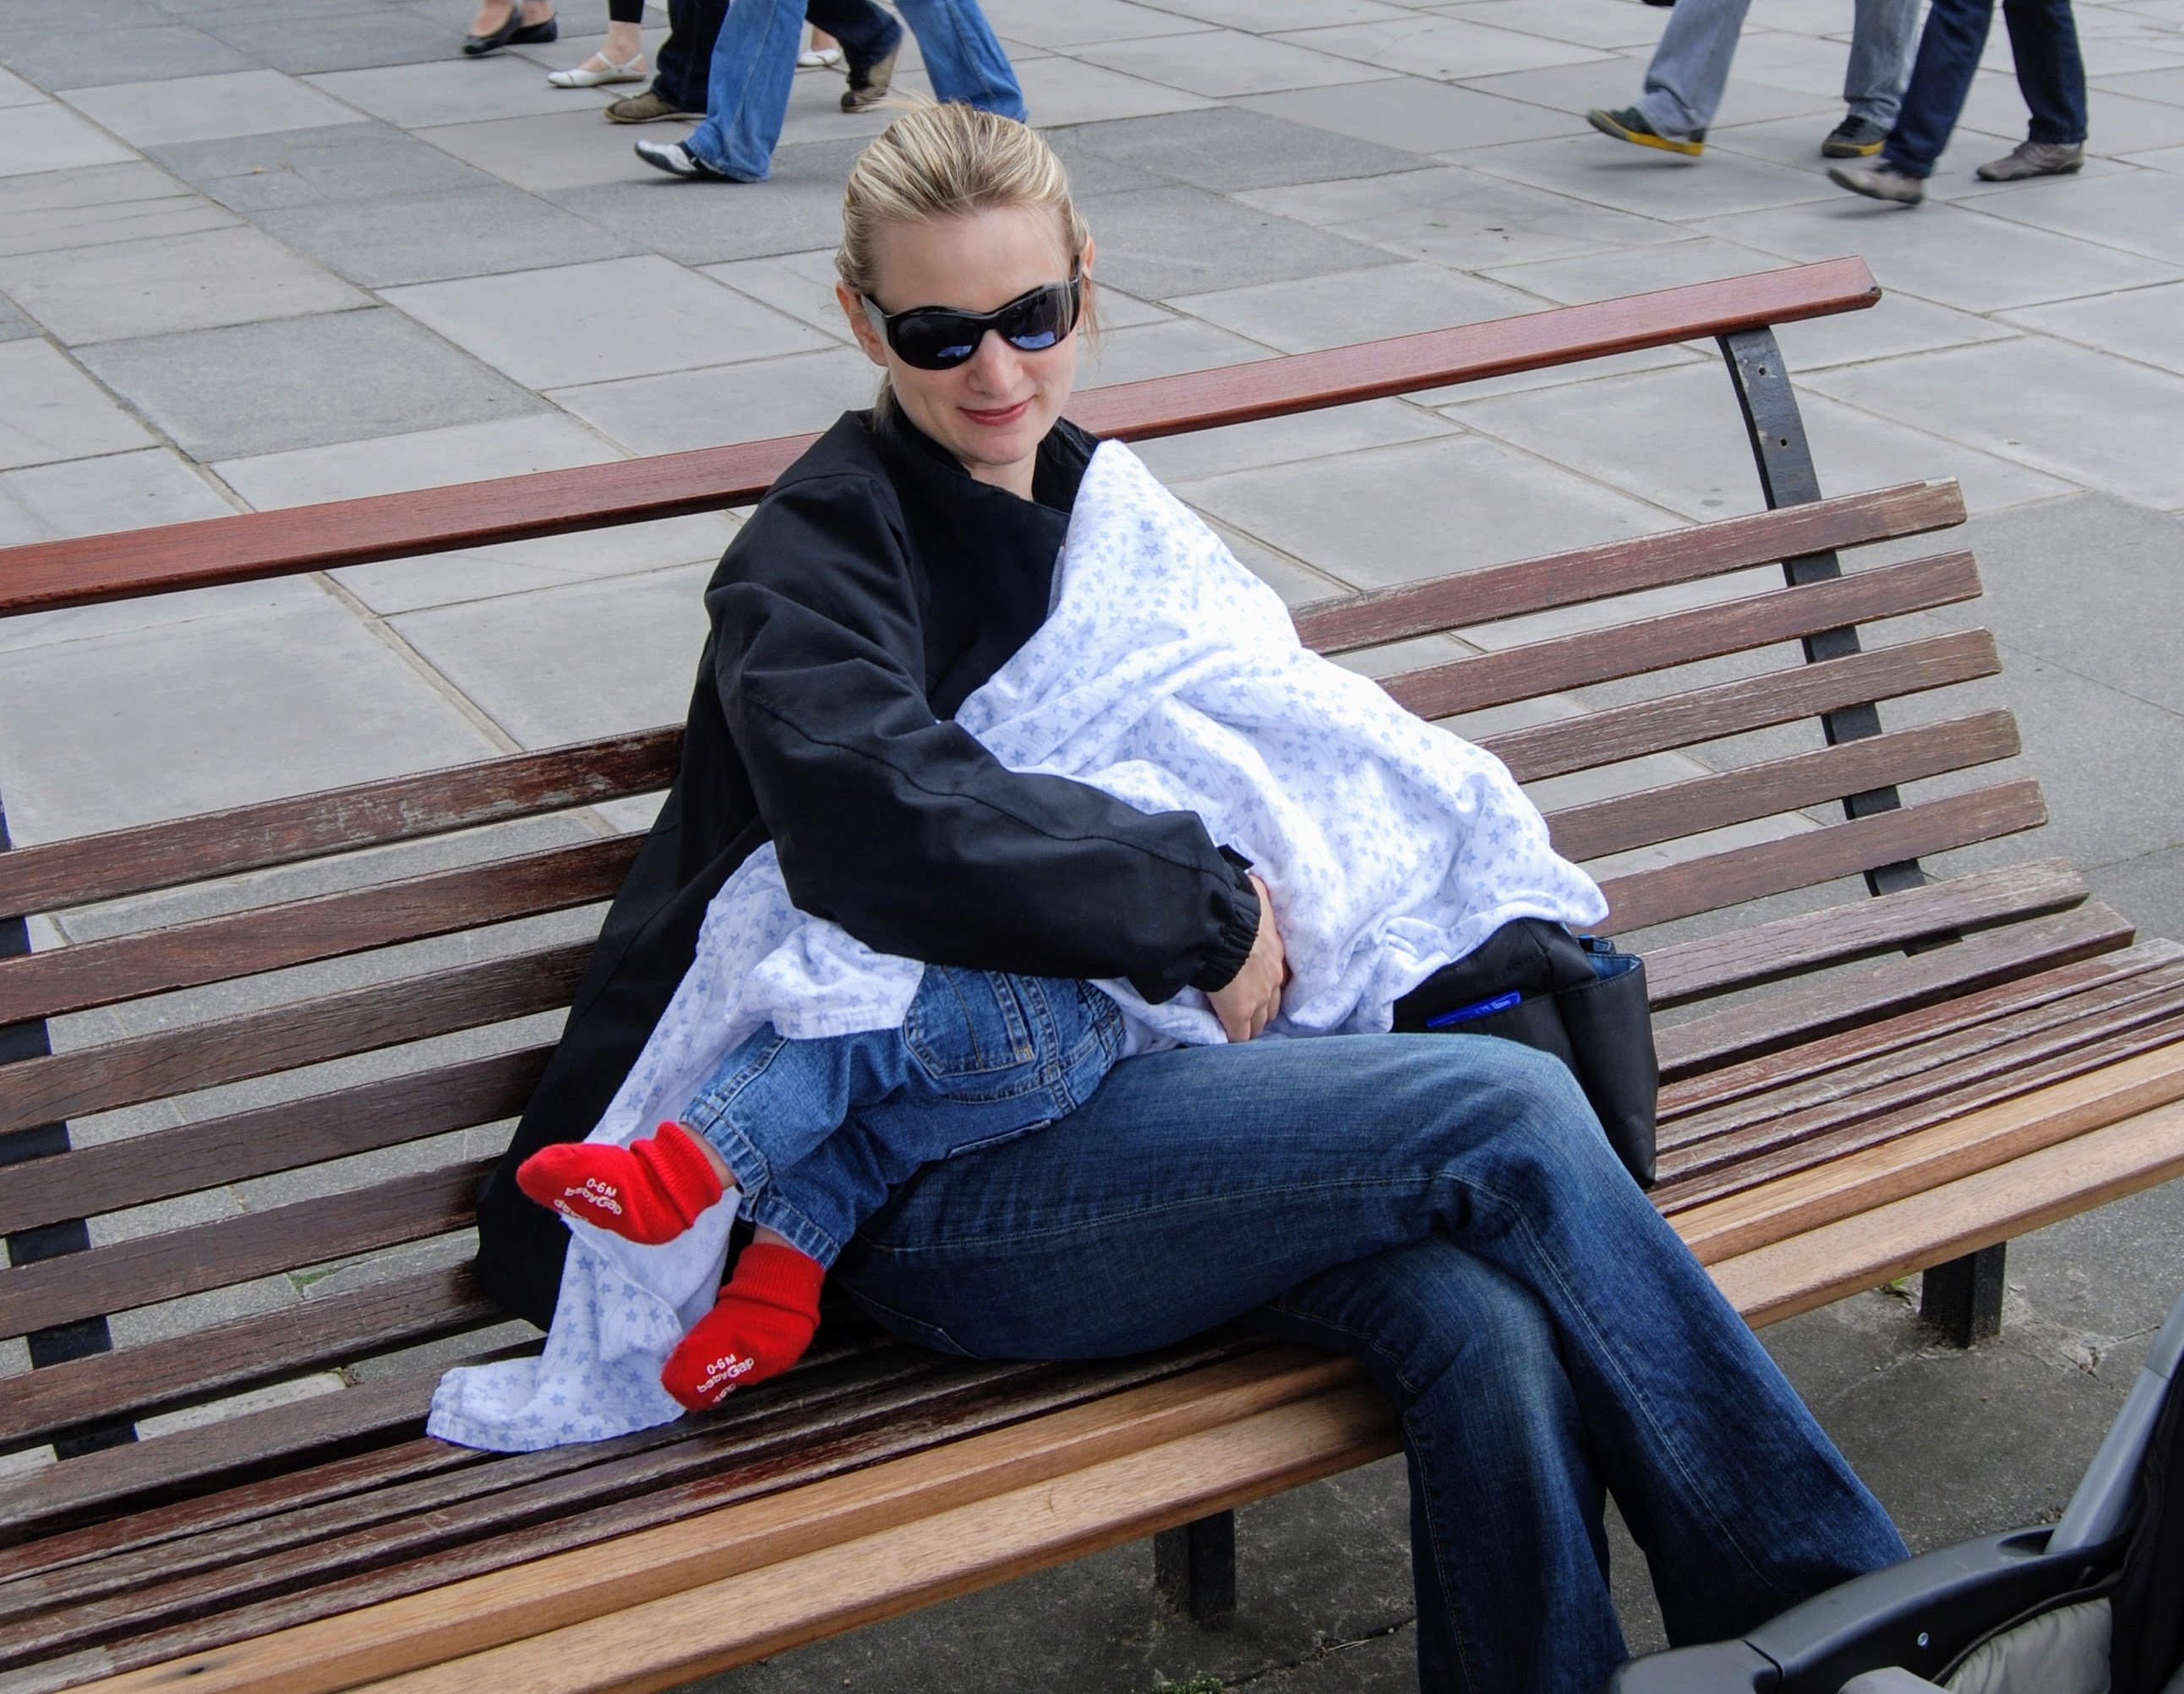
    Nursing cover windbreaker

    There are some important safety concerns related to carriers.  First, the carrier should position in a seated position rather than hanging so that their weight is on their bottom rather than crotch.  Also, the baby should not be worn too low.  If you are not able to kiss the baby’s forehead, you are wearing them too low.  If the baby falls asleep, you may need to support the baby’s head.


    Kiss test on a sleeping baby

    The baby’s body can block your peripheral vision downward, so you have to be careful to watch your step, particularly on an uneven walking surface.  I often find myself using the “extra care” while walking that I used when pregnant.  But, I’ve used the carrier on numerous hikes, walking in a rocky lava tube and exploring the cave behind a waterfall in Iceland.  For us, our carrier was a great way to keep a baby or toddler close, comfortable and happy when traveling.  The only reason we did not use them more or exclusively was that the stroller did a much better job of carrying stuff, and carrying for long periods of time did lead to fatigue and even pain, but for us, a carrier was definitely a travel essential.

    Check out our other Travel Tips for advice about traveling with kids.

  • Travel With Infants and Toddlers: Nursing and Pumping

    Travel With Infants and Toddlers: Nursing and Pumping

    Travel for a nursing mom – with or without her baby – has some extra challenges, but they are not insurmountable.  In fact, I found that an exclusively nursed infant is one of the easiest travel companions.

    Nursing Covers

    When my first son was born, nursing covers had not yet gained popularity. In fact, I did not know one person who owned one and had never seen one in use.  Whenever I needed to nurse him in public as an infant, I took him to the car or inquired about a private room.  It was truly a struggle to discretely cover a fidgety baby with a blanket that I was really nervous about our trip to London when he was four months old and exclusively nursed.  We got through the plane journey and our first few days traveling into Central London.  Even without comments, glares or stares, I was on edge every time I needed to feed him in public.

    Bank of the River Thames
    Riviera Maya

    Then, we traveled to Barcelona. Our hotel was just outside the main tourist area, so it was not possible to retreat to our room for feedings every few hours.  During a short rain shower, we ducked into a restaurant for some food, and I began feeding my son at our table.  An older gentleman leaving the restaurant stopped as he passed, picked up the blanket and gently gave my son a soft pat on his head.  My husband and I were shocked at first and then we realized that Spaniards are less conservative than Americans, and he was just interested in seeing the baby and completely unaffected by the fact that I was nursing.  That one incident made me more relaxed while traveling in Europe.

    Thankfully, nursing covers made their debut before my second son was born. They were not widely available as they are now, so I ordered my Bebe Au Lait cover through the specialty online store  and carried it with me just about every time I left the house with a nursing baby since it arrived in my mailbox.  While nursing in public with or without a cover is legal in most places, nursing covers make discreet public nursing possible just about anywhere.  And, the new nursing scarfs and nursing ponchos picked up right where covers left off and added important back coverage. 

    National Gallery in London


    With my nursing cover, I never had an issue nursing my second two children in public. I would nurse anytime I was sitting – on a plane, train or bus or at a restaurant or stop and find a convenient seat or bench (preferably with back support) whenever my baby needed to eat.  If we were out shopping, I would use a fitting room.  At first, I used to carry in a few items to make it look like I was planning to try on, but in later years, I would simply ask if I could nurse in a fitting room and was never once denied.

    While at a museum, I would find a spot where I could sit for about 15-20 minutes.  Sometimes I had to get creative if no benches were available and perch myself on the floor up against a wall or even on the stairs.  Although Pope Francis told mothers to nurse during Mass, I never felt comfortable nursing during a religious service, except during Evensong at the York Minster when our family was seated in a small box that no one else could see inside.

    Tate Modern

    It really is possible to find a place to nurse wherever you are while traveling.  For example, I’ve nursed at all of these places:

    Plane Travel

    I think nursing moms have the advantage when traveling by plane with their babies.  Nursing is not only a great way to calm a baby, but swallowing is a also a cure-all for most ear pressure or pain.  Anytime my baby became slightly cranky on a plane, I would nurse, and that almost always immediately pacified the baby.  Before my first flight with an infant, someone recommended an inflatable travel nursing pillow.  It was a total life-saver.   The pillow fit easily in carry-on luggage and was easy to inflate after boarding.  Our babies (and our arms) were so much more comfortable when we brought this with us.

    Pumping

    If you are a pumping mom or traveling without your baby, there may be challenges finding an appropriate place to pump while traveling. I have sat in the back seat pumping while covered with my nursing cover many times. Although restrooms are generally not what I would consider an appropriate place to pump, I have pumped in a restroom during a wedding reception at least three times.

    Also, cleaning pump parts and storing pumped milk are also considerations. It is helpful to carry dish washing liquid in travel containers and also to notify your hotel in advance that you are a nursing mom and need a refrigerator in your room. Many hotels have additional fees for refrigerators, but I have always received one without charge when requesting for the purpose of storing milk.

    Nancy had more experience than me as a pumping mom and has this advice:

    “I exclusively pumped for four months with my oldest and six months with my second. As a result, I have way more pumping experience than I care to admit. I have pumped on numerous flights and on the Amtrak, have pumped in a disgusting janitor’s bathroom in Manhattan…. My advice to you is to approach it as you would nursing – if would you nurse there, then go ahead and pump.
    I usually travel with multiple sets of pumping parts – at least two pairs. The nice thing is that if I end up needing to pump 3-4 times because I’m away all day, I can just split up the pump parts and pump one side at a time for a total of four pump sessions. I also bring a stack of milk storage containers, a thin sharpie to use for labeling, and many, many gallon size ziplock bags. For transportation, I like using a medium size soft sided cooler which holds the milk, the pump parts (stored in gallon sized zip locks and clearly labeled as clean or dirty), and a few ice packs. I also have my pump (including AC adaptor), cleaning brush and soap, and milk bags in my carry on. When I’m ready to pump, I cover myself with a jacket or blanket and pump away. The times I have pumped on the plane or train I have been lucky to have the row to myself, or at least an empty middle seat, so I just turn my back to the other person and pump quietly. No one has ever said anything or even shown any signs of being aware that I was pumping.
    Once I’m done, I simply store the dirty parts in a ziplock bag to wash when I get to my destination. Most hotels now come equipped with mini fridges, so if I am away for 1-2 nights, I just lay it flat in the fridge, I don’t worry about it. I just store in the fridge, along with the ice packs, until I’m ready to go. On the day of my trip home, I fill gallon size ziplock bag with ice from the hotel’s ice machine, and securely pack my milk into the cooler with said bags of ice! I’ve never had any trouble traveling with the milk.  The one time I wasn’t allowed to bring the gallon size bags of ice across security, I simply asked a restaurant to give me ice when I got through security. Upon arrival home, I put the milk directly into the fridge and fed my baby from that milk first. If the milk froze or developed some ice crystals – even better, as that gave me less to worry about in terms of developing freshness. I always fed baby first from the milk pumped while traveling, though, just to be sure none of it went to waste!”

    Luckily, nursing rooms (aka “mother’s rooms”) are becoming common in airports.  My friend Kate shared an amazing US airport nursing room locator.    The Louis Armstrong New Orleans Airport offers mother’s rooms on each concourse, including this one that features comfy chairs, a power strip and a diaper changing station.  Traveling for a nursing mothers does require advance planning, but the challenges are not insurmountable, and availability of these types of facilities is making it easier.

    Mother’s Room in Louis Armstrong International Airport.

    Check out our other Travel Tips for advice about traveling with kids.

  • Visiting Maui With Kids

    Visiting Maui With Kids

    In September 2013, my husband, my four year old, and my in-laws took a trip to Maui. Our motivation for traveling to Maui was simple – his parents had taken him and his younger brother to all lower 48 states together before my husband started professional school. My husband and I had traveled to Hawaii for our honeymoon years ago and had visited both the Big Island and Oahu, but we had never been to Maui, so we decided to travel together to Maui for his mom’s upcoming milestone birthday. Visiting Maui with kids is truly an amazing experience and we were happy to work in a number of experiences, including exploring Kaanapali, Paia, and the Road to Hana with kids.

    Shortly after we decided to travel to Maui, my husband learned that the Maui Marathon was scheduled to take place while we were there and decided to enter. The Marathon became a good home base for planning our trip. Since we had a good 10 days in Hawaii, we decided to spend a few nights at the Maui Westin, which was sponsoring the Marathon, before moving on to a vacation rental we secured via Homeaway.

    The Westin Maui Ka’anapali:

    The Westin is located on Ka’anapali Beach in Lahaina. It’s a wonderful resort spot for tourists and if you find that off putting, rest assured, it’s nothing like Waikiki. It’s a much slower paced vacation town than Waikiki and at no time did we feel overwhelmed or crowded.

    The Westin’s facilities were amazing – they had numerous pools (water slide included!), and it was a great home base for the three things we had planned in Ka’anapali – the Maui Marathon, a submarine ride on the Atlantis, and my son’s first real introduction to the ocean.

    Because we were there in late September, the resort wasn’t busy and the beach was relatively deserted. We had no trouble doing whatever we wanted to do – swim in the pool, eat at the restaurant, fly kites on the beach.

    While we were there, the hotel was in the middle of major renovations and so, while our room was outdated, it is my understanding that all of the rooms were part of the renovation.  And, although the room was more worn down that I would have liked, it was perfectly serviceable, and the remaining facilities at the hotel were so outstanding that it did not diminish our visit.

    The Maui Marathon

    The main event of our stay in Ka’anapali was the Maui Marathon, which was exceedingly well organized. My husband had no issue getting his race bib the night before and the opening festivities, which included their own Hawaiian flair.

    One thing we definitely noticed about the Maui Marathon was that the race truly embodied not only the island spirit but also included personalized flair that I certainly have never experienced in any other run we have participated in. Each runner was identified by name and hometown as they crossed the finish line, and when my young son decided to run across the finish line with his dad, the announcer actually added in the fact that my husband was being joined by his young son in the race to the finish! In any other race, this likely would have caused a security uproar – but the Maui Marathon took it in stride and seemed to welcome and enjoy the break from protocol.


    celebrating the marathon finish @ the Maui Brewing Company

    Atlantis Adventures

    Our next big adventure after the Marathon was  a submarine ride on the Atlantis. I’ll admit to thinking this was relatively silly when booking online, but a co-worker of mine highly recommended it as she had done this a handful of times with her young child. Surprisingly, this turned out to be an adventure that the adults enjoyed even more than the kid!

    The Atlantis begins with a boat ride out to the submarine, after which you climb down  the ladder into the submarine. Per the website, children must be at least 36 inches and able to navigate the ladder themselves, so while this is something that worked great for my 4 year old, this would likely not work with a child under 3 years of age.

    Once inside the submarine, a digital screen showed the depth of the submarine in relation to sea level.

    As we descended, there wasn’t much to see initially, but as we got closer to sea level, we saw schools of swimming fish before coming to the Carthaginian.  Per the website,

    Atlantis embarked on creating an artificial reef in December 2005 by sinking the aged Carthaginian replica of a 19th century supply vessel. The sunken Carthaginian, which needed major repairs and would have been scuttled at sea otherwise, is anchored to a sandy bottom in 95 feet of water that is devoid of coral reef. The resulting artificial reef will develop into a self-sustaining habitat for indigenous fish, coral and other marine life.

    Our group of five thoroughly enjoyed the submarine ride and would highly recommend it. The adventure lasts just under two hours and reservations are highly recommended. We booked ahead of time online and were able to find coupons that ended up allowing my toddler to participate for free. I believe if you were to attempt to book onsite, not only might you run into reservation/space issues, but you would also be paying full price!

    Paia:

    After a few nights at the Westin, we moved on to our vacation house in Paia, a Hawaiian Plantation Village on Maui’s northern coast. Here, we stayed for 4-5 nights and were able to do small day trips.

    Makena Beach Kayaking/Paddle Boarding:

    My hands down favorite activity while in Maui was when we rented kayaks/paddle boards and went snorkeling with my son. Unfortunately, the resort that we rented the paddle boards from, the Makena Beach & Golf Resort, closed on July 1, 2016, but I would highly recommend looking into paddle boarding or kayaking during your stay in Maui. There are a number of different outfitters that will plan kayaking / snorkeling / paddle boarding adventures for your family and having done this now in both Maui and Alaska, I can say that with a knowledgeable guide, this can be fun for children as young as 3 years old! At age 4, I felt comfortable with my son kayaking and snorkeling in calm water with a life vest on. Although he did not paddle board in Maui, I think he will be ready to do so when we travel to Costa Rica next year!

    Road to Hana:

    Another day trip involved driving the famous Road to Hana. Although many websites suggested taking a tour instead of attempting to drive it ourselves, we decided to just drive in our rental car using one of the many guided CD’s available at grocery stores in the area. As we were staying in Paia, we began our drive to Hana by picking up a picnic lunch before embarking on the full day long drive. The drive itself was interesting, but it was also extremely winding and, as someone who is not a fan of long car trips, it ended up being more than I was really interested in. Although we saw interesting things like a poi (Hawaiian for taro) plantation, enjoyed shaved ice, and made friends with the numerous stray but friendly cats who came out to say hello at the various stops, this is not something I would willingly do again with small children. There are also some necessary precautions that you must make, including ensuring that you have a full tank before leaving Paia because there are no gas stations between Paia and Hana!

    One surprising and necessary stop on the Road to Hana was the Garden of Eden Arboretum.

    Not only did the Garden of Eden provide a necessary break from the long car ride, but it also was a nice provided some nice views of the ocean!

    My favorite thing to do in Paia, however, was to just enjoy the beautiful weather and location. Our house was conveniently located only one block from the ocean. A short 5 minute walk and we were in paradise.

    The house was well equipped with sand buckets, boogie boards, an outdoor shower, and my personal favorite: a hammock.

    The house was within walking distance to the town of Paia so we enjoyed being able to just walk into town for dinner. The town has a number of small artsy stores, a wonderful little hippie grocery store, and little walks that take you to spectacular ocean views.

    Although the house no longer appears available for rent, I highly recommend this off-the-beaten-path kind of Hawaiian vacation stay. Although the resorts are lovely, they are also difficult places to enjoy things like rocking away in a hammock for a few hours. It’s also much more comfortable for a traveling family to have space to spread out, instead of being cooped up in a hotel room!

    To this day, Hawaii remains one of my favorite vacation destinations.  I was thrilled to share Hawaii with my young son, but also experience Maui for the very first time together as a family of three. Although it has now been four years since our trip to Maui, my son still has fond memories of snorkeling together and kayaking in the ocean. When asked just this week, during his first week of third grade, where he would like to visit, his response was “Hawaii.” It’s moments like these when I am really thankful that we have been able to travel with him and take him to the places we have been together.

    Pin it to Pinterest:

  • Visiting Fallingwater With Kids

    Visiting Fallingwater With Kids

    Visiting Fallingwater was a truly magical experience for our family.  Right before my second son turned six, he brought home a children’s book of architectural masterpieces from his school library. Together, we closely examined every page.  He was excited to find a few landmarks that he had already seen, including the Golden Gate Bridge, St. Paul’s Cathedral and Willis Tower.  However, he was absolutely fascinated by Frank Lloyd Wright’s Fallingwater.  Although he had no idea where exactly it was located, he looked at me with wide eyes and said, “Mommy, can you take me there?”

    I told him that I would love to take him to see this house cantilevered over a waterfall that mesmerized him. Fallingwater is about a three hour drive from our home in Cleveland and near my college roommate in Pittsburgh.  Also, my older son had suggested trips to the Grand Canyon and London the previous year, which we somewhat coincidentally ended up taking, so I was thrilled that he found a destination to suggest for us to visit and was excited to visit Fallingwater with kids.

    Fallingwater With Kids – Six and Up Only 

    We consulted Fallingwater’s website and learned that this was the first historic site that we had considered visiting where children under age six are simply not welcome. Fallingwater’s interior has been preserved to its original décor, and visitors actually walk through the narrow hallways and into each room rather than view from behind a rope.  Children under six are simply a risk for disturbing or damaging the interior design.  There are not even exceptions for babies in carriers.  My son said, “That’s ok, we can just wait and go after I turn six next month.”

    I sent a text to my college roommate, with whom I had toured Fallingwater the weekend after 9/11.  She had also been waiting for her daughter to turn six so they could go on a tour. We set aside a Friday in June and booked a Guided House Tour.  We were also traveling with our one year old, who was not permitted on the tour, but my husband volunteered to enter on a grounds pass and explore the property (and family room) with her while we took the tour.

    The grounds were beautiful. My daughter appears to be holding a brown butterfly in this picture.

    Visiting Fallingwater With Kids

    Tickets for the Guided House Tour (currently $30 for adults, $18 for children six and up) are available online, and advanced purchase is highly encouraged and often necessary in the summer.  Photography is not permitted on this two-hour tour, which included the main house, the guest house, the pool and an informational video.

    The more expensive In Depth Tour ($80) offers smaller tour groups and permits still photography for personal use. Children must be at least nine years old to participate and do not receive a discounted rate.  This tour often sells out weeks in advance.  There is also a Children’s Tour listed on the website with noted availability on select days, but you cannot book through the website.

    Note that Fallingwater is closed on Wednesdays.

    Fallingwater – Kid Facts

    Frank Lloyd Wright met the Kaufmann family when he briefly served as an architecture teacher to Edgar Kaufmann Jr. Edgar Jr. convinced his father, Edgar Sr., the owner of Kaufmann’s Department Store, to have Wright design a weekend home on property they owned in Bear Run, Pennsylvania.  Edgar Sr. wanted the home to have a view of the waterfall on the property.  Instead, Wright designed a home that was partially built into the waterfall.  Edgar Sr., his wife, Liliane, and Edgar Jr. used Fallingwater as a weekend home from 1937 until 1963.  Liliane and Edgar Sr. died in 1952 and 1955, respectively, and Edgar Jr. donated Fallingwater and the surrounding property to the Western Pennsylvania Conservancy.

    Place to See Before You Die?

    In 2008, Smithsonian included Fallingwater as one of four Triumphs of Vision on its list of 28 Places to See Before You Die.  While I full-heartedly believe that Frank Lloyd Wright was an architectural genius and that the concept of a house built into a waterfall is pretty exceptional, I am really not so sure that Fallingwater should be in the same category as other architectural masterpieces on the list like the Taj Mahal, the Louvre, the Great Wall of China, Ankor Wat or Macchu Pichu. It was, after all, a summer home for a wealthy family and an example of form over function. It was so impractical for its intended use that it was donated 25 years after it was constructed and then had to be opened to tours in order to cover the property’s exorbitant maintenance costs.

    Is Fallingwater Kid Worthy?

    While I may question some of Fallingwater’s accolades, it was a great experience for my college roommate, our two six year olds and my eight year old. The guides were extremely knowledgeable and held the interest of the kids.  It was the architectural masterpiece my son picked out of the book, and he had a permanent grin throughout the tour. Over a year later, he still remembers the patios, the stone floor in the living room and the staircase leading to the waterfall.  Our visit to Fallingwater with kids was a huge hit.  Now, my architecture-loving son wants to see the Eiffel Tower, and I cannot wait to take him.  (Update:  I did take him to the Eiffel Tower in July 2018, and it really was a dream come true.)

    Every so often, we encounter a place that is so fabulous for those traveling with kids that it is worthy of being featured on its own. For more amazing locations, please check out our other Spotlight features!

    Pin it to Pinterest:

  • Visiting Thermal Pools in Iceland

    Visiting Thermal Pools in Iceland

    Bathing outdoors in volcanically heated pools has been a tradition since Viking times.  Thermal pools heated to about 100 degrees Fahrenheit are available all over the country and relatively inexpensive.  Because the water is so warm, Icelanders enjoy thermal pools all year around.  Geothermal pools in Iceland are significantly less chlorinated than pools in the US because of strict hygiene guidelines and the water is completely replaced about every other day.  Thermal pools in Iceland were definitely a highlight of our trip.

    We loved visiting thermal pools around the country.  Our first thermal pool experience was in Eskifjörður on a 50 degree wet and windy morning.  It was definitely an experience we will never forget and would also definitely do again. We tried all the water slides and the hot tubs (aka hot pots) of varying temperatures.  We had this great idea to break up the journey from Akureyri to Reykjavik by stopping at a thermal pool.  Unfortunately, it turned out that the Laugarbakki pool was “just a hot tub at the moment.”  It would have been helpful to have consulted this listing of Iceland’s pools in advance.

    Thermal Pool Necessities

    You can rent a towel and even a suit at thermal pools, but the cost of rental is equivalent to the cost of admission.  Despite the cost, our preference is always not to rent swimwear, so we each brought one suit and also packed small beach towels to use at the pools.  As a an additional benefit, they also come in handy to dry off on rainy days.

    Flip flops and bathing suit covers are not used in thermal pools.  Also note that use of cell phones and cameras is not allowed.  Thus, I have no pictures of our four visits to public thermal pools.

    Thermal Pool Etiquette

    There is strictly-adhered to pool etiquette regarding hygiene and dry floors.  After paying our entrance fee (which was generally about $20 for our entire family), we received directions on how the lockers work.  Then, we took off our shoes and socks off outside the appropriate locker rooms and left them on the shoe racks or carried them with us in one of the provided bags.   In the locker rooms, we would undress completely and put everything in the locker except our towels and suits.  Then, we would leave the towels on the towel racks by the showers and carry our suits into the shower and hang it on the faucet.  A soap/shampoo combo is provided in the shower area.  Notorious signs identifying “problem areas” to pay attention to are visible in the shower areas of all public pools.  After washing, we would put our suits on and finish rinsing off.  I would then tie up my long hair into a ponytail or bun before heading to the pool and pick up provided arm bands for my daughter to wear.  These were generally available near the pool entrance.

    We would shower again after swimming and make sure to towel dry our hair before entering the changing room.  It is imperative that you do not track water from the shower area into the changing room.  Luckily, most pools have bathrooms in the shower area.  Most pools have centrifugal dryers next to the sinks to spin excess water off of wet suits.  Put one suit in, close the lid and hold it closed for about 10 seconds while the dryer spins.

    Preparing Children for Thermal Pools

    We explained to our boys that showering in a communal shower before swimming was both customary and required at Iceland’s pools well in advance, and it was no issue.  Young children can go into locker rooms with either parent.  Because both my husband and I were always there, the boys went with him, and I took our daughter.  Our toddler needed no forewarning and was completely unaffected about the communal showers, but adding a toddler to the changing room regimen did complicate the process for me on our first visit.

    Blue Lagoon

    The best thermal pool in Iceland is the Blue Lagoon, which is the most popular tourist destination in Iceland and costs significantly more than the public thermal pools and also has slightly different rules.  At check in, we each received a wrist band.  It was important to make sure this did not come off while we were bathing because it can be used to make food and beverage purchases and was also needed to access our lockers.  Several times, guards notified me that my band needed to be tightened.

    Showering naked before bathing (people do not really “swim” in the Blue Lagoon) is required, but there are private shower stalls.  Because of the silica and sulfur in the water, it was important to leave conditioner in our hair while we were in the Blue Lagoon.  Also, there are no towel racks inside the locker rooms; instead, we brought our towel or bathrobe with us and hung it on the hooks outside.  Flip flops are permitted, and children under age eight must wear arm bands.

    Use of cameras and phones remain off limits in the changing rooms, but they are most definitely permitted in the Lagoon itself.  In fact, we saw more cameras in the Blue Lagoon than anywhere else in Iceland.  We used our son’s waterproof camera rather than our phones, but most people had their phones with them in the water.  Waterproof cases are highly recommended and not so surprisingly are rather expensive to purchase on site.

    After we were done bathing, we showered and washed our hair again.  There is a special area in the locker room for drying after your shower that offers Blue Lagoon lotion.

    There are so many opportunities to visit thermal pools in Iceland, and we’re sad that we missed the Secret Lagoon while touring the Golden Circle, but it’s high on our list the next time we visit Iceland. Planning a family trip to Iceland?  Check out our listing of all Iceland posts.

    Pin it to Pinterest:

  • Travel Tips: International Travel With Kids

    Travel Tips: International Travel With Kids

    Passports, visas and immunizations are important considerations when traveling internationally with children.  The U.S. Department of State has a helpful tool that allows visitors to find passport, visa and immunization requirements for specific destinations.  It is necessary to plan in advance to make sure that you have everything taken care of before your trip.

    Passports for Kids

    It used to be possible for U.S. citizens to travel to a number of countries with only their birth certificate or for minors to travel on their parent’s passport when flying abroad, but this is no longer possible.  U.S. citizens can generally only travel within the U.S., to U.S. territories, to Canada or Mexico in limited circumstances or on certain closed loop cruises without a passport.

    All U.S. citizen children traveling out of the country by air must have a valid passport that complies with the requirements of their destination and where necessary, a visa. Note that many countries require not only a valid passport at the time of entry but also for the duration of your stay or some time period afterwards.  It is recommended that your passport will not expire for at least six months after your intended stay.  When applying for a new passport, you should aim for it to arrive at least several weeks before traveling.

    The U.S. Department of State publishes current processing times for passport applications. In our experience, children’s passports usually come more quickly than predicted, but you do not want to take the risk of not having your passport in time for travel.  Expedited processing is available at an additional fee.

    The passport application for children under 16 requires completed forms (available online in form filler and PDF formats), original/certified U.S. citizenship evidence (e.g. birth certificate), a photocopy for application, proof of parental relationship (e.g. birth certificate), form of identification for parents and photocopy for application, appropriate photograph of the applicant and the required fees. Make sure that you have completed (but unsigned) forms, all documentation, pictures and required copies before you go to the post office or library that you have confirmed processes passports.

    If you plan to apply for a passport for your child as soon as possible after birth, you need to inform the hospital to expedite the birth certificate. Birth certificates can take a long time to process, and even with expedited status and multiple phone calls, my daughter’s took 30 days to be issued.  My husband got certified copies on the day the birth certificate was issued, and we applied for her passport the next day so that we could travel to Mexico before the end of my 12 week maternity leave.

    If completing the forms and collecting the documentation was not enough of a hurdle, passport photos can also be a bit of a hurdle, especially for a baby. You can get passport photos at Costco, Walgreens, FedEx and even some Post Offices. The picture needs to comply with stringent guidelines. Check the picture yourself before going to the Post Office.  We once had a professional picture rejected and had to run to the closest CVS to the post office to have it retaken before submitting the application.

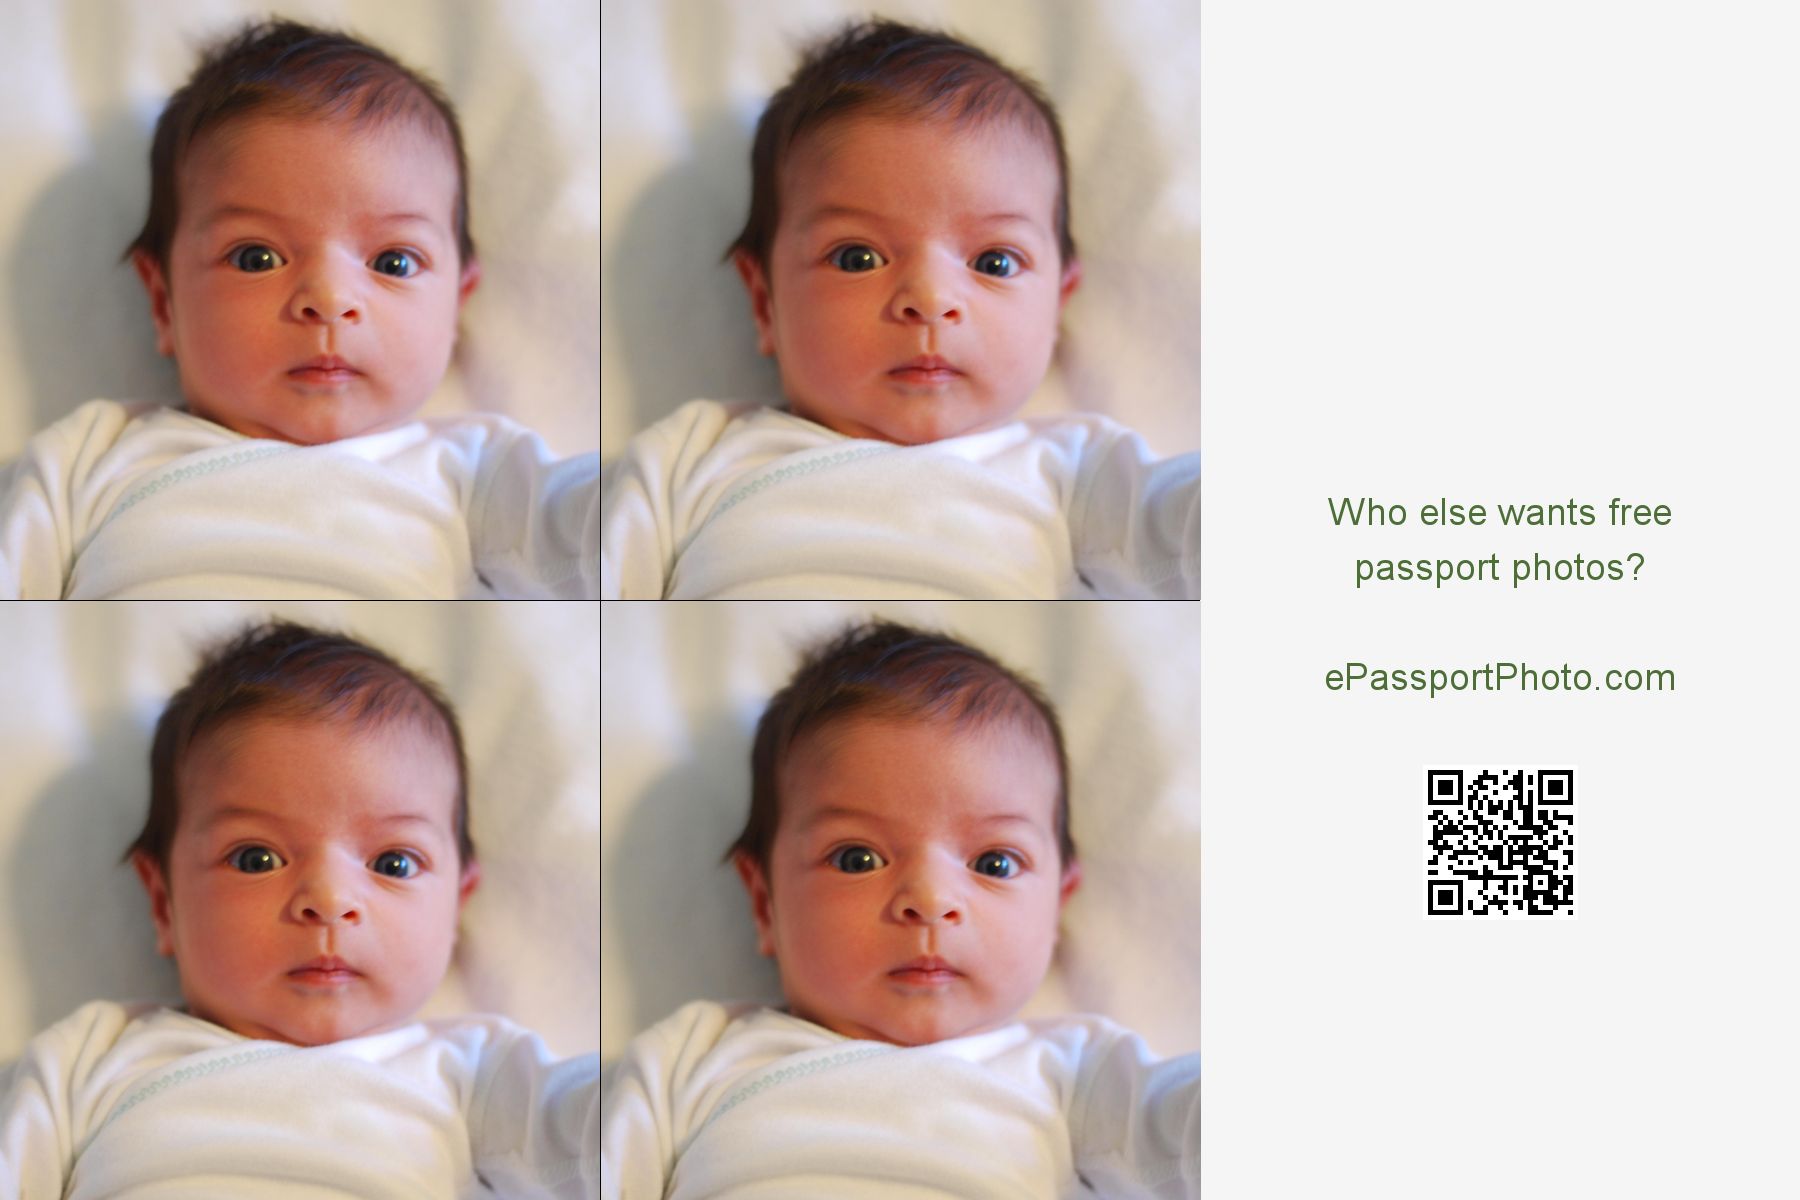
    Because all of our children have traveled abroad before five months, they have needed passport photos at very young ages. While there is some leniency with infants’ photos, it can be extremely challenging to wake an infant to have a professional photo taken.  After several failed attempts to get a professional picture of my daughter who was only a few weeks old, I took the picture myself with her sitting on a bouncy seat covered in a white sheet and then edited the picture using epassportphoto.com to make sure it complied with the size guidelines.  I took over 100 shots and even enlisted the help of a visiting friend, but the resulting picture had my newborn daughter’s eyes open and looking at the camera, printing at Target cost me $.20 and the outtakes were fun.

    To apply for a child’s passport, both parents and the child must go to the post office together with all completed forms (available online), required documentation and two copies of the child’s passport photo. Many post offices post the times that they handle passport applications.  These times are likely during mid-day during the week, and we have found that information on the website may not be correct, but it is also very challenging or not possible to call in advance to verify.  It’s ideal if you can go to the Post Office and verify passport application hours before you are actually near any sort of deadline, but we are typically not that organized.

    The good news about passports is that they are valid for five years of unlimited international travel for children under 16 and for ten years for all applicants over 16.

    Visas for Kids

    If a visa is required for your destination, you need to inquire into specific visa rules and the various lengths of validity. Typically, the longer the duration of validity, the more expensive the visa.  We traveled on 60-day e-tourist visas for India but had to apply during a specific window and complete final processing at the Bangalore Airport upon arrival.  It was a bit of an added hassle to our middle of the night arrival, but far less expensive than the one-year visa.  This option made sense for us because we did not expect a return trip in the near future.

    While visas add an extra paperwork and fees into international travel plans to certain destinations, it is far easier for US citizens to obtain visas to visit other countries than it is for non-US citizens to get visas to travel to the US.

    Immunizations for Kids

    In addition to identifying required immunizations by destination, the Center for Disease Control suggests necessary immunizations and travel considerations. Your pediatrician may be able to administer these immunizations.  We have found that our insurance generally covers the cost of non-standard immunizations such as Hepatitis A and typhoid, but it is important to call and inquire as soon as you know your travel plans because these immunizations might not be regularly stocked.  Our pediatrician was willing to write required prescriptions for our India trip but had only one dose of the typhoid vaccine available and was unable to secure additional dosages for our other children. We were glad we asked, but it is still necessary to visit a travel doctor for prescriptions and immunizations before travel.  There are not a lot of options in our area and most have very limited hours, so you have to schedule an appointment well in advance of your travel, if needed.

    Additional Considerations for International Travel With Kids

    It is important to travel with photocopies of passports and visas for your entire family.  If one ever goes missing, at least you will have your information.  If a child is traveling internationally with only one parent, the traveling parent needs to bring a copy of a Minor Travel Consent Letter signed by the non-traveling parent.

    When traveling abroad with kids, it’s important to find the best travel products that work for your family, including strollers, carriers, car seats and baby monitors.

    While paperwork is never fun, I promise it will be worth it when you get to your international destination!

    Check out our other Travel Tips for advice about traveling with kids.

  • Travel Tips: Traveling with Kids and Car Seats

    When traveling with kids car seats are a necessary evil – you have to keep your kids safe when coming and going, but they’re heavy and cumbersome and aren’t always the most pleasant thing to try and install after a long day of travel.

    Full disclosure: I am a bit of a car seat junkie and have always erred on the side of caution. My 8 year old can legally ride in the car without a car seat now, but he still rides in a high back car seat in our vehicles, and if given the choice, I always have him ride in a backless booster when carpooling or in grandparents’ vehicles. As a bone fide car seat junkie, however, I have now taken numerous taxi rides and plane trips with / without car seats and can share what has worked for us and what hasn’t.

    Will I need a car seat at my destination?

    The obvious first question is — do we need a car seat at our destination? There are many variables to consider:

    • Will you be doing a lot of travel by car? While a car seat may be critical for a trip to Los Angeles, it is less necessary and likely superfluous for a trip to New York City.
    • Can you rent/borrow a car seat? Most rental car companies give you the option of renting a car seat.  I have friends who have had awful experiences, but also friends who have had wonderful experiences. We rented a car seat once – for a 24 hour layover in Munich – and had a perfectly acceptable experience.  We also recently had neighbors who had family visiting from the UK and needed two car seats – happily, we were able to loan them our spare car seats during the duration of their trip.
    • Do you have alternative options? For a solo trip to LA where I needed a high back booster, I decided to just purchase a car seat and have it shipped to my mother. My brother installed it prior to picking us up from the airport and we happily left the car seat with them for future trips. This is an option to consider if you will be flying somewhere to visit family and plan on making frequent return trips.

    How will we get to/from the airport/train station?

    The second question we always have to answer is how we are getting to/from the airport or train station. When my son was 8 months old and we were flying to Orlando where we did not need a car seat, I opted to walk to/from the metro station with my son and metro to the airport in lieu of riding in a taxi cab with him unrestrained. I did the return walk to/from the metro station with him in a stroller on the trip home from the airport. Eighteen months later, when the same son was 2.5  years old and we were making a similar trip, I decided to just let him ride in the back of the taxi cab instead of making the trek to/from the airport via metro. Why? Because he was older and I felt safer riding in the backseat with him, versus a still relatively floppy infant who couldn’t be restrained at all. The fact that the airport is less than 5 miles from our house with a speed limit of no more than 40 miles per hour also informs that decision.  So, part of “how will we get to/from the airport/train station?” also involves “how much risk am I willing to take?” While legally, children in our state can ride unrestrained in a “for hire” vehicle, each parent needs to decide what they are comfortable with given their unique circumstances. Given the option, if we are bringing a car seat, I prefer to install the seat in the cab/uber because safety is almost the most important!

    What car seat do I need?

    Everyone’s favorite question when it comes to young kids – what gear do I need? The age/weight of your child dictates what gear you need and, of course, as the kids get older, the more options you have!

    Infant Car Seat:

    There is no replacement for the infant “bucket” car seat. We have owned two Chicco Keyfit 30’s and have been happy with them. Although it is one of the heavier bucket seats on the market, it didn’t really bother me much as both my kids outgrew them in terms of comfort well before we started seriously traveling with them by plane. Moreover, I loved the ease of the keyfit stroller caddy, which made it possible for me to transport sleeping babes to and from just about anywhere, providing me with a few precious additional minutes of peace and quiet!

    three weeks old and napping by the ocean in St. John’s Island, South Carolina while mom and dad enjoy a relaxing lunch

    The Convertible Car seat:

    The convertible car seat is the most difficult car seat to travel with, in large part because it’s so heavy and cumbersome and, during the age your child is in the convertible, there’s very little by way of “other” options. For both kids, we used the Britax Marathon and simply took them with us everywhere. We would install them using the LATCH mechanism on taxis/cabs, set them up in the airplane seat (if needed), and then install at our destination.

    rear-facing install on an airplane, prior to second birthday

    Although there are accessories you can purchase that are designed to alleviate the burden of hand carrying the car seat, we never used them. My husband simply tightened the car seat straps and carried them over his shoulder. If needed, he would double bag it in a black trash bag before checking it, but for the most part, we simply gate checked it and had no problems retrieving it on the other end of our trip. Both my sons loved the familiarity of having their same car seat on our trips and we never worried about the quality or condition of a rental company car seat.

    The Harness Booster:

    At some point, your child may outgrow the convertible car seat and you may decide that you’re not quite ready for your child to ride in a backless booster. I fell squarely in this camp and purchased a Graco Nautilus which is what my older son has been riding in for the past four years (since he was 4 years old)! The nice thing about these car seats is that they grow with the child. You can keep them in a five point restraint, then adjust to a high back booster + lap belt, before adjusting to a backless booster + lap belt. Unfortunately, the high back booster set up of this car seat is the opposite of built for travel as the back is not attached to the base (they simply click together), so there’s no way of carrying this car seat without it coming apart. I believe we took one trip with this car seat and quickly swore never again – it was large and cumbersome and extremely difficult to keep together. This was also definitely a car seat we had to check at the curb – there was no way we could have carried it with us to the gate without completely losing our minds.

    The Ride Safer Travel Vest:

    photo credit

    The “travel vest” was purchased immediately prior to a trip to NYC where we would be traveling by train – AMTRAK and Subway. I didn’t want to lug around a car seat with us, yet didn’t quite feel comfortable letting my 4 year old ride around in a taxi or friend’s car without some kind of restraint. A friend suggested the travel vest and it turned out to be a lifesaver! The seat comes in a little bag that is easy to carry and is extremely light and not-bulky. It can be tossed into a large carry on, or, you can even have your child wear it as a backpack.

    the ridesafer vest can easily be worn as a backpack

    Although it takes a few minutes to line the car seat belts into the appropriate buckles, we used this car seat on numerous trips where we didn’t plan to travel extensively in a vehicle, but wanted a safe option for car travel on the occasion we were in a vehicle. As an extra bonus, this car seat ended up being an easy solution for carpool and fitting three children across the backseat of my car, on the occasion when I needed to take a classmate of my older son somewhere, but my toddler’s convertible car seat prohibited me from squeezing in an extra backless booster.

    Note that this car seat comes in two different sizes and because it did end up being so useful for carpool, we purchased the bigger size to accommodate our son and his friends for carpool purposes in first and second grade – before they were old enough that I felt safe – both personally and legally – to allow them to ride without a car seat.

    Backless Boosters, the mifold, and the Bumble Bum:

    Although car seat safety guidelines vary by state, in our state, children who are 4 AND 40 pounds can legally ride in a backless booster. There was much rejoicing on our first trip with a backless booster because it not only meant we didn’t have to carry around a giant car seat, but also because it meant our son likely could carry his own booster! We have a basic Graco booster seat  that we reserve for travel and carpool purchases. It is cheap, relatively small, and does what it’s intended to do – lift up my kid so that the seat belt is properly positioned on his body.

    photo credit

    In addition to the regular booster, we also have a mifold, which does the opposite of the regular booster seat – it brings the seat belt down to the child so that it is properly positioned on their body. Although we have not traveled – yet – with the mifold, I have loved the flexibility it has provided us in terms of fitting a third child between two existing LATCH car seats. And, it’s an easy thing to have tucked away in the trunk in case the need arises.

    photo credit

    Another option to consider in the category of backless boosters is the BubbleBum:

    photo credit

    Although my family has not used the bubblebum, I know Catherine’s did on a recent trip to Iceland and aside from having to reinflate it a few times a day, it worked perfectly and was a good, lightweight option for her older two children.  Another family who recommends the BubbleBum used it for their six year old during their family gap year.

    The IMMI GO:

    A car seat that I have yet to try is the IMMI GO.

    photo credit

    I heard about the IMMI GO a few years ago when UBER FAMILY came out, but never had occasion to try it. A friend of mine, however, mentioned that it was actually available for purchase and so we purchased one just prior to our last vacation. Unfortunately, because it arrived just the day before our scheduled departure, I didn’t feel comfortable using it without getting a chance to try it out. My son was just barely within the weight range for it and so, I decided to save it for our next trip. Although I haven’t had a chance to test it out yet, I can safely say, I find its small size to be impressive and look forward to using it on our next trip!

    Per the website, the IMMI GO is:

    Designed and tested for children:

    Height: 31” – 52”

    Weight:  22 – 55lbs.

    Airline Seat Restraints:

    Children don’t legally need a special seat restraint when flying, but as a parent, I know I agonized about whether it was safe for my young children to fly without a restraint. For that reason, prior to age two, we frequently carried on our son’s convertible car seat and strapped it into his airline seat. However, that quickly became undesirable because it took up a lot of space width wise and also because when upset, my son would kick the back of the seat in front of him and there was nothing we could do about it given the extra “lift” the seat gave him. As a result, we ended up purchasing a CARES harness for flights.

    CARES Harness:

    The CARES harness is designed for airline travel. It slides over the top of the child’s seat and provides an extra restraint across your child’s chest. The airplane seat belt is slipped into loops on the harness, which goes across your child’s lap. Although not essential, I did find this extra restraint to be comforting to have on turbulent flights.

    strapped into his CARES harness and ready to go!
  • Japan With Kids (Part VII): What I Wish I Knew

    Japan With Kids (Part VII): What I Wish I Knew

    I have mixed feelings about our trip to Japan, in large part because of how surprisingly difficult it was to get information beforehand and how difficult it was to get around. We underestimated just how difficult “getting around” would be – from reading the subway maps/signs, to locating specific addresses, to finding restaurants that would accommodate us with our son. Having traveled to Asian countries before, I was surprised to find the lack of children in Tokyo and the hostility towards children, since most Asian countries are full of kids and tend to welcome kids with open arms.

    That said, some of the blame is likely entirely our fault as this was the first international trip we took with our son. Although we had traveled with him extensively throughout the United States prior to this trip, we likely over shot in terms of making this around-the-world trip our first International trip with kids. Nevertheless, I loved loved loved our time in Japan and can’t wait to go back. If I could do it differently, though, I would:

    • hire a local travel guide, or make more heavy use of the concierge at the hotel to identify restaurants
    • send my husband out to scope out restaurants before venturing out with our son. On a few occasions, my husband did go out and scope out locations while we were resting or napping in the afternoon and that helped significantly in terms of confirming locations and ensuring that they would allow children to dine
    • not underestimate how important it would be to make prior reservations for better dining establishments. Many of the better rated or better reviewed restaurants are small (think 4-8 tables) and turn over maybe twice during one meal, so it’s imperative that you have prior reservations if you plan to dine
    • spend more time in Kyoto. Although we never ran out of things to do in Tokyo, it was definitely too overwhelming a place to be with a little kid. In Kyoto, children seemed more welcome, and there was lots more we could have done/seen that would not have involved what seemed like endless walking on city streets
    trying to figure out the Japanese bus ticket machine

    In terms of getting around, we had a much easier time getting around in Tokyo once we got our bearings. We eventually figured out how to purchase train tickets and the stops were labeled in English so we were able to pinpoint, generally, where we wanted to go. Once we got to our general location, however, it was still sometimes overwhelming in terms of how much walking we had to do to actually locate our destination. The walking became a problem only because we had a 4 year old with us, BUT, to his credit, we easily put 4-7 miles on those legs every single day, and he managed and did it without any major issues.

    One of the nicest things about Japan was that everyone was extremely helpful and assisted in making sure that commuters got where they wanted to go. For example, our shuttle stop had an attendant with a loud speaker who would call over the bus and make sure that people who wanted to get back to the hotel got on the correct bus. This was an amazing perk and something that we saw quite a bit of throughout Tokyo.

    bus attendant

    If you have the opportunity to travel to Japan, I highly recommend it. A more off-the-beaten-path location like Okinawa or Kyoto is likely to be a better destination with kids, especially younger children. If you happen to be planning a trip in the Spring, aim for the cherry blossom season! Hopefully you get lucky like we did and hit them at peak bloom.

  • Japan Part VI: Tokyo With Kids! (what we ate)

    Japan Part VI: Tokyo With Kids! (what we ate)

    What we ate:

    Eating in Japan ended up being the biggest hurdle to overcome, which was completely unexpected given how much we love Japanese food and how good the quality of food in Japan is! It was difficult largely due to two factors: 1) difficulty in actually locating the intended restaurant (or, in some cases, determining whether a restaurant was even located on the premises) and 2) many restaurants, particularly in Tokyo, were openly hostile to the notion of dining with young children.

    The Japanese address system is extremely complicated and, as this website states, “anyone who can read Japanese may be able to identify any address within a 2 or 3 minute walk. The most detailed bilingual ones are not as good. Of course even a bilingual map as detailed as the Japanese ones would still be very hard for foreigners to use, because the signs are in Japanese only.”

    As luck would have it, we do not read Japanese and had only a bilingual map that didn’t correspond with any of the signs which were all in Japanese. Frequently, we would arrive at what we *thought* was the address for a particular restaurant only to encounter a building with 5 or 6 signs in front – all in Japanese and no obvious signs that there was a restaurant on the premises. We were further limited by the fact that we had a 4 year old who wasn’t as keen on walking an extra mile to find *the* restaurant we had underlined in our tour book and that on occasion, when we did finally find the restaurant we wanted to dine at, we were informed at the door that children were not welcome (usually, this was done by the host pointing at our son, and shaking his head at us).

    There were two restaurants that really stood out in terms of experience:

    Izuei Main Restaurant

    Eel! Who doesn’t love eel? This is a large, popular restaurant both for locals and tourists with a few locations in Japan. They never batted an eye at having a child, and I love me some eel, so this was a perfect lunch spot during our day in Ueno.

    Yakitori in Ginza

    Our day in Ginza, we popped into this popular yaki tori restaurant and enjoyed sampling all the different offerings.

    One of the experiences my husband and I definitely wanted to have was to dine at an authentic izakaya, which wikipedia describes as “an informal Japanese gastropub.” Having been turned away by a number of restaurants due to having a young child with us, we reached out to our concierge at the hotel and explained the situation to us. A few hours later, we checked in with the concierge, and he informed us that he had located an izakaya that was willing to accommodate us and that we had a reservation for that evening! Although the name of the izakaya escapes me, we had a fabulous time that night. Upon arrival, it was inquired as to how much we were willing to spend on dinner (we basically said, whatever it costs and until we’re full), and then were presented with small plate, after small plate, after small plate.

    I highly recommend the experience and suggest that you seek out the assistance of your concierge if you are unable to find an izakaya on your own! Also, because izakayas are so small and people tend to spend a few hours snacking on small plates, reservations are absolutely imperative.

    hanging out at the izakaya

    Finally, no trip to Japan would be complete without:

    (1) Vending machine ramen!

    I was enamored with the idea of vending machine ramen but quickly learned that it’s not as exciting as it sounds nor is it very good/high quality. Basically, there’s a machine with the various options, you place your order and pay at the machine, grab a table, and someone brings you your ramen. I was expecting the ramen to pop out of the machine somehow, but alas, it was not meant to be! I wouldn’t waste another meal on vending machine ramen, but it was a fun experience, and I’m glad to have done it.

    (2) local McDonald’s offerings!

    Being that we were in Japan during prime cherry blossom season, it was no surprise that there were themed offerings at McDonald’s!

    Of course, we were left with no choice but to try both. The drink was some kind of sickeningly sweet soda, and the “burger” wasn’t terrible, although also sweeter than your usual American burger. We were all amused by the pink bun!

    Continue to Part VII – What I Wish I Knew