Category: travel tips

  • Review of Courtyard Coconut Beach in Kauai

    Review of Courtyard Coconut Beach in Kauai

    With two young children, my husband and I typically opt against staying at a hotel when planning a week long vacation. Earlier this year, we found ourselves in possession of two seven night stay certificates at a Category 1 – 4 Marriott hotel that were set to expire in mid-July. After a few hours of online searching, we were happy to secure a seven night stay at the Courtyard Kauai at Coconut Beach during our kids’ vacation.  My review of Courtyard Coconut Beach in Kauai, however, is decidedly mixed. On the one hand, we paid zero dollars out of pocket for our stay (there was a $20/night resort fee that was waived for our stay) that would have otherwise cost just over $4,000; however, the level of construction the hotel was undergoing was well beyond what had been disclosed. While we found the initial appearance of the hotel and the noise to be jarring, at least we had some inkling of the construction. Many other vacationers had no idea that the hotel was under construction, much less that the hotel’s pool and dining facilities were largely nonexistent. While I heartily recommend the Courtyard Kauai Coconut Beach for its location and the amazing staff that did everything they could to accommodate its guests, Marriott’s handling of the situation was subpart and has me re-thinking brand loyalty going forward.

    The resort’s “entrance” during our stay.

    The Courtyard Kauai at Coconut Beach is located approximately 30 minutes from the Lihue Airport.  There is a large parking lot and it is easy to walk right into the resort. Given the construction, however, the main lobby was not open and thus, the makeshift lobby was all that was available during our one week stay. Upon checking in, I was somewhat dismayed that there were just folding tables set up for check in and that there were extra staff on hand to help guide guests. During the check in process, I also received no explanation of the amenities, which I guess should not have surprised me given that well, there were none available during our stay due to construction; I was not provided with a map of the “resort,” nor was I given a map to the nearby hotel with the reciprocal pool access. I was simply told “construction, 7 days a week from 9-5pm and the pool down the road at the — hotel is available for use.” This was definitely a sign of poor things to come in terms of both the level of construction, as well as the staff’s ability to manage disappointed guests.

    My four year old has extremely sensitive ears and the jackhammering was too much for him.

    After checking in, we went up to our room, which was located on the top (4th) floor.

    As described, it was a two bedroom, ocean view room. While surprisingly small (even my 9 year old commented on the small size and he’s not one to notice these things), it was newly renovated and as described. The view of the pool from directly from our balcony, however, left much to be desired.

    Particularly when, during our stay, the hotel’s website and app still boasted about the “pool” features as one of its available amenities.

    Admittedly, we did not spend much time at the hotel, opting to leave early every morning after breakfast to explore the island. However, it would have been nice to have had the option to sit by the beach/pool and order drinks or even evening snacks. A few evenings, we simply picked up pizza before returning to the hotel and ate in our hotel room, since there was no suitable outdoor seating.

    Another aspect in which we were disappointed was that while the website/app advertised its “dining” options as “HIGHLIGHTS,” there was, in fact, only one very limited option for dining.

    Indeed, the main dining room was completely boarded up during our stay and the only option was this banquet/conference room that had been converted into a makeshift dining area.

    That said, my Titanium Elite Status provided us with a complimentary credit of $20/day to use towards food and beverages and kids under 5 eat free so we ate breakfast every single day before departing for our days’ adventures and the food, and the service, were both quite excellent in the dining department.


    Papaya/Granola bowl we requested one morning “to go.”
    The children’s menu offerings.

    During our stay, I briefly peeked into the gym, but it was small and not enticing in the least. I chose to spend my days kayaking and hiking instead, which I also encourage you to do if you find yourself in Kauai. Of course, the option of a treadmill or elliptical is always nice to have and at least this portion of the hotel was not under construction and available for use.


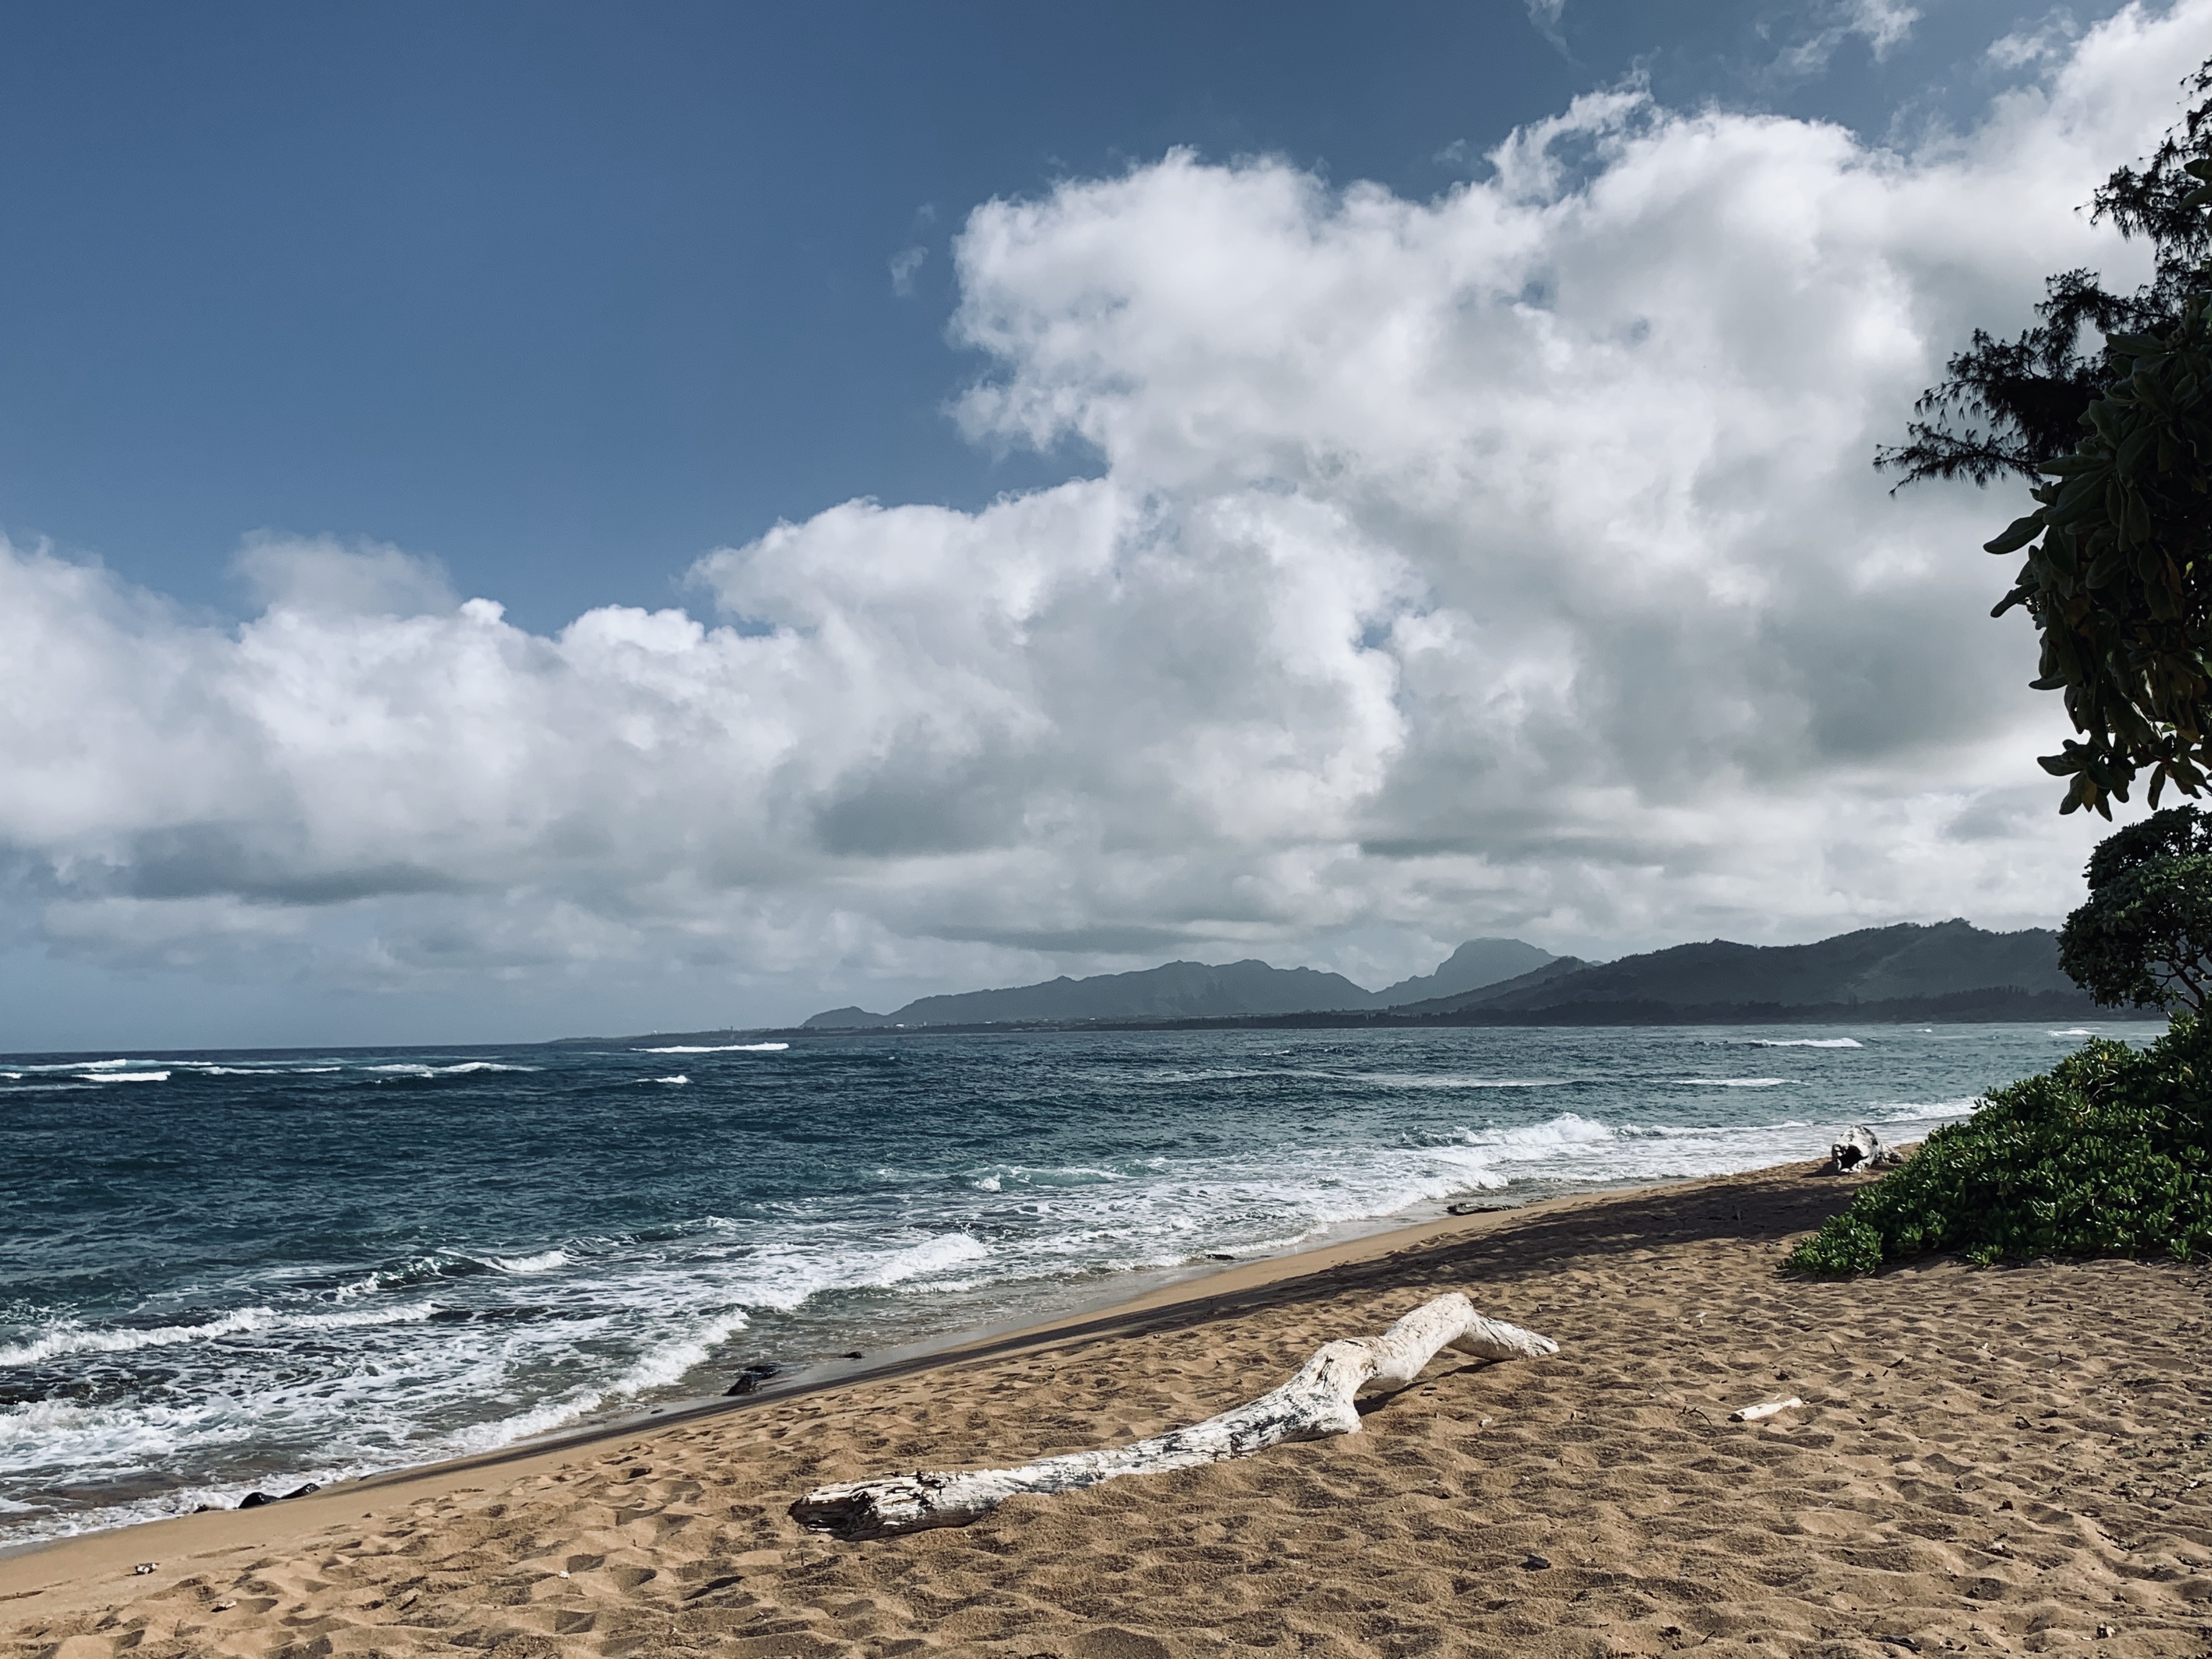
    As advertised, the hotel does have access to a beach which is a very short and easy walk from the rooms. We enjoyed the beach tremendously and it was the first place we went after dropping off our bags.

    Path down to the beach. Note the heavy construction.

    That said, the hotel did not have any feet washing stations or towels available at or near the beach. Instead, towels had to be picked up at reception and dropped back off at reception, so that was a tremendous hassle in terms of using the resort’s beach. Because we could not clean off our feat easily, we didn’t end up spending anytime with the kids at the beach.

    I would have loved the option of sitting in one of these chairs, ordering drinks, while watching the kids play in the sand, but alas! Not this time.

    At bottom, the hotel’s lack of amenities did not have any significant impact on our vacation, given that we were using a certificate for a free stay. A few nights into our stay, a group of new guests arrived and were clearly incredibly dismayed by the level of construction. There were angry words at reception and lots of disgruntled guests wandering around.  One group approached me and asked if we had been aware of the construction, in particular the pool closure, and it was clear that they had no idea prior to their trip and that the lack of amenities was going to significantly impact their stay. At that point, I spoke with the hospitality manager who was entirely sympathetic to our claims (and waived our $20/day resort fee without us even asking), but she noted, sadly that there was nothing she could do. My only guess is that there is some issue between the hotel being unable to finance construction while closing the hotel down for operation and that it is staying open during construction because it has to. Although I don’t know where the blame rests (Marriott or the hotel itself), and I imagine it to be some combination of both, I think the negative impact will be mostly felt by Marriott as anyone who stayed during this massive upheaval will likely negatively reflect about the Marriott experience. The hotel’s central location on Kauai’s eastern shore and it’s gorgeous beach access means that it will always have a steady supply of visitors, but I know that this stay definitely has me questioning the benefits of maintaining Marriott status.

    Final Thoughts?

    There are a number of things that the hotel did poorly, in particularly, failure to disclose the level of construction. But it would be unfair not to point out the things the hotel did well:

    • excellent food at the operating dining room, including incredibly patient servers, despite the fact that they were clearly understaffed and operating in sub optimal conditions;
    • availability of beach towels for use on and off property; and
    • availability of beach chairs and bicycles for use on and off property.

    The only ways we were truly impacted by the construction was that we couldn’t really enjoy the hotel’s beach as much as we likely would have had it been operating.  That said, we also probably saved money by not ordering expensive drinks at the resort and had there been a pool option, we likely would have had to negotiate with the children about spending a day hiking and kayaking and generally out and about as they would have definitely advocated for staying put and just swimming the day away.  In the future, I would definitely stay at the hotel again, on a return trip to Kauai, but I suspect this construction will bump the hotel from a Category 4 to a Category 5 hotel, thus raising significantly the redemption costs. And that is a real shame.
     

  • Costa Rica Rental Car Insurance and Vamos Review

    Costa Rica Rental Car Insurance and Vamos Review

    Last year, my family traveled to Costa Rica for spring break. We scored some awesomely inexpensive tickets from DC to Liberia, but I was completely stumped when trying to figure out an affordable rental car. Rental car prices for our one week stay varied from extremely cheap ($80) to cost prohibitive ($900+) and the insurance requirements were indecipherable. Even more troubling were the numerous reviews from unsuspecting vacationers who booked a seemingly affordable rental car, only to be hit with excessive fees upon arrival. After a few hours of research, I was able to figure out a way to ins and outs of Costa Rica rental car insurance and after reaching out directly to a number of rental car agencies, decided to book with Vamos. Here’s what I learned about Costa Rica rental car insurance and my review of our experience with Vamos.

    Costa Rica Rental Car Insurance:

    Rental car insurance is a government monopoly in Costa Rica and thus, every rental must have liability insurance from the INS (Instituto Nacional de Seguros). The mandatory insurance costs anywhere from $10-$20/day, depending on the vehicle you rent and provides only minimal coverage (it does not cover your rental car at all, only damage to other people, their cars, or property). Thus, if you want coverage for any damages to your rental car, you must purchase supplemental collision ($15-40/day, depending on rental car company and vehicle) or, if you have it, rely on your credit card’s rental car coverage.

    My husband and I both carry the Chase Sapphire Reserve card, which offers primary collision as an included benefit. Primary insurance means that the Chase’s rental car insurance benefit kicks in before our regular car insurance and, for those who might not have a vehicle and thus, do not carry car insurance, the Chase benefit serves as your insurance policy when renting a car on travel. Prior to travel, I called the phone number on the back of my Chase Sapphire Reserve card and inquired about the rental car benefit. I was transferred to Card Benefit Services and, upon confirming my personal details, was emailed a letter verifying my CSR insurance benefit and the terms of coverage. A redacted copy of the letter can be found here.

    Choosing Vamos Rent-A-Car:

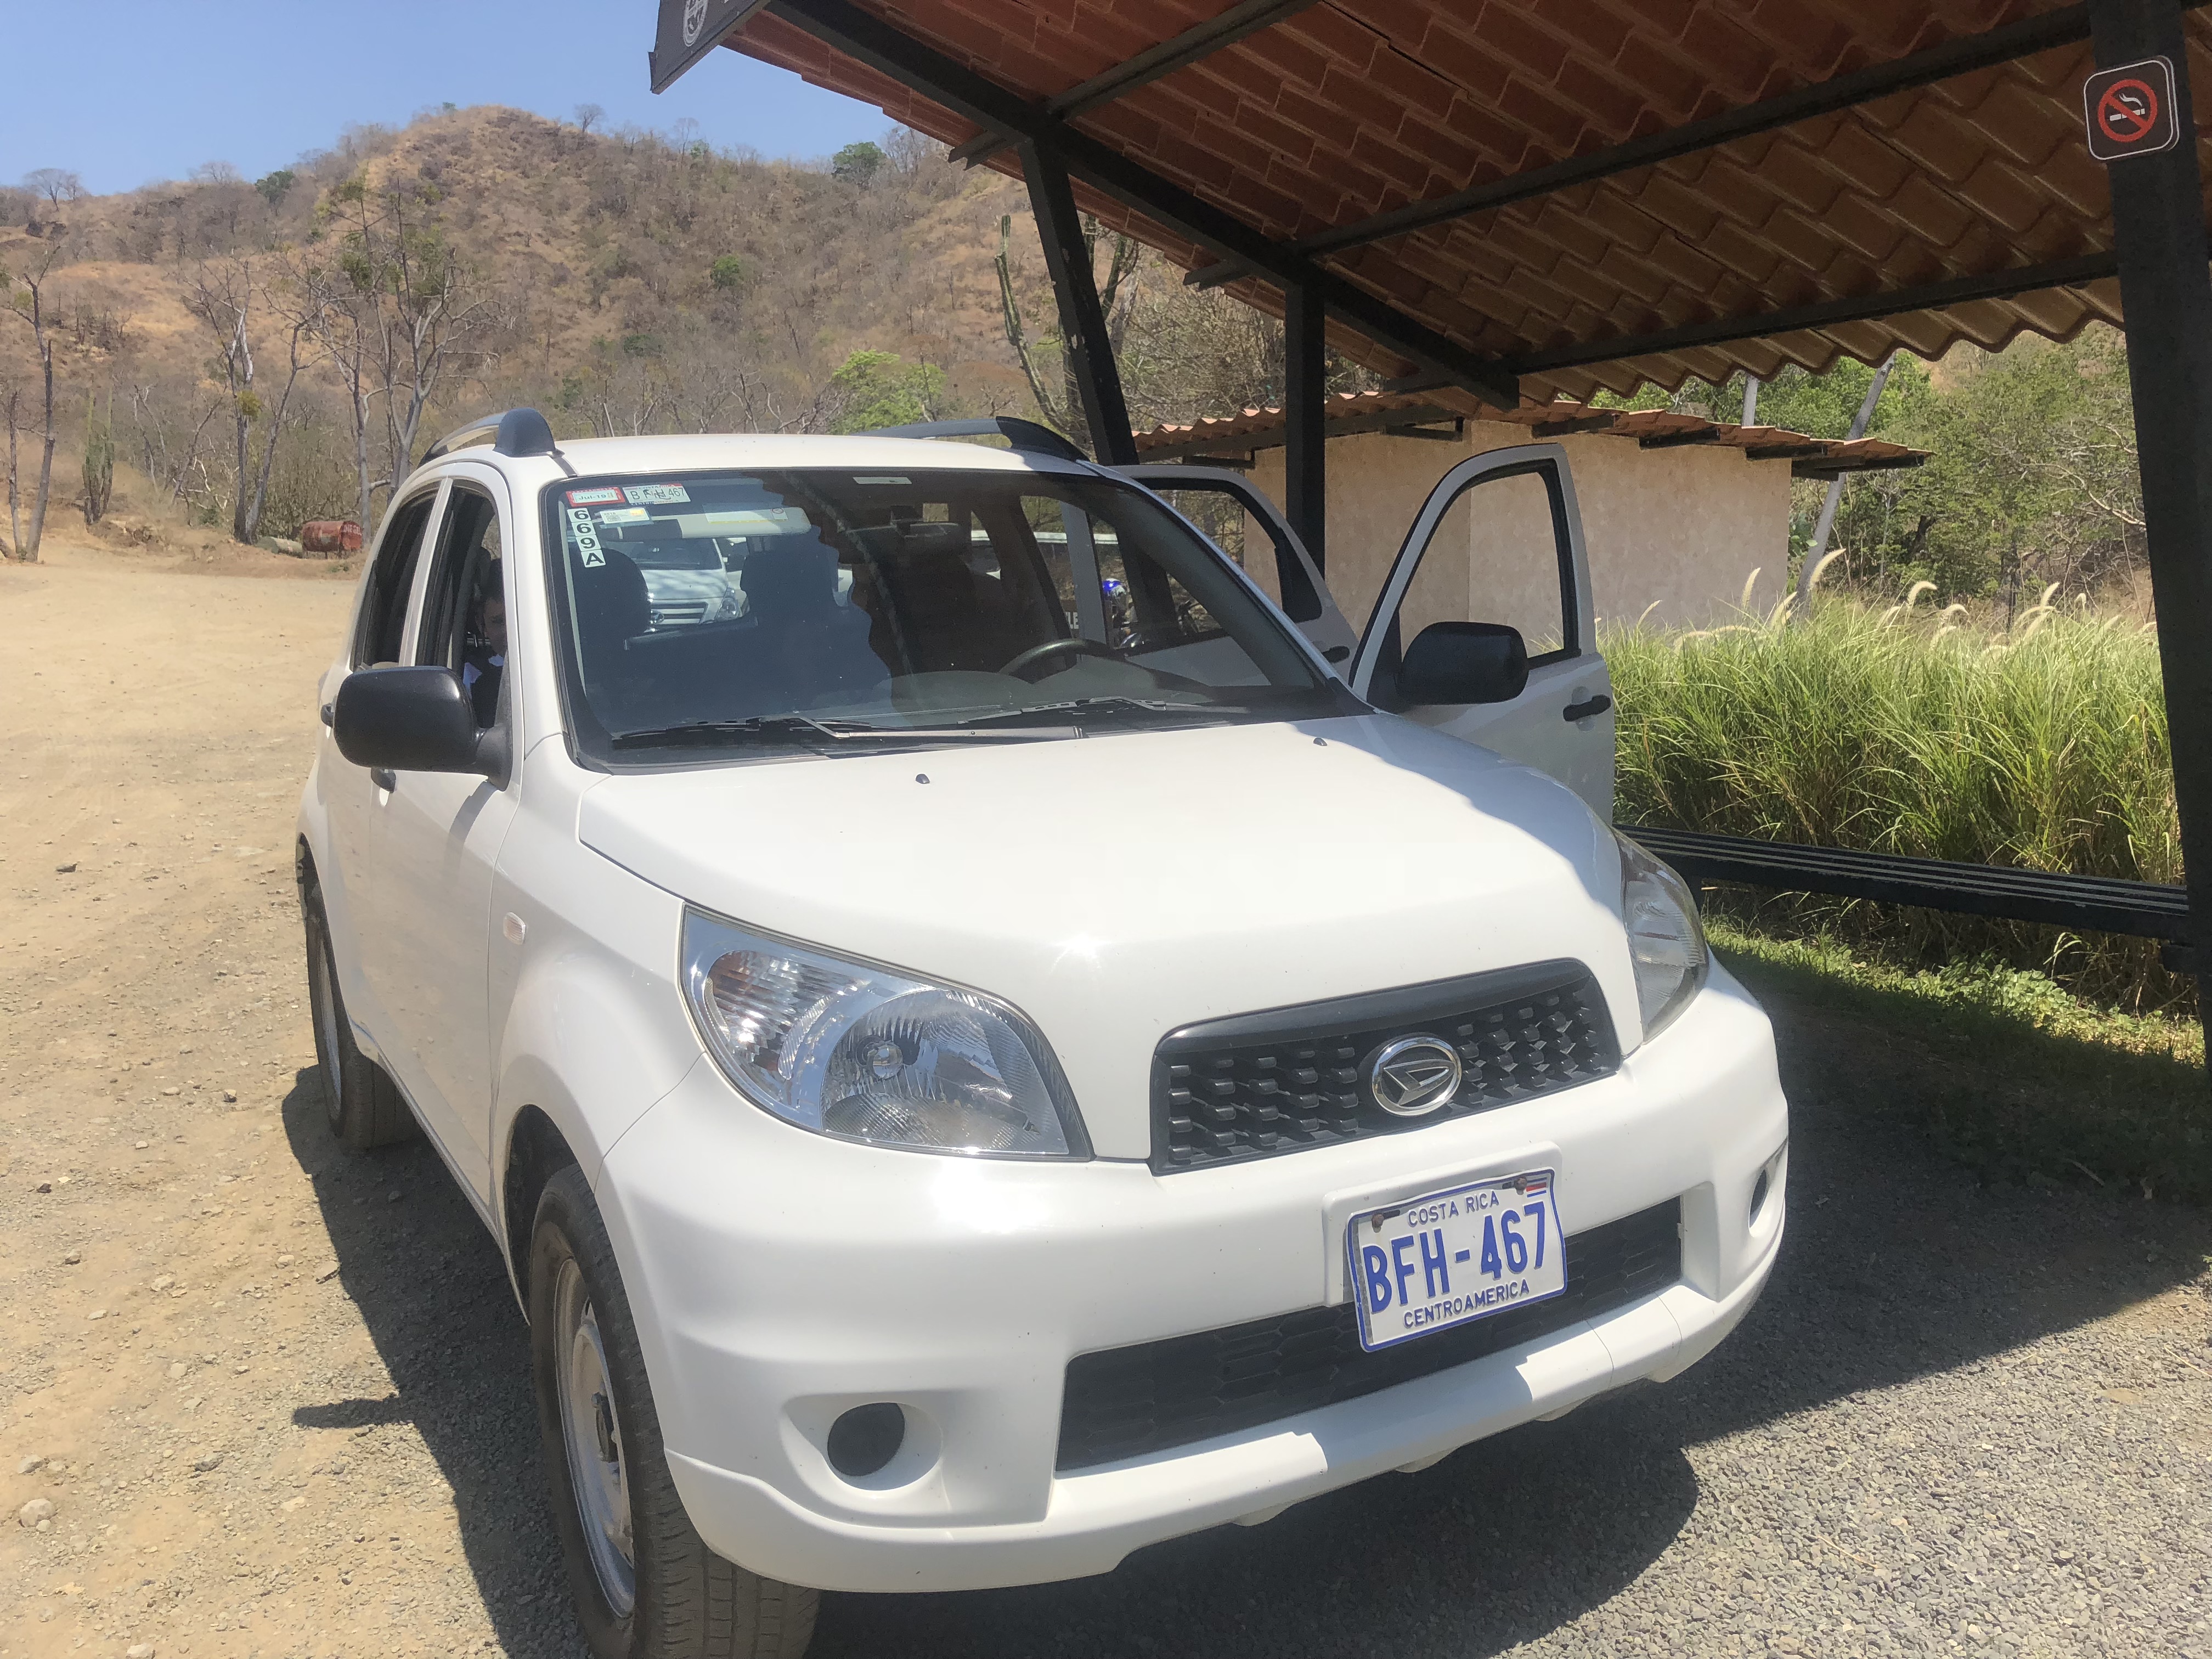
    When researching Costa Rica rental car options, Priceline.com and various independent car rental websites were willing to rent me a car for the entire week for as little as $100, without any insurance. Reading numerous online reviews, however, I feared that we would suffer the same experience as many: showing up and being held hostage at the rental car line and being told we needed to add on hundreds of extra dollars of coverage to our car.  Of all the car rental companies I researched, Vamos Rent-A-Car was the only one that allowed me to: (1) select the mandatory liability insurance and (2) waive the collision insurance during our reservation. As an added bonus, Vamos also included one free child car seat rental and a free cooler. Although the quoted price was just over $300 and thus $200 over the least expensive option I could find online, I valued Vamos’ transparent booking process (and the numerous positive online reviews didn’t hurt either). Moreover, after reserving our vehicle, I emailed Vamos to confirm that our credit card collision coverage would be sufficient. I attached a copy of the letter from Chase’s Card Benefit Services and within hours, received a reply that it was fine and would be accepted. My husband reports that he had no issues when picking up the vehicle and that the final estimated price was the quoted price online.

    Why book a rental car?

    I’m sure you’re asking — why book a rental car? The honest truth is that we are not resort people. My husband and I (and our kids) get antsy if we are in one place for an extended period of time and, traveling with young kids means that we have very little desire to be stuck on hotel shuttles and guided tours.

    Moreover, although our resort offered shuttle services to and from the airport and to other nearby locations, utilizing the cheapest transport option of a private shuttle for our family of four to travel from the airport to the hotel would have cost $280 round trip. Thus, the cost of the rental car was essentially the same as taking a shuttle to/from the airport… but we would also have a rental car available for us to use for the duration of our stay.  Note: it ended up costing us $338 to rent the car for the duration of our trip.

    Car Seats in Costa Rica:

    It may come as a surprise to many, but car seat laws in Costa Rica are significantly more stringent than laws in the United States. Indeed, all children under 12 must be secured in an appropriate car seat when traveling by car in Costa Rica.  Vamos graciously offers one car seat or booster free of charge for the duration of your rental, which was one of the immediate benefits to renting from Vamos as both our kids would require car seats.  I’m a bit of a car seat junkie and almost always insist on bringing our own car seat on trips. For this trip, my intent was to utilize the IMMI GO Child Car Harness. Unfortunately, when my husband arrived at Vamos, he learned quickly that the IMMI GO’s LATCH attachments would not work with our Costa Rican rental car. This being our first international rental car experience with a car seat that wasn’t just a simple booster, we had neglected to consider that international cars may have different attachments. Luckily, Vamos was great and provided us with a rental car seat for my not quite four year old. Although Vamos’ original quote included only one free rental car seat and I had selected a booster seat for my nine year old as our “free seat,” the attendant noticed that my husband was unable to get the IMMI GO to install properly in our rental vehicle and supplied us with a convertible car seat at no extra charge. The convertible car seat was in excellent and clean condition and I was immensely grateful.  Had I been aware of the issue, I would have likely packed the RideSafer Travel Vest, or just brought a booster for my older kid and used the free car seat option on a convertible car seat, which is more cumbersome to travel with.

    Snug as a bug in his Vamos car seat.

    Getting Gas in Costa Rica:

    Our rental car came with a full tank of gas and we only ended up having to fill up once, immediately prior to returning the vehicle. I’m no expert in getting gas in Costa Rica, but our experience was that all of the gas stations are full service – meaning you cannot pump your own gas. While getting gas, we were approached by an individual offering to clean our windshield. I have on idea whether that was a complimentary service, but we declined by waving the individual away. We were able to pay our bill via credit card and I was thankful that we had change from our trip to Rincon, so I could tip the individual who pumped our gas.

  • How to Book a Family Trip to Hawaii on Points

    How to Book a Family Trip to Hawaii on Points

    A few weeks ago, my husband and I found ourselves slightly glum as it has been raining pretty much nonstop for the past few weeks.  The adults, the kids, and even the dog were getting a little house crazy and I decided it was time to really start thinking about where we wanted to spend the kids’ spring break this year.  Last year, we went to Costa Rica and and stayed at the Andaz Papagayo entirely on points. This year, having just moved across country and purchased a home, we had no desire to spend beaucoup bucks (or really, any bucks) on an expensive vacation.  Instead, I decided to take an inventory of our miles and points situation and quickly realized that it was possible to book a family trip to Hawaii on points!

    Booking a Family Trip to Hawaii on Points

    Our first order of business was to decide which island to visit. My husband and I honeymooned on Oahu and the Big Island, and we traveled to Maui with our oldest son in September 2013, when he was four. We had our eyes on Kauai and so with that in mind, I decided it would be the perfect opportunity to try and use one of our seven night Marriott stay certificates.

    Last fall, prior to the merger of SPG and Marriott, I redeemed a bunch of Marriott points that I’d been sitting on for two Marriott Flight and Hotel Travel Packages. The goal at the time was to acquire as many Alaska Airlines miles as possible with our eyes towards a future redemption to Asia, and the seven night stay packages were just an added bonus to the redemption. We certainly did not plan to redeem them, as online travel experts had cautioned that the certificates were extremely hard to use in the United States due to availability, but I decided to call Marriott reservations and see if they had anything available on Kauai that we could use our certificate for.

    Lo and behold, I was delighted to find that there were seven available nights at the Courtyard Kauai at Coconut Beach during our kids’ spring break week. I quickly confirmed that there was a room with two queen beds available and was thrilled when the booking agent asked if I would like an ocean view room with balcony — yes please! Total out of pocket cost for seven nights? $140.  The resort fee of $20/day is not waived for award redemptions but it includes two daily cocktails and parking so I am happy to pay it!

    The price without points? Over $4000 (and a garden view room to boot).

    After confirming our hotel reservations, my next order of business was to book round trip flights for four from LAX to Kauai. After poking around a bit online, our preference was to fly American Airlines nonstop from LAX to LIH. However, tickets for four would have cost over $2000, so I wasn’t quite willing to pull the trigger, despite the major hotel coup.

    The easiest option, of course, would’ve been to use Alaska Airlines or American Airlines points to book four round trip tickets.  However, a quick search indicates that each round trip ticket in economy would cost 40,000 or 50,000 miles, depending on date/time availability. Luckily, I remember that British Airways is an American Airlines partner and that British Airways charges award redemptions based on miles traveled. Thus, a trip from the West Coast to Hawaii is only 25,000 British Airways Avios points. I don’t happen to have any Avios points, but I do have Chase Ultimate Rewards points in abundance and after confirming: 1) award availability on my desired dates/times of travel and 2) that points transfers happen instantly, I transferred 100,000 points from my Chase Ultimate Rewards account to my Avios account. 100,000 miles and $44.49 later in taxes and fees, I found myself with four confirmed, economy, round trip tickets from LAX to LIH.

    Conclusion?

    I’ve posted previously about how my family uses miles and points to travel around the world. Typically, we use our miles and points to help defray some of the cost of a large trip OR to travel business class or take a trip that we otherwise would not have been able to afford, such as our trip round-the-world. While I certainly did not plan to book a trip to Hawaii entirely on miles and points when I first started planning, that’s where we ended up and I am counting down the days until my family of four travels to Hawaii for a total out of pocket cost of $184.49 for airfare and accommodations which otherwise would have cost $6,105.46.

  • Icelandic Weekend Getaway With Kids: Final Thoughts

    Icelandic Weekend Getaway With Kids: Final Thoughts

    Traveling to Iceland with kids is something I would recommend without reservation.  I absolutely loved our time in Iceland and it was a perfect destination for our first mother-son international trip. Thanks to Catherine’s extensive write ups on her family’s trip to Iceland last summer, I was likely more prepared for this trip than any international trip I’ve ever taken. That being said, there were still a number of things that came as a surprise that anyone traveling to Iceland with kids should be mindful of.

    Our 5AM Arrival to KEF Airport:

    Our 5am arrival to KEF Airport was rough. Although I am generally a great sleeper on planes, a number of things conspired to keep me from getting any rest on our red eye flight from BWI to KEF. First, the flight departed BWI at around 9pm, a few hours prior to when I usually go to sleep, and it’s really a rather short flight at just over 5 hours, so there wasn’t a lot of time to get relaxed and tired before we landed at 5am. I did not end up sleeping, at all, on the flight over, and I paid for the lack of sleep dearly as I was exhausted and could barely keep my eyes open on the long drive from KEF to Reynisfjara. I had visited a number of forums online prior to our trip and I knew this was a common problem prior to our trip and one that many people choose to remedy by visiting the Blue Lagoon immediately upon arrival and then staying in Reykjavik that first night just to ease the transition. That said, although the first day was difficult, I was glad that we quickly adjusted to the time change so that we could maximize the rest of our trip. Luckily, my son is a seasoned traveler and at almost nine years of age, he had no problems sleeping in the car and rebounded quickly. Those traveling with younger children will need to plan ahead, depending on their child’s ability to manage the time change and red eye flight. While trolling the online forums prior to our trip, I read that a number of hotels in Reykjavik are extremely accommodating to the flight schedules and will often have rooms available for check in as early as 8am. If you’re staying in Reykjavik, this is definitely something you might want to consider as it would allow you a quick nap and time to freshen up upon arrival.

    The Price of Gas, Groceries, and General Dining Out:

    I had been told that Iceland was expensive, but I didn’t quite realize how expensive it was until I was eating our $45 lunch of burger and fries our first afternoon in Vik. That said, I didn’t particularly mind how expensive the food was as my nine year old is a relatively picky eater and thus, I didn’t fully expect to be dining out as much as I would have been had I been traveling solo or with my husband. We ended up picking up spaghetti supplies at the local grocery store and making a meal out of it – for a total of less than $10 USD. While grocery store prices were slightly higher than typical in the US (for example, $3 for the smallest bag of spaghetti versus $1.50 or $1.99), this was without a doubt a more economical option than dining out and for a traveling family, this can result in significant cost savings.

    Prices a fish and chip restaurant in Reykjavik.
    Home to our expensive, but delicious $45 meal of two burgers, fries, and a beer.

    While restaurant prices were high, I will note that the quality of the food was very good. My friend, who traveled to Iceland last year as part of a couples trip, reports that while prices at mid-level restaurants were high compared to the US, prices at fine dining establishments were comparable to prices in the US, which may be something to keep in mind for those traveling with older children who can appreciate a fine meal or two.

    Note: Airport food is generally more expensive than non airport food and the prices at KEF airport are simply outrageous. We ended up at KEF airport on the day of departure with quite a bit of time. We had spent the day traveling between The Lava Tunnel and The Blue Lagoon and had not eaten much more than a nibble here and there, so I simply decided we would grab something at KEF, which ended up being one of our most expensive meals. And, unlike food quality outside of the airport, the pizza was mediocre and the soup was pre-made and simply sitting in a giant vat.

    My $22 bowl of soup and my son’s $18 pizza.

    As with food prices, I was surprised by the gas prices. I had been warned previously that most cars are diesel and that prices were high, but I did not expect to pay nearly $100 for a full tank of gas. I also was slightly unprepared none of the three gas stations I visited would accept a credit card – I was required to enter a pin each time I sought to purchase gas and thus, I was glad to have packed my ATM card.

    Also, do not underestimate just how remote and far between gas stations can be when driving outside the city. My gas light went on at some point while we were driving around in Reykjavik prior to leaving for the Blue Lagoon, but I just assumed that since it was a relatively heavily traveled route that there would be gas stations along the way. Boy was I wrong. I ended up driving nearly 10km on empty and it was a rather panicked trip the entire time as I feared not only running out of gas with a nine year old, but possibly resulting in some kind of delay that would have us missing our departing flight home.

    Get gas and get gas often, even if you think there is surely a gas station along the way!

    Tax Refund:

    One surprising aspect of our trip to Iceland was how simple the country made obtaining a tax refund for purchases. During our day in Reykjavik, I purchased a vase that cost approximately $70 as a souvenir for my mother-in-law and had been given a tax refund receipt. I did not expect to actually pursue obtaining a refund as past experiences traveling abroad had suggested that it was simply more trouble than it was worth.

    After checking in for our return flight home, I spotted the tax refund booth and decided to go ahead and investigate. It turns out that all I needed to do was fill out a form, present my receipt and passport, and the taxes paid would be automatically refunded to my credit card. The whole process took less than 10 minutes and I confirmed that my ~$7USD refund was credited shortly thereafter. If you find yourself purchasing lots of goods to bring home, be sure to save your receipts and check out the Tax Refund booth at KEF!

    Note: Cash refunds are an option, but will involve a processing fee that is some portion of the refund.

    Currency:

    Speaking of money, we had no issues using our credit cards at just about every destination, with the exception of when purchasing gas. I did withdraw approximately $100 USD upon arrival at KEF and although we never needed the cash, I did use it on occasion simply for the novelty of the experience.

    At most retailers, the credit card machines were prominently displayed at check out and I was given the choice of selecting whether to charge the amount in my native or local currency.

    • Note: Bring a chip enabled credit card (visa or mastercard) and always select native currency rather than local currency when purchasing abroad.

    Driving in Iceland:

    I had no trouble driving in Iceland and hardly needed a map as the Ring Road is pretty self-explanatory. I brought our Garmin GPS, which was helpful for maneuvering within Reykjavik, but otherwise, simply followed the signs along the major highways to reach our destinations. There are a number of portions along the Ring Road where the highway narrows from two lanes to one, particularly when crossing rivers and streams, so just be aware and pull off to the side in the face of oncoming traffic.

    Language:

    Everyone, without exception, spoke English. I did not expect to have any language barrier issues and there were none with the exception of our car! Our car was programmed in Icelandic and would frequently ding out warnings at me, which completely freaked me out while attempting to drive. I managed to take some photos of some of the warnings and googled them later when we had arrived at our destination for the evening… turns out, the signs were telling me I had reached the speed limit and should slow down.

    Note: Although the car was telling me to slow down, I was frequently blown off the road by passing motorists. This was particularly the case when driving in inclement weather.

    Kid-Friendly:

    Iceland is a very kid-friendly destination. Granted, I was traveling with my nearly nine year old that has literally traveled the world, but there were kids everywhere and as I have mentioned, kids under 12 were generally free or admitted at a reduced price at many destinations. Although I had some initial apprehensions about visiting The Blue Lagoon with my opposite-sex child, it ended up being a non-issues as there were a number of attendants in the men’s changing facilities that were happy to help him maneuver the facility.

    WiFi/Cellular Reception:

    As a Verizon Wireless customer, I enabled TravelPass which provides access to my regular data and cellular plan for $10/day when traveling to certain countries, Iceland included. We had WiFi available at our accommodations every evening, but I wanted to add the data coverage given that I was driving solo with my young son in a foreign country. Although we did not need the coverage for directions, it was handy to have while driving on the Ring Road for looking up specific address or dining options. It was also just a great peace of mind, knowing that if we ran out of gas (oops) or ended up with a flat tire, I did actually have a means of contacting someone.

    Planning to visit Iceland with kids?  Be sure to check out our listing of all Iceland posts or join our Facebook group We Go To Iceland With Kids, a forum to ask questions and share ideas about family travel to Iceland

  • Travel Tips:  ASTC Passport Program

    Travel Tips: ASTC Passport Program

    Participation in the ASTC Travel Passport Program is an amazing value. Our family membership to the Cleveland Museum of Natural History comes with perks like reduced parking rates, guest passes and invitation to members-only events in addition to unlimited visits to the Museum and free shows at its Nathan and Fannye Shafran Planetarium & Ralph Mueller Observatory.  Because of the Museum’s affiliation with the ASTC Travel Passport Program, we also receive free reciprocal admission at hundreds of natural history, science and children’s museums.   The ability for our family to use the ASTC Passport Program to visit member museums around the country for free is a huge value!

    What does the ASTC Passport Cost?

    Each ASTC Passport member charges its own rate for a membership.  Our family membership to the Cleveland Museum of Natural History costs us $90 a year.

    ASTC Passport Review

    We have had this membership for approximately two and a half years.  Honestly, we don’t immediately renew when it expires but wait for the next opportunity when we want to visit the Cleveland Museum of Natural History or one of the other ASTC member museums and sign up for a new membership.   When visiting Los Angeles last Fall, we decided while walking down the Hollywood Walk of Fame that we wanted to go to the La Brea Tar Pits next.  I called my husband from our Uber and had him purchase a membership online.  Minutes after he sent me the confirmation email, I used it to get free admission into the Tar Pits.  Since then, we’ve used our current membership for admission for several trips to the Cleveland Museum of Natural History, two visits to the Carnegie Science Center and the Children’s Museum of Pittsburgh.  The value of those museum visits are about four times of the cost of our membership, and we still have five months left, including summer break.

    Nancy is very fortunate to live in Washington, DC and have the free Smithsonian museums at her doorstep.  She never considered purchasing a museum membership to use solely for travel until this spring.  Her family purchased a membership to a local children’s museum and used it for free admission when visiting Kidspace Children’s Museum in Pasadena and plans to use it to visit more museums when traveling.

    Our family has visited 10 amazing ASTC affiliate museums and always looks forward to our next opportunity to use our membership.


    #1:  Adler Planetarium – Chicago, Illinois

    My older son wanted to be an astronaut through pre-school, and both boys had a great time visiting the Adler Planetarium, which was the first planetarium in the western hemisphere.  The beautiful stone building houses many interactive exhibits and three theaters, including the most technologically enhanced planetarium theater and a high-definition 3D theater.  Our boys were aged three and five at the time of our visit and enjoyed the interactive exhibits focusing on the planets, solar system and space exploration, and, of course, the planetarium show.


    #2:  Carnegie Science Center – Pittsburgh, Pennsylvania

    Of the dozens of museums my 10 year old has visited, the Carnegie Science Center is his favorite.  He’s probably not alone, as this is Pittsburgh’s most popular museum. The “science” portion of the museum is pretty cool, but the real draw for him is Highmark SportsWorks®, which is housed in an adjacent building and uses more than 30 interactive sports exhibits to show how physics, anatomy, biology and chemistry control sports.  The Ropes Challenge consists of a series of challenges, including a rope bridge, rolling logs and a horizontal net that culminate in a zip line and is probably my boys’ favorite “exhibit” ever, especially the zip line.  Other highlights of the sports complex include the SkyTykes Ropes Course, located under the Ropes Challenge, a 24-foot rock climbing wall (which even my daughter tried out), a batting cage, a 10-meter dash and various challenges for endurance and balance.  This bright complex is a perfect place for kids to burn energy, especially on cold or rainy days.

    Inside the Carnegie Science Center, my boys’ favorite exhibit is Roboworld, which is considered the world’s largest permanent robotics exhibition.  Roboworld features more than 30 interactive displays, including a robot who shoots baskets with impressive precision and another who challenges visitors in air hockey.  My kids could spend hours playing air hockey with a robot or comparing basketball precision.


    #3:  Center of Science and Industry – Columbus, Ohio

    The Center of Science and Industry, commonly known as “COSI” is a comprehensive science museum with more than 300 interactive exhibits.  We were fortunate to visit several years ago during the week that COSI hosted its annual outdoor Big Machines exhibit.  At the time, our four and six year old boys were at the height of their machinery enthusiasm and absolutely loved “touch a truck” events.  So, it was a bit of a challenge to get them away from the trucks and inside COSI.  Once inside, we discovered that COSI nails the “hands on” aspect of science, particularly with its lab spaces and hallway exhibitions.


    #4:  Children’s Museum of Pittsburgh – Pittsburgh, Pennsylvania

    A dream climber for kids

    The Children’s Museum of Pittsburgh is an interactive museum for kids with great activities and hands-on creating opportunities for kids of all ages.  The two-story climber attracted my 3.5 year old daughter like a magnet.  She had to make it to the top and then back again.  I was nervous about her exiting at the top until another mom assured me that the entrance and exit were both located at the bottom.  As soon as we arrived, she headed straight for the two-story climber that thankfully has entrance and exit openings only at the bottom.

    My boys happily worked in the MAKESHOP® just opposite the climber while I hung out at the wall dividing the two areas to keep an eye on all three children.  The kids used household boxes to anchor markers in place and then attached motors to make them move on their own.  The project involved tape, hot glue and a lot of trial and error, and this was my boys’ favorite exhibit at the Museum.  The Museum’s Studio also offers hands-on creating opportunities for kids of all ages.  This multimedia space offers wonderful supplies that allow kids to create paint, sculpt and silkscreen.  The Studio is housed in a former planetarium and is a beautiful and bright space to inspire creative juices.


    #5:  Cleveland Museum of Natural History – Cleveland, Ohio

    We are members of the Cleveland Museum of Natural History, which is located in University Circle, about 15 minutes from our house.  So, this is the ASTC museum we visit the most frequently.  Inexpensive metered parking is usually available on Wade Oval, right outside the Museum.  Because of our membership, I occasionally bring my oldest and youngest for a short visit while my husband accompanies our middle child to his nearby piano lesson.   It’s also a snow day favorite or something we combine with a trip to the Cleveland Museum of Art, which is located around the corner.

    In good weather, we often enjoy the Ralph Perkins II Wildlife Center & Woods Garden, which opened in the Fall of 2016 and features living plants and animals that are native to Ohio.  The dinosaur collection may not compare to those of the National Museum of Natural History – London, the Field Museum or the Carnegie Museum of Natural History, but the Tyrannosaurus Rex skeleton is still pretty cool, and there is a mastodon skeleton that was found in the region.  Lucy, the reconstructed cast of female hominid who lived over 3 million years ago is the a perennial favorite of my kids.  Lucy’s skeleton was discovered in Ethiopia in 1974 by Donald Johanson, the curator of the Cleveland Museum of Natural History.  I have a series of pictures of my two youngest standing next to Lucy at various ages.

    We always try to catch a planetarium show at Nathan and Fannye Shafran Planetarium & Ralph Mueller Observatory.  My daughter is a huge fan of the One World, One Sky:  Big Bird’s Adventure, and even though my boys have seen it more times than we can count, they agreed to accompany her the last time that the timing aligned – albeit after a few eye rolls.


    #6:  The Field Museum of Natural History – Chicago, Illinois

    The Field Museum is one of the world’s largest natural history museums.  It opened in 1893 and was named to honor its first major benefactor, Marshall Field, the founder of the Chicago-based department store who donated $1 million to the Museum in 1894.  It is located on Museum Campus along Lake Michigan and also boasts one of the world’s best dinosaur collections, including Sue, the world’s most complete Tyrannosaurus Rex skeleton, which was prominently displayed in the main hall of the Museum until 2017.  With two young boys aged three and five who were excited about prehistoric creatures, we definitely did not miss the dinosaur exhibit.

    We also explored an Egyptian tomb in the three-story Inside Ancient Egypt exhibit.  This exhibit includes one of the world’s largest collections of human mummies.  This was our boys’ first exposure to Egypt, but they were fascinated and have since enjoyed Egyptian exhibits at the National Museum of Natural History and the Cleveland Museum of Art.


    #7:  Great Lakes Science Center – Cleveland, Ohio

    While we cannot use our membership to the Cleveland Museum of Natural History for free reciprocal membership to ASTC member museums within a 90 mile radius of our home, we recently visited the Great Lakes Science Center as part of a NASA Free Evening.  The event feature science-related programming and Astronaut Terry Virts, the author of View from Space.  Our kids thoroughly enjoyed hearing Virts describe his experiences on the space station.  Virts’ presentation and slide show inspired them to thoroughly explore the NASA Glenn’s Visitor’s Center, including the 1973 Skylab 3 Apollo Command Module.  They also enjoyed trying out all the hands-on exhibits and building with Lego as part of the Science Center’s special exhibit.


    #8:  La Brea Tar Pits & George C. Page Museum – Los Angeles, California

    The LaBrea Tar Pits & Museum are dedicated to La Brea’s shallow pools of oil that coagulated into asphalt and trapped Ice Age animals.  The Tar Pits are registered as a National Natural Landmark, and over 3.5 million fossils have been found on the site, with excavation continuing year round at Project 23 and seasonally at Pit 91.  My son was fascinated by the Fossil Lab where you can watch paleontologists working on specimens collected from Project 23.   After viewing the completed fossils, watching Titans of the Ice Age, the 25-minute 3D movie featured in the Museum’s theater, and observing the Fossil Lab, my son had an opportunity to try separating fossils himself.  With all these great hands on opportunities, it’s not surprising that the stop at the La Brea Tar Pits & Museum was his favorite of our trip.


    #9:  Maryland Science Center – Baltimore, Maryland

    The Maryland Science Center is another phenomenal science museum located in Baltimore’s Inner Harbor.  This was the first science museum we visited as a family.  We were skeptical if our one and three year old boys were old enough for the Science Center, but they had a blast, especially while exploring the Spacelink exhibit and the Kids Room, which includes a large water play area.  We also enjoyed a show at the IMAX theater.


    #10:  Smithsonian’s National Museum of Natural History – Washington, D.C.

    The Smithsonian’s National Museum of Natural History is an amazing free admission museum on the National Mall.  It was the world’s most visited natural history museum in 2017.  The Museum’s collection includes over 126 million specimens.  Our favorite is the Hope Diamond, the 45.5 carat grayish-blue pendant surrounded by 16 diamonds that is reportedly insured for $250 million.   The Hall of Fossils includes 46 complete skeletons and is currently undergoing a massive $45 million, five-year renovation and scheduled to reopen in 2019.  The iconic 14-foot tall elephant is the focal point of the entry rotunda.

    For traveling families who enjoy natural history museums, science centers and children’s museums, investing in a membership to the ASTC Travel Passport Program museum can be an amazing value.  Next on our list is the Ontario Science Centre, which was one of my favorite museums that I visited as a child.  Make sure to check out our other posts on other ASTC  museums, including children’s museums, natural history museums and science museums.   

  • Travel Tips:  Dealing With Travel Disruptions

    Travel Tips: Dealing With Travel Disruptions

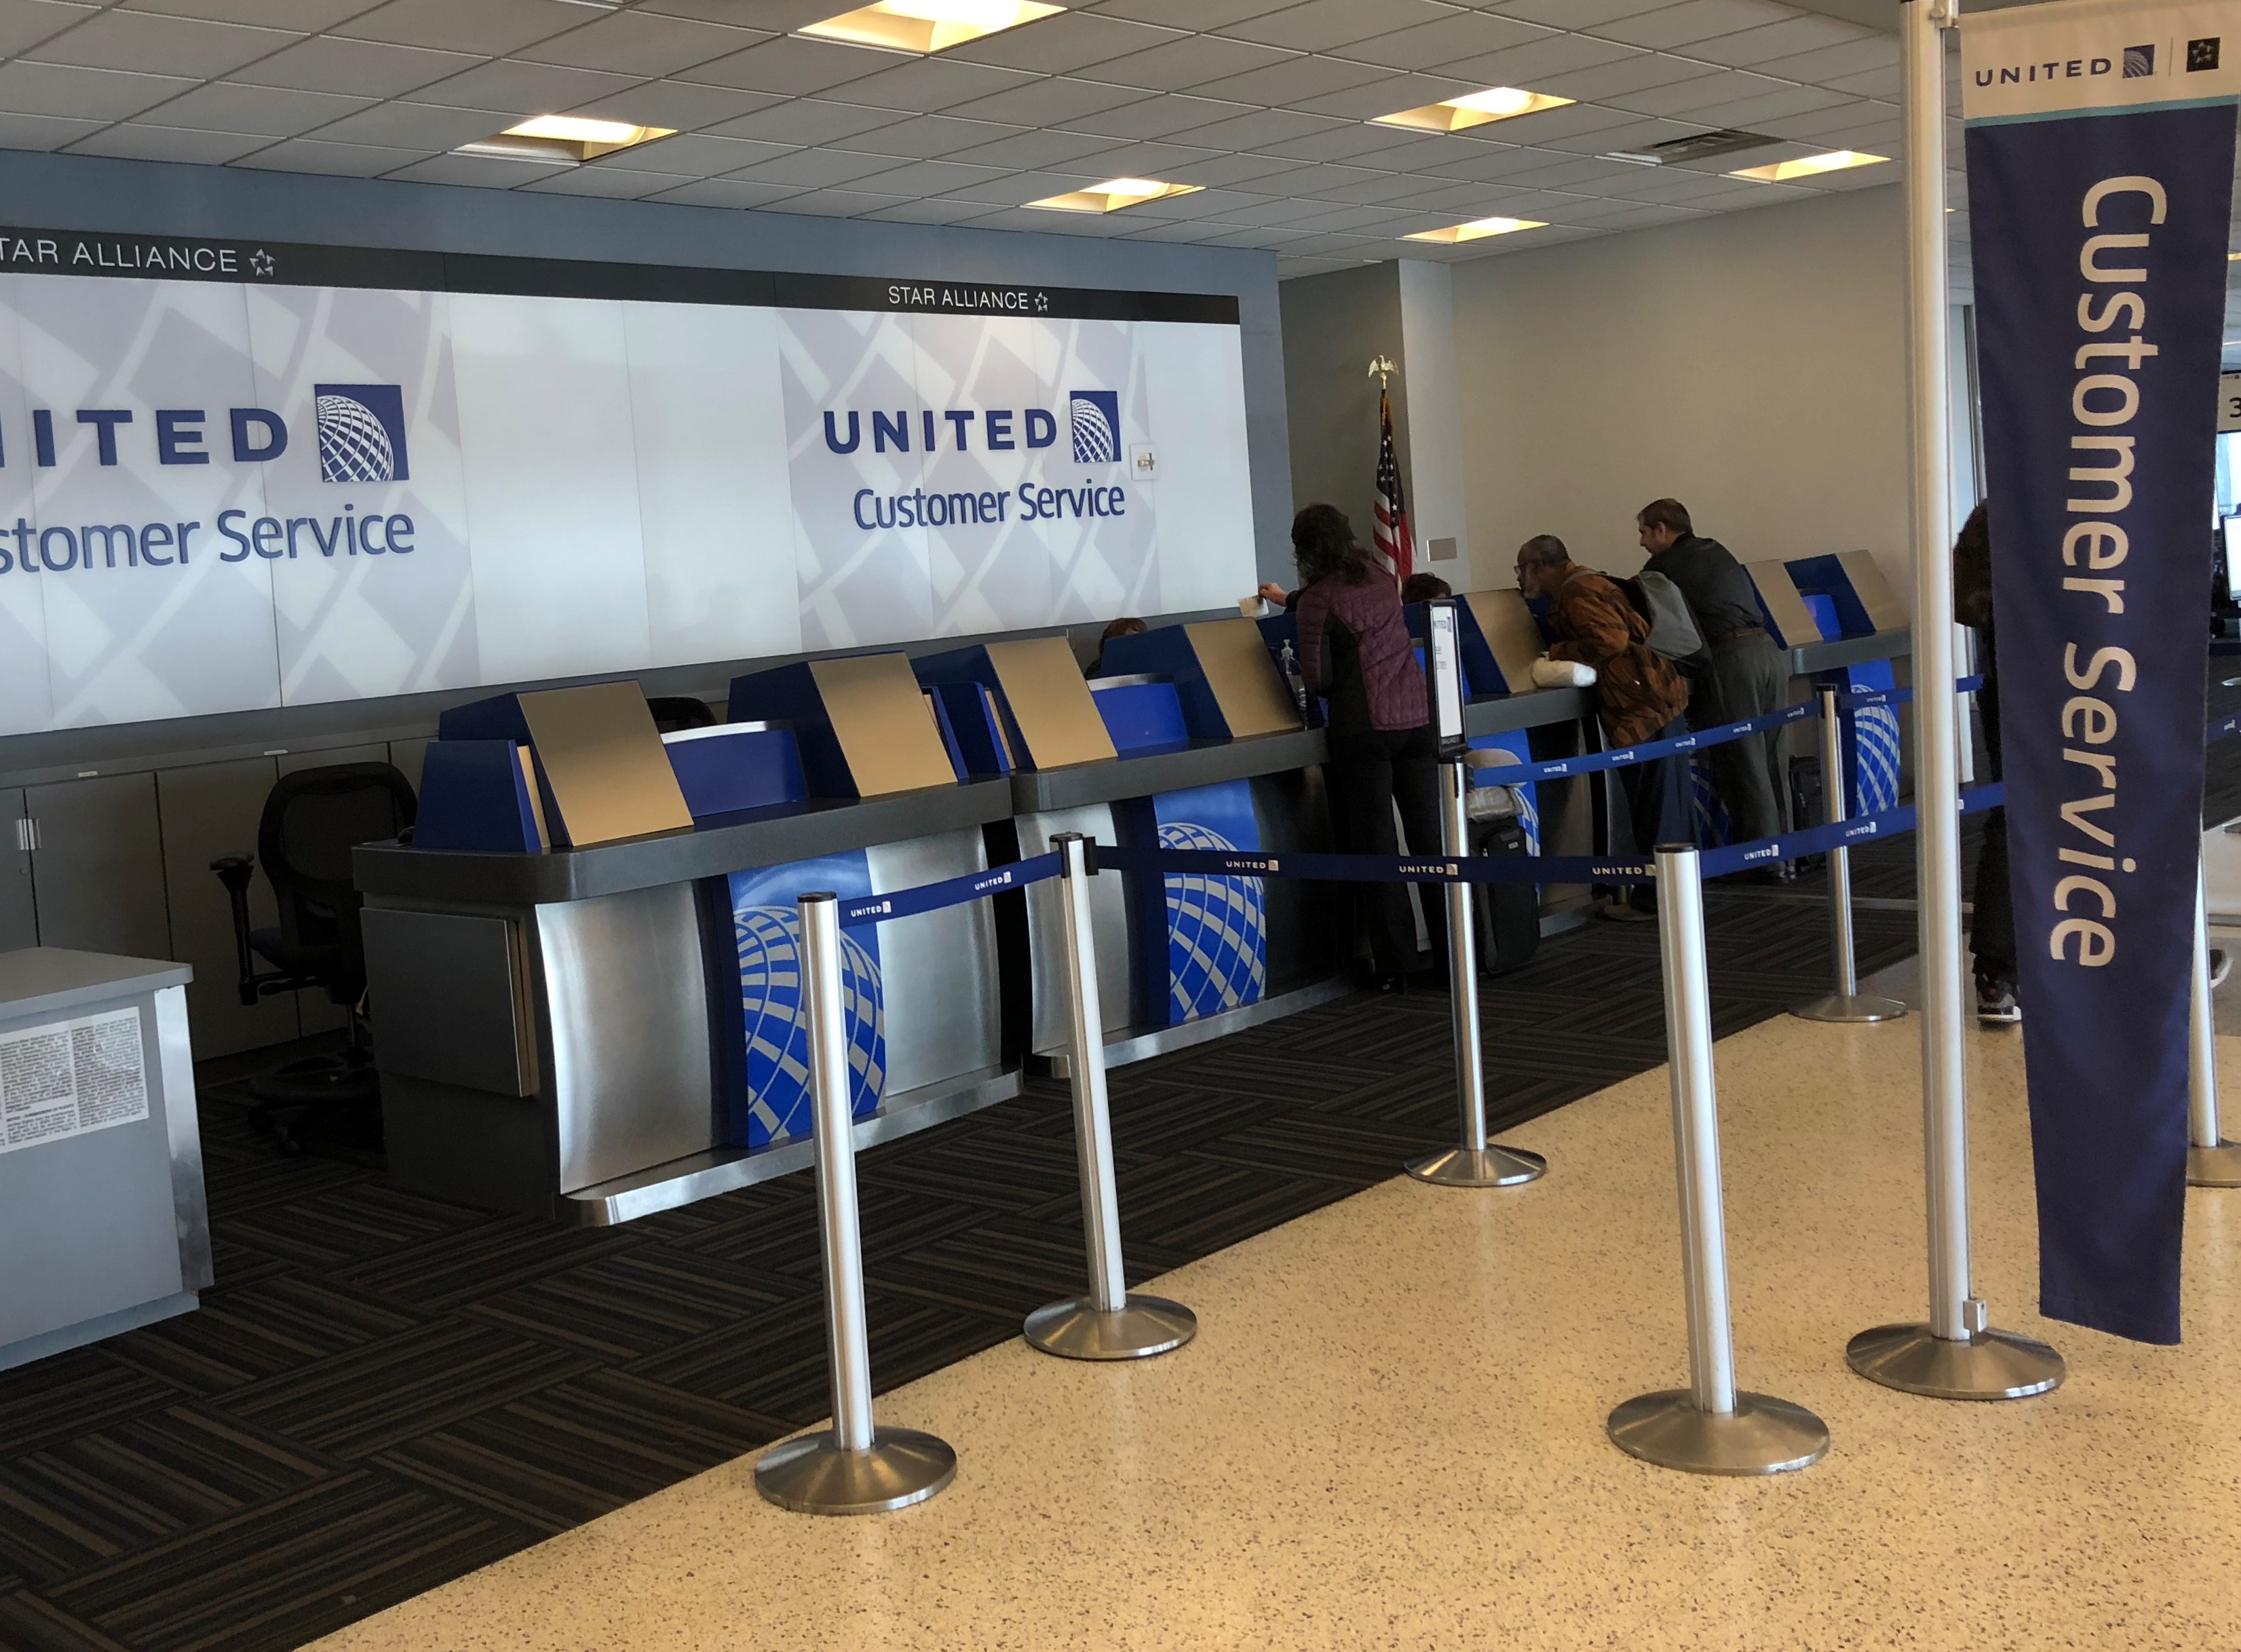
    Travel nightmares like cancelled flights, flight delays, mechanical issues, winter storms and lightening unfortunately happen from time to time.  While on a recent business trip to New York City, I received a text and email messages from United Airlines stating that there might be a travel disruptions due to weather.  As a result, United was waiving change fees to provide travelers with additional flexibility.  My colleague and I were booked on the 7:15 p.m. evening flight but definitely did not want to be stuck in NYC during the unexpected winter storm.  We tried to change our flight online to the afternoon departure, but the only options available were for the following day, when the storm was predicted to be at its worst.  After waiting on hold for a United Airlines customer representative for over 30 minutes, I learned that the only way to possibly fly standby on the full 3:15 pm flight was to inquire at Newark Airport.After our meetings concluded around noon, my colleague and I decided to go straight to Newark.  The United representative at the counter checked the flight and indicated she could not help us but directed us to someone else.  The second representative did some additional checking but told us that she also could not process a change but that possibly the representatives at Travel Assistance near the gate could help us.  We proceeded through security with our 7:15 p.m. tickets and headed straight to Travel Assistance, which had no line.  The representative confirmed that the 3:15 p.m. flight was fully booked but that no one was on the standby list.  We asked if it would be possible for us to fly standby, and she indicated that the change would require a $75 fee.  I inquired about the travel waiver in place because of the storm, and she said that while she did not see the 3:15 p.m. flight as an option for the fee waiver that she would go ahead and process our standby tickets.  We were delighted to find that there were a few available seats after boarding completed and were absolutely relieved to be heading home well in advance of the storm.  It turned out that our 7:15 p.m. flight was only slightly delayed, but just about all flights were cancelled the next day.

    My travel companion was impressed with how my “savvy traveler” skills scored us the standby seats, but I assured her that I did not utilize any specialized knowledge.  Instead, I just made sure to be nice while navigating through Newark.  It is important to recognize that not every representative has the ability to make a specific change; however, each representative may be able to lead me to someone who can help.  And, customer service representatives are far more likely to help kind travelers as opposed to unpleasant ones, even when there is a valid issue.

    Airport board every traveler wants to see

    When dealing with travel disruptions, try to remember these five things:

    • #1:  Be kind: This is the most essential travel rule.
    • #2:  Recognize limitations:  Not all airline employees have the authority to make every kind of change but may be able to direct travelers to someone who can help.
    • #3:  Phrase requests as questions:  I find it helpful to ask questions like, “Is this a full flight?” or “Is it possible…?” rather than, “I want….” or “I need….”
    • #4:  Be patient:  Some waiting is inevitable in any travel disruption situation.
    • #5:  Travel with carry on luggage whenever possible:  It is much easier to accommodate a last-minute travel change if checked luggage is not involved.

    Travel disruptions are no fun for anyone, but making travel adjustments can make them less painful.

    Check out our other Travel Tips for more advice about traveling with kids.

  • Immi Go Car Seat Review

    Immi Go Car Seat Review

    If you know me, one of the things you’ll probably know is that I’m a bit of a car seat fanatic.  Over the years, I’ve purchased and used over a dozen car seats and/or booster seats and it should come as no surprise that I was chomping at the bit to finally try out the IMMI GO on a recent trip to Los Angeles. Here’s my IMMI Go car seat review for those debating whether to add this item to your travel arsenal!

    All packed up and ready to go!

    Weighing in at 10 lbs and only 16.5 inches at its widest, the IMMI GO car harness was developed when Uber decided they wanted to offer their customers a car seat option. Designed and tested for children 31″ – 52″ and 22 – 55lbs, the IMMI GO is a great alternative to kids who are in between the convertible car seat and backless booster stage. I’ve written previously about car seats and how difficult the harness booster / high back booster seat is to travel by air with because of the way the two pieces tether together (and frequently come apart during transit). The IMMI GO is truly the most amazing substitute and I’m thrilled to have it as part of our arsenal of travel car seats.

    The IMMI GO’s small size was easy for me to carry on (and there’s a carry handle on top as well) and I just simply tucked it into the overhead cabin on our flight to LAX. Upon arrival, we opened up the car seat, attached it via LATCH, and hooked the top anchor onto the backseat anchor point. Although the IMMI GO will not work with a car that does not have a top anchor, this was not a problem with any of the cars we own or even any taxis/rentals we have been in, but I did notice that it would not work in my mom’s 1998 Camry because well, it’s a bit outdated.

    My three year old was absolutely thrilled to sit in the IMMI GO. He’s still in a convertible car seat at home, so this was a big step up for him – he got to ride in a “BIG SEAT” like his big brother.

    I was super thankful to have the IMMI GO because of it’s small size and ease of installation, but I’ll admit, it was hard to watch my little guy slumped over when he fell asleep. The convertible car seat provides more of a cushion and “seat back” for him to comfortably sleep than the IMMI GO, but that can’t be attributed to the IMMI GO’s design – it’s simply a function of the high back booster seat. For comparison purposes, here’s a photo of my son sleeping in a convertible car seat from the day before.

    Overall, I give the IMMI GO two thumbs up and highly recommend it to parents looking for a travel car seat for their 3-4 year old, but who aren’t quite ready yet to let their kids ride in a backless booster. The IMMI GO is so much easier to travel with and install than a high back booster seat, and I am thankful that I don’t have to compromise either my son’s safety or my sanity in order to keep him safe on our travels.

  • Product Review: Inflatable Footrest for Airplane

    Product Review: Inflatable Footrest for Airplane

    Disclosure: Some of the links below are affiliate links, meaning, at no additional cost to you, We Go With Kids will earn a commission if you click through and make a purchase of an inflatable footrest for airplane. Opinions are the author’s.

    Airplane inflatable cushions or airplane inflatable footrests are all the rage right now, and I don’t mean the basic neck pillows that I invariably forget to pack before every major trip (although with Catherine’s Ultimate Packing List, I should never have this problem again). I’m talking about inflatable cushions that are designed to turn a standard economy seat into a bed for young children.

    source

    Pricing and features vary considerably, starting from the super affordable Mode Relax, Travel Pillow Foot and Neck Rest which is available for just $22 on Amazon, to the Fly Tot, which at the time of writing, can be purchased for $131 on Amazon (double unit with footpump).

    For my recent cross country six hour flight, I opted to purchase the Mode Relax, simply to test it out and see whether it would suit my preschooler.

    By way of background, my preschooler is a tall three year old who does not like to snuggle for his naps. Instead, he prefers “space” and will frequently inch away from me in bed, if my arm happens to graze his (he doesn’t like to cuddle, but he does insist on being close, hence why I’m stuck waiting for him to fall asleep most nights)! Having flown a handful of cross country flights with him already, I knew that it was extremely unlikely that he would nap on the plane since he simply will not sleep on me. Thus, for $22, the Mode Relax seemed like something that might be worthwhile, if it would help him get comfortable enough to sleep on the six hour flight that happened to involve an extremely early wake up (5am!).

    IMG_0533
    deflated foot pillow (left) and neck pillow (right)

    The travel pillows (footrest and neck pillow) comes packaged in a small black drawstring bag, that handily fit into my carry on. About the size of a small travel pillow, I didn’t mind the size, although I was worried momentarily about my ability to re-stuff the travel pillow back into the bag after inflating it. Spoiler alert: it wasn’t a problem.

    IMG_0532
    I managed to fit the content back in the bag, despite hasty plane folding and stuffing.

    I purposely waited until my toddler showed signs of being tired en route, about two hours into our six hour flight, before I suggested “making a bed” for him to sleep on. He happily agreed and was positively delighted by the “little bed” that appeared before his very eyes!

    Using the stopwatch on my phone, I timed how long it took me to blow the thing up by mouth and was surprised to find that it did not take nearly as long as I expected: less than 3 minutes. My toddler loved having a place to rest his head and he quickly demanded back scratches. Given that it was his first time seeing a neck pillow, his usage of it was somewhat unorthodox, but I let it slide.

    For the record, my toddler never actually fell asleep using this cushion. He was too enamored by its existence to fall asleep. But, it did help him relax comfortably on the flight and, as an added bonus, it kept him from kicking the seat of the person in front of him. For “only” $22 and given its relatively small size and light weight, it will definitely be something I take with us on future flights, at least until he stops kicking the seat back in front of him as a matter of course.
    While this is a nice, inexpensive tool for us, it is by no means a must have or essential item. I would ditch it in a heart beat if there was no space in my carry on (and because of that, the inexpensive $22 option is definitely the better way to go). That said, I was glad to have an inflatable footrest on this trip as I was traveling solo with two kids and thus, needed very single possible means of entertaining my non-cuddly preschooler during the cross country flights. As an added bonus, he didn’t end up using the neck pillow so I got to use it — because, as expected, I left my behind.

  • Travel Tips:  The Ultimate Packing List For Vacations With Kids

    Travel Tips: The Ultimate Packing List For Vacations With Kids

    Packing is an important travel skill that became more complicated when we started traveling with kids.  Through my years of traveling before kids, including weeks spent backpacking in Europe, I learned to be an efficient but comprehensive packer without using an actual list.  Before I used a packing list for family travel, it was challenging to make sure we had everything we were likely to need, but not too much more.  This ultimate packing list for vacations with kids has been a game changer and helped me efficiently pack for any family trip.

    The Packing List for Family Vacations

    I now pack for myself and my three kids when we travel as a family. My love of charts, Excel and to do lists combined when I created my first packing list for our trip to Orlando in October 2011 but only recently realized that they were a “thing.”  I use my two-sided packing list to prepare for all of our family trips.  The first side includes miscellaneous items that we need to make sure to take.  The second side covers person-specific items of clothes and gear with columns for each of my three kids and myself.  By using tally marks to identify the number of each item already packed, I can quickly determine how many of each item that I have for each person and who still needs pajamas or socks. I create outfits as I add items and try to pack basic wardrobe pieces when possible so that matching isn’t an issue. There have definitely been times when something was missed because I didn’t double-check the list, but those oversights are now less frequent.

    Using a packing list is more essential when traveling to an area where essentials may not be readily available.  Our resorts in Riviera Maya have had gift shops with slim selection and high prices for any forgotten items, and coin laundry was not available. We needed snorkeling gear, sand toys, swimwear, evening attire, traveling clothes, emergency medicines and diapers and wipes for 10 days. By using a packing list, I came home with some, but not many extra diapers and wipes.  Luckily, no desperate trips to the gift shop were needed because the diapers size I needed was not available!

    Because tally marks are used to identify how many of each item I have already packed, I use the same list for a short weekend getaway as well as a trip abroad.  I am constantly adding and deleting items as our family’s needs change.  I’ve included sub-lists for beach, baby and gear that are not needed for every trip, but it’s easier to cross off items that will not be needed than to try to remember what I might need for each type of trip.

    Packing Efficiently for Family Vacations

    Efficient packing helps us avoid the frustration of lugging around more than we need. Because the discount airlines that we often fly have steep charges for any luggage bigger than a backpack, packing light actually saves us money, too.  We avoid luggage fees and have invested in suitcases of varying sizes so that we always have the largest possible option permissible.  When recently traveling to Treasure Island and Clearwater for three nights, we traveled only with one backpack/personal item each and paid no luggage fees. On our trip to Iceland in 2017, we also each carried a small backpack containing the majority of our own clothes.  Our coats, inflatable BubbleBum car seats, shoes and excess clothing and gear were all combined into a single checked suitcase.  So, we only needed a one checked suitcase for a 10-day tour of Iceland for five of us, and we still definitely had more than we needed.

    Packing for Trips with Infants and Toddlers

    Infants and toddlers have unique packing needs and therefore a dedicated section on our packing list template.  Good thing that their clothes are small because the rest of their items tend to be bulky.  Make sure to pack a significant number of outfits, considering unexpected diaper leaks.  With babies, there are also necessities that must be available at all times like diapers and wipes that I always remember to pack more than I anticipate needing, especially when traveling to a location where they are not widely available.

    Our kids sometimes require excess baggage for sleepovers with their grandparents

    Packing List for Family Beach Vacation

    Because beach vacations require specific equipment and attire, we have dedicated a separate section on the our packing list template focusing on beach packing needs. 

    Why We Love Our Packing List for Traveling With Kids

    Using a packing list helps make travel preparation easier and travel more comfortable even less expensive.  Intrigued about what our free printable family packing list template looks like?  Take a peek at our WGWK Ultimate Packing List (PDF) and WGWK Ultimate Packing List (Word) and personalize for an upcoming trip.

    Check out our other Travel Tips for more advice about traveling with kids.


  • Tips for Road Trips with Kids

    Tips for Road Trips with Kids

    I am not a fan of road trips, but we are a family who road trips. We live 300+ miles away from family and travel to see them at least five times a year. We also occasionally add on a road trip component to a vacation, like we did earlier this year when we drove from Los Angeles to Monterey and back, either because of flight costs or because we simply want to see things that we otherwise would not be able to if we didn’t spend time driving. As a result, we easily spend 3,000 miles a year in the car. That’s a lot of miles on the road with toddlers/kids/dogs. Over the years, we have learned a number of tips for road trips with kids!

    #1: Start Early

    First road trip to South Carolina before he was one month old!

    My kids spend a lot of time in the car. We live in a major metropolitan area with tons of traffic and our daily commute to daycare/school can be anywhere from 30 minutes to 90 minutes, depending on traffic, weather, general conditions. As a result, my kids are used to being in the car for at least 90 minutes a day from birth. We also started road trips early – when my oldest was less than four weeks old, we drove 9+ hours (over 500 miles) to South Carolina for a family reunion. Both kids traveled to my in-laws (300+ miles) by the time they were two months old. Starting early not only gets the kids used to being in the car, but also helped condition us to traveling by car with young children.

    #2: Be Flexible

    A longer than usual stop at a Walmart to stretch our legs. I’ve been known to pick up household essentials while stopped to save me from having to run to the store when we get home!

    As everyone knows, kids go through phases and they include everything from sleeping through the entire car ride to screaming the minute they see a car seat. As a result, it’s important to be flexible. We have woken up our toddler at 3am to begin the drive to my in laws to avoid holiday traffic or simply in the hopes that he would stay asleep and sleep through a portion of the car ride. We’ve also driven through the night to avoid traffic and taken strange detours (including stopping for lunch at our local Walmart) simply to give sthe kids a chance to stretch their legs.

    #3: Be Prepared

    Being prepared is critical to a successful road trip with kids. Being prepared means having all your essentials ready and easily accessible – diaper bags packed and within reach, a general plan as to where your stops will be, including where you will stop for a meal, factoring in other needs such as potty breaks and nap times.

    Devices: I also make sure that we have fully charged and loaded iPads prior to trips. Family practice when it comes to screen time varies and I applaud those parents who travel with kids without relying on devices, but this is the one time in which screen time is unlimited. I simply want to make sure we survive the trip with as few incidents as possible. If that means screen time, all the time, so be it. As a result, I spend a few minutes the night prior to any road trip ensuring that our iPads are fully charges and loaded with the kids’ most recent tv/movie/cartoon obsession. I also double check to make sure my kids have their headphones packed so that my husband and I don’t go insane listening to whatever it is they’re watching in the backseat.

    Snacks: Being prepared also includes having necessary items at the ready. For some families, this means a steady supply of snacks. Due to a choking incident when my oldest was three, I am not a fan of food in the car for young children. As a result, I typically don’t let my kids eat in the car and prefer instead to simply stop and let them snack / eat at rest stops. I have gotten more flexible as the kids have gotten older (so yes, my eight year old is allowed to eat in the car, but not when his 2.5 year old little brother is riding next to him), but as a general rule, we don’t snack in the car. Water is permitted, of course, provided it is in the appropriate vessel (leak-proof water bottle / sippy cup for my toddler who tends to drop everything).

    Diapering Essentials: For those traveling with young children, diapering essentials are necessary.  When both my kids were infants, I simply packed a regular pillow in the car and changed the kids on my lap in lieu of using a public diaper changing station of questionable sanitation. As they grew, I packed towels or swaddle blankets, or disposable changing liners, to lay on a patch of grass so I could change them outside, instead of in a grimy bathroom. For boys (and girls!), it’s helpful to master the art of the stand up diaper change so that for most bathroom incidents, there is no need to even enter a public bathroom. A potty training or newly potty trained toddler adds a new level of difficulty and stress. Although many people have luck bringing a portable potty seat along with them on long car rides, neither of my kids used the portable potty. As a result, I put my kids in “travel diapers” for long car rides (basically a regular diaper that is there for emergency situations), pack lots of wipes (including Chlorox wipes for sanitizing public toilet seats), and many, many changes of clothes and plastic bags for holding soiled clothes. Luckily, the newly potty trained stage is short lived, and as long as you plan regular stops, we have been fortunate to avoid having too many issues.

    My toddler is prone to car sickness, so I purchased these plastic paint buckets to keep handy in situations where he gets sick before we can safely pull over.

    Other Essentials: I happen to have a toddler who is prone to motion sickness, so I pack puke bags and plastic buckets (I’ve found plastic paint mixing buckets to be the perfect size and quality for this purpose!), which I keep within reach so I can hand them over to him when he feels ill. If your child has any special needs, you will want to have within easy and immediate access anything you might need in the event a situation arises. As any parent with kids knows, “other essentials” also includes things like lovies and blankets, pacifiers, special toys… basically anything that your kid might suddenly demand during a long car ride. If you pack your child’s favorite stuffed animal in the trunk and they need the toy in order to fall asleep, then you’ll find yourself stopped in a parking lot, frantically unpacking and digging around for the stuffed animal. I say this from experience – save yourself the heartache and frustration and make sure you have these essential items up front and easily accessible.

    Having the emesis bags handy helped prevent a major disaster during our drive from Monterey to Los Angeles.

    Adult Needs: It is important to make sure that adult needs are taken care of. When you’re stopped, take the time to use the restroom, get a drink of water or a bite to eat, grab some caffeine or music that you want to listen to on the radio… The most important thing is that your family arrives as its destination safely and making sure that the adults (especially the driver!) have their needs taken care of is a necessity. This is also useful because you don’t want to find yourself needing to pull over for a restroom if/when the kids finally fall asleep!

    #4: Have a Sense of Humor

    Having a sense of humor and knowing that the most important thing is to arrive at your destination safely is key. No matter what happens, know that someday, you’ll look back at the road trip memories fondly (or so they say!).

    Mastering the art of the roadside vomit clean up…